Bioprinting the Brain: Advanced 3D Techniques for Neural Tissue Engineering and Regeneration
This article provides a comprehensive overview of current 3D bioprinting techniques for fabricating neural tissue scaffolds, targeted at researchers and drug development professionals.
Bioprinting the Brain: Advanced 3D Techniques for Neural Tissue Engineering and Regeneration
Abstract
This article provides a comprehensive overview of current 3D bioprinting techniques for fabricating neural tissue scaffolds, targeted at researchers and drug development professionals. It explores foundational principles and biomaterial selection, details methodological approaches including extrusion, inkjet, and laser-assisted bioprinting, and discusses critical troubleshooting for cell viability and print fidelity. The content further compares scaffold validation methods and assesses the translational potential of different techniques for modeling neurological diseases, drug screening, and ultimately, clinical neural repair applications.
Building Blocks of the Mind: Fundamentals of Neural Tissue Bioprinting
Within the thesis of 3D bioprinting for neural tissue scaffolds, the development of physiologically relevant 3D neural models is paramount. Traditional 2D cultures fail to replicate the complex cytoarchitecture and cell-cell interactions of the brain, while animal models present significant ethical, translational, and species-specific limitations. This document provides detailed Application Notes and Protocols for establishing advanced 3D neural models, emphasizing bioprinted scaffolds as a foundational technology for neuroscience research and drug discovery.
Application Note 1: Comparative Analysis of Neural Model Systems
Table 1: Quantitative Comparison of Neural Model Platforms
| Parameter | 2D Monolayer Culture | Animal Models (e.g., Mouse) | 3D Bioprinted Neural Construct |
|---|---|---|---|
| Transcriptomic Fidelity to Human Brain | Low (R² ~0.5-0.7) | Moderate (R² ~0.6-0.8, species-specific) | High (R² >0.8, using human iPSCs) |
| Structural Complexity (Layering, Networks) | None | High, but species-specific | Engineered (e.g., grey/white matter mimicry) |
| Microenvironmental Control (ECM, Stiffness) | Low (plastic/glass) | Fixed (in vivo) | High (tunable bioink) |
| Throughput for HTS | High | Very Low | Moderate to High |
| Cost per Experiment (Relative) | 1x | 100-1000x | 10-50x |
| Clinical Translation Predictive Value | Poor (<15%) | Moderate (~50%) | Emerging (Promising for disease phenotype) |
Protocol 1: Bioprinting a Laminar Cortical Model with GelMA-based Bioink
Objective: To fabricate a 3D, layered neural tissue construct mimicking the cortical plate using gelatin methacryloyl (GelMA) bioink laden with human induced pluripotent stem cell-derived neural progenitor cells (hiPSC-NPCs).
Materials & Reagents:
- Bioink: 7% (w/v) GelMA (Type A, ~90% methacrylation), 0.25% (w/v) LAP photoinitiator.
- Cells: hiPSC-NPCs (≥2x10⁶ cells/mL final bioink concentration).
- Bioprinter: Extrusion-based bioprinter with a temperature-controlled stage (4-10°C) and a 405nm UV light source (5-15 mW/cm²).
- Support Bath: 4% (w/v) Carbopol.
Procedure:
- Bioink Preparation: Dissolve GelMA and LAP in warm, sterile PBS. Filter sterilize (0.22 µm). Mix with hiPSC-NPC pellet to achieve final concentration. Keep on ice, protected from light.
- Printing Setup: Load bioink into a sterile, cooled syringe (22G conical nozzle). Fill printing reservoir with Carbopol support bath.
- Printing Parameters: Set stage temperature to 10°C. Print at a pressure of 25-35 kPa and speed of 8 mm/s.
- Layer-by-Layer Fabrication:
- Print first layer (200 µm strand spacing).
- Crosslink immediately with 405nm UV light (10 mW/cm² for 30 seconds).
- Lower stage by 150 µm, print second layer with 90° orientation shift.
- Repeat crosslinking. Repeat for 10 total layers.
- Post-Processing: Gently wash constructs in PBS to remove support bath. Transfer to neural maturation media.
Maturation: Culture in neural basal medium supplemented with B27, BDNF (20 ng/mL), GDNF (10 ng/mL), and cAMP (1 µM) for 4-6 weeks, with media changes every 2-3 days.
Protocol 2: Functional Analysis of 3D Neural Network Activity via MEA
Objective: To record and analyze spontaneous and evoked electrical activity from a matured 3D bioprinted neural construct using a multi-electrode array (MEA) system.
Materials & Reagents:
- MEA Plate: 48- or 96-well MEA plate with TiN electrodes.
- Recording System: MEA amplifier and data acquisition suite.
- Pharmacological Agents: TTX (1 µM), CNQX (10 µM), AP5 (50 µM), Bicuculline (20 µM).
Procedure:
- Transfer: Carefully transfer a 4-week matured construct to a pre-coated (PEI/laminin) MEA well. Allow 1-hour stabilization.
- Baseline Recording: Record spontaneous activity for 10 minutes at 37°C, 5% CO₂. Sample rate: 25 kHz. Bandpass filter: 200-3000 Hz.
- Pharmacological Challenge: Perfuse compounds sequentially with 15-minute intervals and 10-minute recordings post-addition: a. Bicuculline (GABAₐ antagonist) → Assess disinhibition. b. CNQX/AP5 (Glutamate antagonists) → Confirm glutamatergic transmission. c. TTX (Na⁺ channel blocker) → Confirm action potential dependence.
- Data Analysis: Use custom scripts or commercial software to extract:
- Mean firing rate (MFR, in Hz)
- Burst frequency and duration
- Network bursting index
- Synchronization index
Table 2: Expected Functional Readouts from Matured 3D Neural Constructs
| Metric | Week 2 | Week 4 | Week 6 | Response to Bicuculline |
|---|---|---|---|---|
| Mean Firing Rate (Hz) | 0.1 - 0.5 | 1.5 - 5.0 | 3.0 - 10.0 | Increase of 150-300% |
| Bursts / Minute | 0 - 2 | 5 - 15 | 10 - 25 | Significant Increase |
| Synchronization Index | <0.1 | 0.2 - 0.4 | 0.3 - 0.6 | Modulated |
The Scientist's Toolkit: Essential Research Reagents & Materials
Table 3: Key Reagent Solutions for 3D Neural Model Development
| Item | Function | Example/Note |
|---|---|---|
| Tunable Hydrogel (Bioink) | Provides biomimetic, printable ECM; dictates mechanical cues. | GelMA, Hyaluronic Acid-MA, PEG-based. RGD motifs critical. |
| hiPSC Lines | Source of patient/disease-specific human neurons & glia. | Use well-characterized, differentiation-competent lines. |
| Neural Induction Cocktail | Efficiently directs hiPSCs to neural lineage. | Dual SMAD inhibition (SB431542, LDN193189). |
| Maturation Factors | Promotes synaptic development, network integration. | BDNF, GDNF, NT-3, cAMP. |
| Live/Dead Viability Assay | Quantifies cell survival post-printing. | Calcein-AM (live)/EthD-1 (dead). |
| Immunostaining Markers | Validates neuronal/glial differentiation & cytoarchitecture. | β-III Tubulin (neurons), GFAP (astrocytes), MAP2 (maturity). |
| MEA System | Functional, non-invasive electrophysiology. | Critical for network phenotyping and compound screening. |
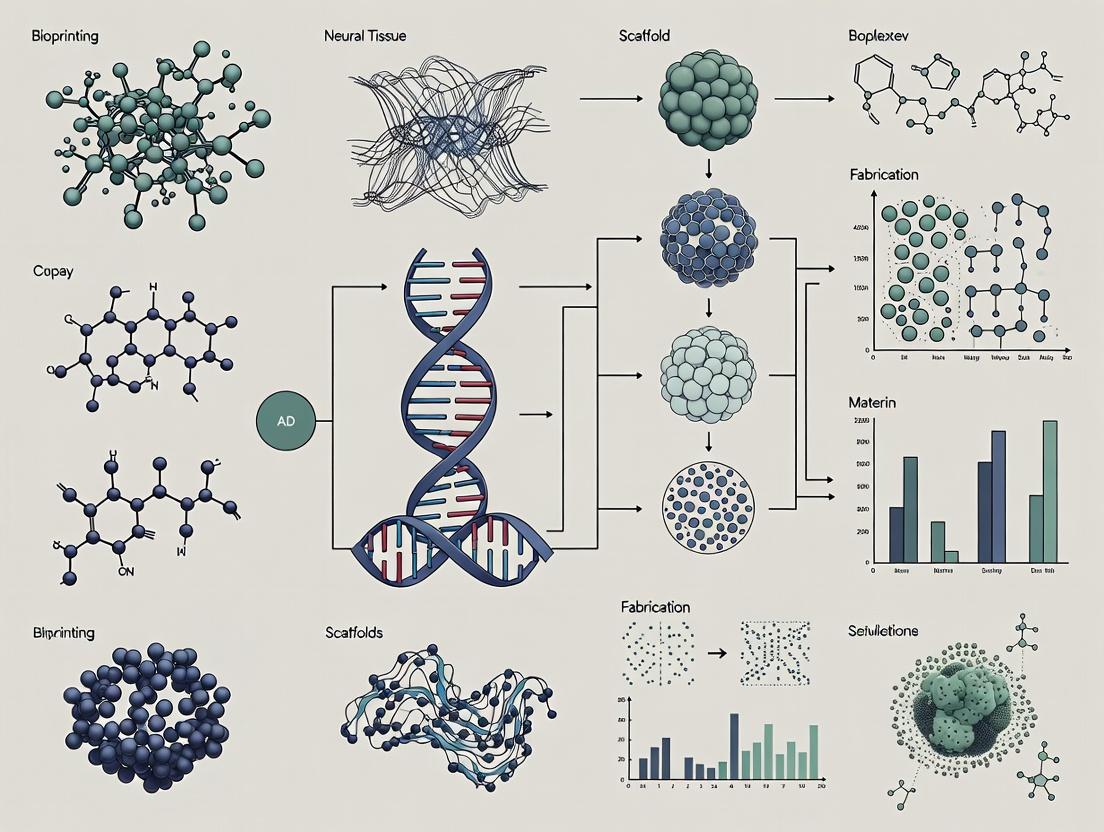
Visualizations
Title: Logic of 3D Neural Model Imperative
Title: 3D Bioprinted Neural Construct Workflow
Title: Key Glutamate Signaling Pathway in 3D Models
Application Notes on Core Components in Neural Tissue Bioprinting
1.1 Bioinks for Neural Applications Bioinks are composite materials designed to encapsulate cells and provide a supportive 3D microenvironment. For neural tissue engineering, they must mimic the delicate, compliant nature of the central nervous system (CNS) and support complex cell-cell interactions. Key bioink categories include:
- Hydrogel-based: Dominant for neural work due to high water content and tunable stiffness. Examples: modified hyaluronic acid (HA), fibrin, gelatin methacryloyl (GelMA), and self-assembling peptides.
- Decellularized extracellular matrix (dECM): Derived from neural or other tissues, providing tissue-specific biochemical cues.
- Composite/Hybrid: Combine polymers (e.g., alginate with GelMA or silk fibroin) to tailor mechanical strength, printability, and bioactivity.
Critical Parameters: Printability (viscosity, shear-thinning), post-printing stability (crosslinking mechanism—UV, ionic, thermal), biocompatibility, and biodegradation rate matching tissue ingrowth.
1.2 Cell Sources for Neural Bioprinting The choice of cell type is pivotal for replicating neural functionality.
- Primary Neural Cells: (e.g., cortical neurons, astrocytes, oligodendrocytes). Offer high fidelity but have limited availability and expansion capability.
- Neural Stem/Progenitor Cells (NSCs/NPCs): Favored for their self-renewal and differentiation potential into major neural lineages. Often derived from induced pluripotent stem cells (iPSCs).
- Induced Pluripotent Stem Cells (iPSCs): Patient-specific, ethically favorable, and capable of indefinite expansion. Require precise differentiation protocols pre- or post-printing.
- Supportive Cells: Co-printing with astrocytes, microglia, or endothelial cells to create more physiologically relevant niches and vascular networks.
1.3 Scaffold Design Principles for Neural Tissues Scaffolds must provide a permissive environment for axonal growth, synaptic connectivity, and electrical activity.
- Topographical Cues: Aligned fibers or microchannels within the bioink guide neurite extension and create anisotropic tissue architecture.
- Mechanical Properties: Stiffness (elastic modulus, E) should approximate brain tissue (0.1-1 kPa). Soft substrates promote neuronal differentiation and network formation.
- Porosity & Permeability: High, interconnected porosity is essential for nutrient diffusion, waste removal, and cell migration. Optimal pore size ranges from 50-200 μm for neural tissues.
- Biochemical Functionalization: Incorporation of adhesion peptides (e.g., RGD, IKVAV) and growth factors (e.g., BDNF, GDNF) via chemical conjugation or affinity-based systems to promote survival and differentiation.
Data Presentation: Quantitative Comparison of Common Neural Bioinks
Table 1: Comparative Analysis of Bioink Formulations for Neural Tissue Bioprinting
| Bioink Material | Typical Conc. | Gelation Method | Elastic Modulus (E) | Key Advantages | Key Limitations for Neural Use |
|---|---|---|---|---|---|
| Hyaluronic Acid (MeHA) | 1-3% (w/v) | UV Crosslinking | 0.5 - 5 kPa | Native CNS component, tunable, supports NPC growth. | Low mechanical strength alone, fast degradation. |
| Gelatin Methacryloyl (GelMA) | 5-15% (w/v) | UV Crosslinking | 1 - 30 kPa | Excellent cell adhesion, tunable RGD density. | Stiffness often >1 kPa at high conc., thermal sensitivity. |
| Fibrin | 5-20 mg/ml | Enzymatic (Thrombin) | 0.1 - 0.5 kPa | Excellent biocompatibility, promotes neurite outgrowth. | Poor mechanical stability, fast degradation. |
| Alginate (with RGD) | 1-4% (w/v) | Ionic (Ca²⁺) | 2 - 100 kPa | Excellent printability, tunable strength. | Non-degradable (standard), inert, requires modification. |
| Self-Assembling Peptides (RADA16-IKVAV) | 0.5-1% (w/v) | Ionic/ pH Shift | 0.1 - 10 kPa | Nanofibrous ECM mimic, precise bioactive epitopes. | Low viscosity, challenging to print standalone. |
| Silk Fibroin | 5-15% (w/v) | Solvent/Shear | 1 - 20 MPa | High strength, controllable degradation. | Requires processing to reduce β-sheet content for soft gels. |
Note: Modulus ranges are highly formulation-dependent. Composite bioinks (e.g., GelMA-Alginate) are commonly used to balance properties.
Experimental Protocols
Protocol 1: Bioprinting a 3D Neural Progenitor Cell (NPC) Niche using Composite GelMA-HA Bioink
Objective: To fabricate a soft, degradable 3D scaffold supporting NPC viability, proliferation, and differentiation.
Materials:
- GelMA (5-10% w/v, low methacrylation degree)
- Hyaluronic Acid Methacrylate (MeHA, 1% w/v)
- Photoinitiator: Lithium phenyl-2,4,6-trimethylbenzoylphosphinate (LAP, 0.1% w/v)
- Human iPSC-derived Neural Progenitor Cells (NPCs)
- Extinction cell culture medium (e.g., DMEM/F12 + B27 + EGF + FGF)
- Sterile PBS
- Extrusion bioprinter with temperature-controlled stage (4-10°C) and 365-405 nm UV curing system
- Printhead with conical nozzle (22-27G)
Method:
- Bioink Preparation: Dissolve GelMA and MeHA in PBS at 37°C. Filter sterilize (0.22 μm). Add LAP and mix thoroughly. Keep solution at 37°C until cell addition.
- Cell Harvesting & Encapsulation: Harvest NPCs as single-cell suspension. Centrifuge and resuspend in a small volume of culture medium. Mix cell suspension with the pre-warmed GelMA-MeHA-LAP solution to achieve a final density of 5-10 x 10⁶ cells/mL. Maintain mixture at 37°C to prevent pre-gelation.
- Printing Parameters: Load bioink into a sterile cartridge. Maintain cartridge temperature at 15-20°C to increase viscosity for printing.
- Nozzle: 25G (≈250 μm inner diameter).
- Pressure: 20-40 kPa (optimize for consistent filament formation).
- Print Speed: 5-10 mm/s.
- Stage Temperature: 4-10°C to aid initial filament stabilization.
- Layer Height: 80% of filament diameter.
- Printing & Crosslinking: Print desired scaffold (e.g., grid structure, 10mm x 10mm, 5 layers). Immediately after deposition of each layer, apply a brief UV light dose (365 nm, 3-5 mW/cm² for 10-30 seconds per layer) to partially crosslink.
- Post-Print Curing: After final layer, apply a final UV dose (10-20 seconds) for complete crosslinking.
- Culture: Transfer constructs to a multi-well plate, wash with PBS, and immerse in NPC proliferation medium. Culture at 37°C, 5% CO₂, with medium changes every other day.
- Differentiation: After 3-5 days of proliferation, switch to differentiation medium (remove EGF/FGF, add BDNF, GDNF).
Protocol 2: Assessing Neurite Outgrowth in 3D Bioprinted Constructs
Objective: To quantify neuronal differentiation and network formation within a bioprinted scaffold.
Materials:
- Bioprinted NPC-laden constructs (from Protocol 1, after 14-21 days differentiation)
- 4% Paraformaldehyde (PFA)
- Permeabilization buffer (0.1-0.5% Triton X-100 in PBS)
- Blocking buffer (5% normal goat serum in PBS)
- Primary antibodies: Anti-βIII-tubulin (neurons), Anti-MAP2 (mature neurites), Anti-GFAP (astrocytes)
- Secondary antibodies (fluorophore-conjugated)
- Nuclear stain (DAPI, 1 μg/mL)
- Confocal microscope
Method:
- Fixation: Wash constructs with PBS and fix in 4% PFA for 45-60 minutes at 4°C.
- Permeabilization & Blocking: Wash 3x with PBS. Permeabilize with 0.3% Triton X-100 for 2 hours. Wash, then block with blocking buffer overnight at 4°C.
- Immunostaining: Incubate with primary antibodies diluted in blocking buffer for 48 hours at 4°C under gentle agitation. Wash extensively (6-8 hours, multiple buffer changes). Incubate with secondary antibodies for 24 hours at 4°C. Wash again thoroughly. Incubate with DAPI for 2 hours.
- Imaging & Analysis: Image using a confocal microscope with Z-stacking capability. For neurite analysis:
- Use maximum intensity projections.
- Employ software (e.g., FIJI/ImageJ with Simple Neurite Tracer or IMARIS) to trace βIII-tubulin⁺/MAP2⁺ processes.
- Quantitative Metrics: Measure Neurite Length, Number of Branches, and Number of Branching Points per neuron. Calculate the percentage of βIII-tubulin⁺ cells with neurites extending >50 μm.
Mandatory Visualizations
Title: Neural Bioprinting Component & Design Workflow
Title: Key Signaling for NPC Differentiation in 3D
The Scientist's Toolkit: Research Reagent Solutions
Table 2: Essential Materials for Neural Bioprinting Research
| Item | Function in Neural Bioprinting Context | Example Product/Catalog |
|---|---|---|
| GelMA (High & Low Methacryl.) | Core hydrogel polymer providing cell-adhesive RGD motifs and tunable UV-crosslinkable matrix. | Advanced BioMatrix GelMA Kit, Sigma-Aldrich 900671. |
| Hyaluronic Acid Methacrylate | Provides brain-ECM mimicry, influences stiffness, and supports stem cell niche. | ESI-BIO MeHA, Glycosil. |
| LAP Photoinitiator | Cytocompatible photoinitiator for rapid UV crosslinking of methacrylated polymers. | Sigma-Aldrich 900889. |
| iPSC-Derived Neural Progenitors | Reproducible, scalable, and clinically relevant cell source for neural tissue models. | Axol Bioscience Cortical NPCs, Fujifilm Cellular Dynamics iCell Neurons. |
| BDNF & GDNF Growth Factors | Critical neurotrophins added to differentiation media to promote neuronal survival/maturation. | PeproTech 450-02 & 450-10. |
| IKVAV-Peptide Modified Gel | Laminin-derived peptide that is conjugated to polymers to enhance specific neuronal adhesion. | Nanofiber Solutions PuraMatrix. |
| Calcium Chloride (for Alginate) | Ionic crosslinker for alginate-based bioinks, used in core-shell or composite printing. | Sigma-Aldrich C5670. |
| RGD Peptide (for Alginate) | Must be grafted to inert alginate to enable cell adhesion and spreading. | Sigma-Aldrich A8052. |
Within the broader thesis on 3D bioprinting for neural tissue scaffolds, this document provides application notes and protocols for key biomaterial classes. These materials serve as the foundational bioinks and structural matrices essential for replicating the neural microenvironment, supporting neuronal growth, and facilitating tissue integration.
Application Notes & Quantitative Comparisons
Table 1: Key Properties of Hydrogel Biomaterials for Neural Scaffolds
| Material | Typical Polymer Concentration | Gelation Mechanism | Storage Modulus (G') Range | Key Advantages for Neural Tissue | Primary Limitations |
|---|---|---|---|---|---|
| Hyaluronic Acid (HA) | 0.5 - 2.0% (w/v) | Covalent (e.g., UV, Michael), Ionic | 10 Pa - 2 kPa | Native ECM component, promotes angiogenesis, tunable degradation | Low mechanical strength, potential inflammatory response at low MW |
| Gelatin Methacryloyl (GelMA) | 5 - 15% (w/v) | Photocrosslinking (UV/Vis, 365-405 nm) | 100 Pa - 10 kPa | Excellent cell adhesion (RGD), tunable stiffness, high printability | UV exposure can be cytotoxic, thermal sensitivity pre-crosslinking |
| Fibrin | 5 - 20 mg/mL | Enzymatic (Thrombin + Ca2+) | 50 Pa - 1 kPa | Excellent biocompatibility, inherent bioactivity, promotes neurite extension | Rapid degradation, poor mechanical integrity, batch variability |
| Decellularized ECM (dECM) | 3 - 10 mg/mL | Thermal (e.g., 37°C), pH shift | 50 Pa - 5 kPa | Tissue-specific biochemical cues, complex native composition | High viscosity, difficult printability, undefined composition |
| HA-GelMA Composite | 1% HA / 5% GelMA | Dual: Photocrosslinking + Ionic | 500 Pa - 5 kPa | Combines bioactivity of HA with structural integrity of GelMA | Complex optimization of two crosslinking mechanisms |
Table 2: Performance Metrics in Representative Neural Cell Culture Studies
| Biomaterial System | Cell Type Seeded | Neurite Length (µm) at 7 Days | Cell Viability (%) at Day 7 | Reference (Example) |
|---|---|---|---|---|
| 2% HA (MeHA) | Neural Stem Cells (NSCs) | 120 ± 25 | 92 ± 3 | (Burdick Lab, 2022) |
| 10% GelMA | DRG Neurons | 450 ± 75 | 85 ± 5 | (Heilshorn Lab, 2023) |
| 10 mg/mL Fibrin | PC12 Cells | 300 ± 50 | 95 ± 2 | (Willerth Lab, 2023) |
| 5 mg/mL Brain dECM | iPSC-derived Neurons | 200 ± 40 | 80 ± 7 | (Cho Lab, 2024) |
| 1%HA/7%GelMA Composite | NSC Spheroids | 350 ± 60 | 90 ± 4 | (Zhao et al., 2024) |
Detailed Experimental Protocols
Protocol 1: Synthesis and 3D Bioprinting of GelMA-based Neural Constructs
Objective: To fabricate a 3D neural tissue scaffold using GelMA hydrogel laden with neural progenitor cells (NPCs) via extrusion bioprinting. Materials: See "The Scientist's Toolkit" below. Procedure:
- GelMA Synthesis & Characterization:
- Dissolve type A gelatin (from porcine skin) at 10% (w/v) in Dulbecco's Phosphate Buffered Saline (DPBS) at 50°C.
- Add methacrylic anhydride (MA) dropwise (0.6 mL per gram of gelatin) under vigorous stirring for 3 hours at 50°C.
- Stop reaction with a 5x dilution of warm DPBS. Dialyze against distilled water (12-14 kDa cutoff) for 5-7 days at 40°C. Lyophilize for 48 hours.
- Confirm degree of functionalization (DoF) via 1H NMR (target: ~80%).
- Bioink Preparation:
- Dissense lyophilized GelMA at 7% (w/v) in sterile, warm (37°C) cell culture medium.
- Add 0.25% (w/v) photoinitiator Lithium phenyl-2,4,6-trimethylbenzoylphosphinate (LAP). Protect from light.
- Gently mix with a suspension of human iPSC-derived NPCs at a density of 10 x 10^6 cells/mL.
- 3D Bioprinting Process:
- Load bioink into a sterile, temperature-controlled (20-22°C) syringe fitted to an extrusion bioprinter.
- Use a 22G conical nozzle (410 µm diameter).
- Print a 15mm x 15mm grid structure (2 layers, 0/90° pattern) onto a petri dish.
- Printing Parameters: Pressure: 18-22 kPa, Speed: 8 mm/s, Layer Height: 300 µm.
- Crosslinking & Post-Processing:
- Immediately after printing, expose the construct to 405 nm UV light at an intensity of 5 mW/cm² for 60 seconds.
- Transfer construct to a 24-well plate containing neural maintenance medium.
- Culture at 37°C, 5% CO2, with medium changes every 48 hours. Assessment: Assess cell viability (Live/Dead assay) at 1, 3, and 7 days post-printing. Immunostain for β-III-Tubulin (neurons) and GFAP (astrocytes) at day 14.
Protocol 2: Preparation and Characterization of Decellularized Brain ECM Bioink
Objective: To derive a neural-specific dECM hydrogel from porcine brain tissue and characterize its biochemical and physical properties. Procedure:
- Decellularization:
- Mince 10g of fresh porcine brain cortex (grey matter).
- Wash in deionized (DI) water with agitation (120 rpm) for 24 hours at 4°C.
- Treat with 1% (w/v) sodium dodecyl sulfate (SDS) in DI water for 48 hours at 4°C with agitation.
- Rinse with DI water for 24 hours, then treat with 1% (v/v) Triton X-100 in DI water for 24 hours.
- Perform a final wash in PBS with 1% Antibiotic-Antimycotic for 72 hours, changing solution every 12 hours.
- Lyophilization & Digestion:
- Freeze tissue at -80°C and lyophilize for 72 hours.
- Mill the lyophilized dECM into a fine powder using a cryomill.
- Digest the dECM powder at 10 mg/mL in 0.1M acetic acid containing 1 mg/mL pepsin (w/w relative to dECM) for 48 hours at 4°C under constant stirring.
- Neutralize to pH 7.4 using 0.1M NaOH and dilute to a final concentration of 5 mg/mL with cold PBS. Keep on ice.
- Gelation Kinetics & Characterization:
- Rheology: Transfer 500 µL of dECM pre-gel to a rheometer plate at 4°C. Raise temperature to 37°C at 2°C/min and monitor storage (G') and loss (G'') moduli over 30 minutes. Record gelation time (crossover of G' and G'').
- Biochemical Analysis: Quantify total collagen (Hydroxyproline assay), sulfated glycosaminoglycans (sGAG; DMMB assay), and residual DNA (PicoGreen assay). Target: DNA removal >95% vs native tissue.
- Sterilization: For cell culture, filter sterilize (0.22 µm) the acidic digest pre-neutralization, then neutralize under sterile conditions.
Visualizations
Neural Scaffold Biomaterial Selection Logic
GelMA Neural Construct Bioprinting Workflow
Brain dECM Hydrogel Preparation Protocol
The Scientist's Toolkit: Key Research Reagent Solutions
| Reagent/Material | Vendor Examples (for reference) | Function in Neural Scaffold Research |
|---|---|---|
| Gelatin, Type A | Sigma-Aldrich (G2500), Millipore | Source material for synthesis of GelMA; provides RGD sequences for cell adhesion. |
| Methacrylic Anhydride (MA) | Sigma-Aldrich (276685) | Functionalizing agent for GelMA synthesis; introduces photocrosslinkable methacrylate groups. |
| Lithium Phenyl-2,4,6-trimethylbenzoylphosphinate (LAP) | Tokyo Chemical Industry (L0236) | Broad-spectrum, cytocompatible photoinitiator for UV/visible light crosslinking of GelMA and other methacrylated polymers. |
| Hyaluronic Acid, Sodium Salt | Lifecore Biomedical, Bloomage Biotech | High-molecular-weight form used for chemical modification (e.g., methacrylation) to create photopolymerizable hydrogels. |
| Fibrinogen from Human Plasma | Sigma-Aldrich (F3879) | Precursor protein for forming fibrin hydrogels; combined with thrombin for enzymatic gelation in cell encapsulation. |
| Thrombin from Bovine Plasma | Sigma-Aldrich (T7513) | Serine protease that cleaves fibrinogen to initiate fibrin polymerization and hydrogel formation. |
| Pepsin from Porcine Gastric Mucosa | Sigma-Aldrich (P7000) | Proteolytic enzyme used to solubilize decellularized ECM powders into a viscous, gelable pre-polymer solution. |
| DNA Quantitation Kit (PicoGreen) | Invitrogen (P11496) | Ultrasensitive fluorescent assay critical for quantifying residual DNA in dECM to validate decellularization efficiency. |
| Anti-β-III-Tubulin Antibody | Bio-Techne (MMS-435P), Abcam (ab18207) | Primary antibody for immunocytochemical identification of neurons in 3D hydrogel cultures. |
| LIVE/DEAD Viability/Cytotoxicity Kit | Invitrogen (L3224) | Standard assay (Calcein AM/EthD-1) for quantifying cell viability and distribution in 3D bioprinted constructs. |
Application Notes
The pursuit of engineering functional 3D neural tissue via bioprinting necessitates a critical evaluation of cellular building blocks. The choice between NSPCs, iPSCs, and glial support cells profoundly influences the scaffold's fidelity, functionality, and translational applicability. Within bioprinting research, these sources are selected based on their proliferative capacity, differentiation potential, capacity for integration, and ability to recapitulate the native neural microenvironment.
Neural Stem/Progenitor Cells (NSPCs): Sourced from fetal tissue or differentiated from pluripotent stem cells, NSPCs are committed to the neural lineage. They offer a favorable balance between expansion capability and directed differentiation into neurons, astrocytes, and oligodendrocytes. In 3D bioprinting, they are prized for their inherent self-organization tendencies and reduced risk of teratoma formation compared to iPSCs. A key challenge is donor variability and limited long-term expansion without phenotypic drift.
Induced Pluripotent Stem Cells (iPSCs): iPSCs provide a virtually unlimited, patient-specific cell source. They must be pre-differentiated into neural progenitors or specific neural subtypes before printing to ensure construct predictability and safety. The use of iPSC-derived neural cells enables the modeling of neurological diseases in vitro for drug screening and the potential for autologous grafts. However, protocols for large-scale, homogeneous differentiation and the residual risk of undifferentiated cells remain significant hurdles.
Glial Support Cells: Primary or stem cell-derived astrocytes, microglia, and oligodendrocyte precursors are no longer considered mere support actors. Co-printing these cells with neurons is essential for constructing mature, homeostatic, and immunologically competent neural tissues. Astrocytes facilitate synapse formation and nutrient exchange, microglia provide immune surveillance, and oligodendrocytes enable myelination. Their inclusion moves bioprinted scaffolds from simplistic neuronal networks toward authentic neuroglial assemblies.
Experimental Protocols
Protocol 1: Differentiation of iPSCs to Neural Progenitor Cells (NPCs) for Bioprinting
Objective: Generate a scalable, consistent population of NPCs from iPSCs suitable for encapsulation in bioinks.
- Culture iPSCs on Matrigel-coated plates in mTeSR Plus medium until 70-80% confluent.
- Neural Induction: Switch to neural induction medium (e.g., NIM containing DMEM/F12, Neurobasal, N2, B27, 1μM Dorsomorphin, 10μM SB431542). Culture for 10-12 days, changing medium daily.
- NPC Expansion: Manually pick or enzymatically detach emerging neural rosettes. Plate rosettes on Poly-L-ornithine/Laminin-coated dishes in NPC expansion medium (Neurobasal, B27, 20 ng/mL bFGF, 20 ng/mL EGF). Passage every 5-7 days using Accutase.
- Characterization: Validate NPC identity via flow cytometry for Nestin (>90%), PAX6, and SOX1. Confirm multipotency by differentiation into βIII-tubulin+ neurons and GFAP+ astrocytes.
- Bioink Preparation: Harvest NPCs, centrifuge (300 x g, 5 min), and resuspend at 10-20 x 10⁶ cells/mL in chosen bioink (e.g., gelatin methacryloyl (GelMA) blended with hyaluronic acid). Maintain on ice before printing.
Protocol 2: 3D Bioprinting of a Co-culture Neural Scaffold with NSPCs and Astrocytes
Objective: Fabricate a layered construct containing NSPCs and astrocytes in a spatially defined architecture.
- Cell Preparation:
- Differentiate or isolate NSPCs and label with a cytoplasmic dye (e.g., CellTracker Green).
- Culture human induced astrocytes (iAs) and label with a distinct dye (e.g., CellTracker Red).
- Bioink Formulation:
- Bioink A (NSPC-laden): 5% (w/v) GelMA, 0.5% (w/v) LAP photoinitiator, NSPCs at 15 x 10⁶ cells/mL in PBS.
- Bioink B (Astrocyte-laden): 5% (w/v) GelMA, 0.5% LAP, astrocytes at 10 x 10⁶ cells/mL.
- Bioprinting Process:
- Load bioinks into separate cartridges of a stereolithography (SLA) or extrusion bioprinter.
- Print a 10mm x 10mm base layer (100μm thickness) using Bioink B.
- Crosslink with 405nm blue light (5s exposure, 10mW/cm²).
- Print a second lattice layer directly atop using Bioink A.
- Final crosslinking of the full construct (15s exposure).
- Post-Print Culture: Transfer construct to a 6-well plate with co-culture medium (Neurobasal-A, B27, 1% FBS, 10 ng/mL BDNF). Culture for up to 4 weeks, assessing cell viability, neurite outgrowth, and glial integration.
Data Presentation
Table 1: Comparative Metrics of Neural Cell Sources for 3D Bioprinting
| Parameter | Primary NSPCs | iPSC-Derived NPCs | Primary Astrocytes | iPSC-Derived Astrocytes |
|---|---|---|---|---|
| Expansion Potential | Moderate (5-10 passages) | High (>20 passages) | Low (2-4 passages) | High (>15 passages) |
| Typical Yield | 1-5 x 10⁶ per isolation | 1-5 x 10⁹ per differentiation run | 2-5 x 10⁵ per isolation | 1-5 x 10⁸ per differentiation |
| Neuronal Differentiation Efficiency | 60-80% (βIII-tubulin+) | 70-90% (MAP2+) | N/A | N/A |
| Glial Marker Expression | GFAP+ (30-50%), O4+ (10-20%) | GFAP+ (>95% for astro-induction) | GFAP+ (>98%) | GFAP+ (>95%) |
| Printing Viability (Day 1) | 85-90% | 80-88% | 75-85% | 82-90% |
| Cost per 10⁶ Cells | High ($500-$1000) | Medium ($100-$300) | Very High ($1000+) | Medium ($150-$350) |
| Key Advantage | Native commitment, faster maturation | Scalability, genetic engineering | Functional maturity, native phenotype | Scalability, disease modeling |
Table 2: Bioink Formulations and Outcomes for Neural Cell Types
| Bioink Composition | Crosslinking Method | Encapsulated Cell Type | Post-Print Viability (Day 7) | Notable Functional Outcome |
|---|---|---|---|---|
| 5% GelMA, 0.1% HA | Photo (405 nm) | iPSC-NPCs | 78 ± 5% | Extensive neurite extension (>500 μm) by Day 14. |
| 1.5% Alginate, 3% Fibrin | Ionic (Ca²⁺) + Enzymatic | Primary NSPCs | 82 ± 4% | Spontaneous calcium oscillations by Day 21. |
| Hybrid: 3% GelMA, 2% Alginate | Photo + Ionic | Co-culture: NPCs & Astrocytes | 85 ± 3% (NPCs), 80 ± 6% (Astros) | Enhanced neuronal survival (40% increase vs. neurons alone). |
| Peptide Hydrogel (RADA16-I) | pH-triggered self-assembly | Microglia progenitors | 88 ± 2% | Maintained ramified morphology and LPS-responsive activation. |
Diagrams
iPSC to Neural Lineage Differentiation Workflow
Spatially Defined Co-culture Bioprinting Process
The Scientist's Toolkit: Research Reagent Solutions
| Reagent / Material | Supplier Examples | Function in Neural Bioprinting Research |
|---|---|---|
| mTeSR Plus Medium | STEMCELL Technologies | Feeder-free, defined medium for maintaining undifferentiated iPSCs prior to neural induction. |
| STEMdiff SMADi Neural Induction Kit | STEMCELL Technologies | A standardized, dual-SMAD inhibition kit for robust, efficient conversion of iPSCs to NPCs. |
| Gelatin Methacryloyl (GelMA) | Advanced BioMatrix, Cellink | A tunable, photocrosslinkable bioink providing cell-adhesive RGD motifs essential for neural cell survival and process outgrowth. |
| LAP Photoinitiator | Sigma-Aldrich, Cellink | (Lithium phenyl-2,4,6-trimethylbenzoylphosphinate) A cytocompatible photoinitiator for visible light crosslinking of bioinks like GelMA. |
| Neurobasal & B-27 Supplements | Thermo Fisher Scientific | Base medium and serum-free supplement critical for long-term survival and differentiation of primary and stem cell-derived neural cells in 3D. |
| Recombinant Human BDNF, GDNF | PeproTech | Trophic factors added to post-print culture media to promote neuronal maturation, synaptic activity, and survival in 3D constructs. |
| CellTracker Dyes | Thermo Fisher Scientific | Fluorescent cytoplasmic dyes for pre-labeling different cell populations (e.g., NSPCs vs. astrocytes) to track their location and interaction post-printing. |
| Poly-L-ornithine & Laminin | Sigma-Aldrich | Standard coating combination for 2D culture of neural cells and often incorporated into bioinks to enhance cell adhesion. |
| Live/Dead Viability/Cytotoxicity Kit | Thermo Fisher Scientific | Standard assay (Calcein AM/EthD-1) for quantifying cell viability within bioprinted constructs at various time points. |
| Matrigel Matrix | Corning | Basement membrane extract used for 2D iPSC culture and sometimes as a bioink component or post-print coating to enhance biocompatibility. |
Application Notes
The regeneration of neural tissue requires scaffolds that recapitulate the complex physical and topological features of the native extracellular matrix (ECM). Within the broader thesis on 3D bioprinting for neural scaffolds, this document outlines the application of engineered porosity, stiffness, and surface topography to direct neural stem/progenitor cell (NSC/NPC) fate, neurite outgrowth, and network formation.
1. Porosity and Permeability: A highly interconnected porous network is critical for nutrient/waste diffusion, cell migration, and vascularization. Optimal pore sizes for neural tissue are typically in the 50-200 µm range, facilitating cell infiltration and spatial organization. Effective porosity (>90%) is often achieved using sacrificial bioinks or cryogelation techniques.
2. Mechanical Cues (Stiffness): The central nervous system (CNS) parenchyma is soft (~0.1-1 kPa), while peripheral nerves are slightly stiffer (~1-10 kPa). Matching scaffold compliance to native tissue modulus is essential to prevent glial scar formation, promote neuronal differentiation, and ensure functional electrophysiology. Stiffness is tuned via polymer concentration, crosslinking density, and composite materials.
3. Topographical Guidance: Aligned fibers, grooves, and patterned surfaces provide contact guidance for axon growth cones, directing neurite extension and enhancing the rate and precision of network assembly. This is crucial for bridging lesion sites in spinal cord injury.
Table 1: Quantitative Parameters for Mimicking the Neural Microenvironment
| Parameter | Target Range (CNS) | Target Range (PNS) | Key Measurement Technique | Influence on Neural Cells |
|---|---|---|---|---|
| Elastic Modulus | 0.1 - 1 kPa | 1 - 10 kPa | Atomic Force Microscopy (AFM) | Soft substrates promote neuronal differentiation; stiff substrates promote glial differentiation. |
| Average Pore Size | 50 - 200 µm | 50 - 150 µm | Micro-CT Scanning, SEM Analysis | Facilitates 3D cell migration, network formation, and diffusion. |
| Porosity | >90% (ideal) | 70-90% | Gravimetric Analysis, Micro-CT | High interconnectivity supports metabolic exchange. |
| Fiber/Groove Alignment | 1 - 5 µm width/height | 1 - 10 µm width/height | Scanning Electron Microscopy (SEM) | Contact guidance for directed neurite outgrowth and Schwann cell alignment. |
| Ligand Density | 1 - 10 µg/cm² (e.g., laminin) | 5 - 20 µg/cm² (e.g., laminin) | Fluorescence Tagging, ELISA | Regulates integrin-mediated adhesion, survival, and differentiation. |
Experimental Protocols
Protocol 1: Fabrication of Anisotropic, Topographically-Patterned Hydrogel Scaffolds via Soft Lithography
Objective: To create 3D hydrogel scaffolds with controlled microgrooves for studying contact guidance of neurites.
- Master Mold Fabrication: Spin-coat SU-8 photoresist on a silicon wafer. Use a photomask with parallel line patterns (width: 2 µm, spacing: 2 µm, height: 5 µm) and UV expose. Develop to create the positive relief master.
- Polydimethylsiloxane (PDMS) Stamp Replication: Mix PDMS base and curing agent (10:1), pour over the master, degas, and cure at 65°C for 2 hours. Peel off the PDMS stamp.
- Hydrogel Patterning: Prepare a 3% (w/v) fibrinogen solution in PBS. Coat the PDMS stamp with the solution. Place a pre-formed, partially crosslinked collagen I hydrogel (1.5 mg/mL, 5 mm thick) on the stage. Gently press the coated stamp onto the hydrogel surface for 5 minutes.
- Scaffold Completion: Carefully remove the stamp, leaving the microgrooved pattern on the hydrogel surface. Immerse the scaffold in a thrombin solution (2 U/mL) for 10 minutes to crosslink the fibrin, creating a stable patterned interface.
- Cell Seeding: Seed primary rat hippocampal neurons (density: 500 cells/mm²) onto the patterned surface in Neurobasal medium. Culture for up to 7 days, fixing at desired time points for immunocytochemistry (β-III-tubulin).
Protocol 2: Tuning Scaffold Stiffness via Crosslinking for NSC Differentiation Studies
Objective: To generate a series of methacrylated gelatin (GelMA) hydrogels with discrete stiffness values to assess NSC fate.
- GelMA Solution Preparation: Prepare 5%, 7%, and 10% (w/v) solutions of GelMA (from porcine skin, ~90% methacrylation) in PBS containing 0.5% (w/v) lithium phenyl-2,4,6-trimethylbenzoylphosphinate (LAP) photoinitiator. Keep solutions at 37°C to prevent gelling.
- Hydrogel Fabrication: Pipette 100 µL of each GelMA solution into a cylindrical mold (8 mm diameter). Expose to 405 nm UV light (6 mW/cm²) for 30 seconds to achieve crosslinking.
- Mechanical Validation: Using a rheometer in oscillatory mode, confirm the storage modulus (G') of each hydrogel batch (n=5). Target moduli: 5% GelMA (~0.5 kPa), 7% GelMA (~2 kPa), 10% GelMA (~8 kPa).
- 3D Cell Encapsulation: Mix human NSCs (ReNcell VM) with the pre-polymer GelMA/LAP solutions at 5 x 10^6 cells/mL. Pipette 50 µL droplets into molds and crosslink as in Step 2.
- Culture and Analysis: Culture scaffolds in NSC maintenance medium for 14 days. Analyze differentiation via qPCR (markers: Tuj1 for neurons, GFAP for astrocytes, O4 for oligodendrocytes) and confocal imaging of immunostained sections.
Protocol 3: Assessing Neurite Outgrowth on Aligned vs. Random Nanofiber Scaffolds
Objective: To quantify the directionality and length of neurite extension on electrospun polycaprolactone (PCL) fibers.
- Scaffold Fabrication:
- Aligned Fibers: Electrospin a 12% (w/v) PCL solution in chloroform/DMF (7:3) onto a high-speed rotating mandrel (2500 rpm). Collect aligned fibers on coverslips.
- Random Fibers: Electrospin the same solution onto a stationary collector.
- Surface Functionalization: Sterilize scaffolds in 70% ethanol for 1 hour. Coat with 10 µg/mL poly-D-lysine for 1 hour, followed by 5 µg/mL laminin in PBS for 2 hours at 37°C.
- Cell Seeding: Seed differentiated PC-12 cells or primary dorsal root ganglion (DRG) neurons onto scaffolds at 100 cells/mm².
- Fixation and Staining: After 48-72 hours, fix cells with 4% PFA for 15 min. Permeabilize, block, and immunostain for β-III-tubulin and the nuclear marker DAPI.
- Image Analysis: Capture confocal microscope images (20x). Use directional orientation plugins (e.g., in ImageJ) to calculate the angle of neurite extension relative to the fiber axis (for aligned scaffolds). Measure total neurite length per cell using skeletonization plugins.
Diagrams
Title: Signaling from Scaffold Cues to Neural Cell Response
Title: Workflow for Neural Scaffold Development & Testing
The Scientist's Toolkit: Research Reagent Solutions
Table 2: Essential Materials for Neural Microenvironment Mimicry Experiments
| Item | Function in Research | Example Product/Catalog # (Representative) |
|---|---|---|
| Methacrylated Gelatin (GelMA) | Photocrosslinkable bioink allowing precise stiffness tuning and cell encapsulation. | GelMA, Advanced BioMatrix, #5103 |
| Laminin-1, Mouse Natural | Critical ECM protein coating for promoting neural cell adhesion, neurite outgrowth, and survival. | Laminin I, Invitrogen, #23017015 |
| Lithium Phenyl-2,4,6-trimethylbenzoylphosphinate (LAP) | Highly efficient, water-soluble photoinitiator for visible light crosslinking of bioinks. | LAP, Sigma-Aldrich, #900889 |
| Poly-ε-Caprolactone (PCL) | Biodegradable, FDA-approved polymer for electrospinning topographically aligned fiber scaffolds. | PCL, Sigma-Aldrich, #440744 |
| Y-27632 (ROCK Inhibitor) | Small molecule inhibitor of Rho-associated kinase; used to enhance cell viability after seeding and reduce contractility. | Y-27632 dihydrochloride, Tocris, #1254 |
| Anti-β-III-Tubulin Antibody | Primary antibody for specific immunostaining of neurons and their neurites. | Anti-Tuj1, BioLegend, #801201 |
| Neurobasal & B-27 Supplement | Serum-free medium and supplement optimized for long-term survival of primary neurons. | Neurobasal, Gibco, #21103049; B-27, Gibco, #17504044 |
| Recombinant Human BDNF & GDNF | Neurotrophic factors added to culture medium to support neuronal differentiation, maturation, and survival. | BDNF, PeproTech, #450-02; GDNF, PeproTech, #450-10 |
From Blueprint to Biostructure: Key Bioprinting Techniques and Their Neural Applications
Extrusion bioprinting remains the predominant technique for fabricating neural tissue constructs due to its versatility in material handling, cost-effectiveness, and ability to create structurally relevant, cell-laden scaffolds. Within neural tissue engineering research, it addresses three critical fronts: (1) creating complex, 3D architectures that mimic the native extracellular matrix (ECM) to support neuronal growth and network formation; (2) depositing multiple materials to model heterogeneous tissues like gray-white matter interfaces or blood-brain barrier constructs; and (3) employing advanced coaxial printing to generate hollow, vasculature-like channels or core-shell fibers for controlled growth factor delivery, essential for nutrient diffusion in thick neural grafts.
The technique's robustness makes it a "workhorse" for high-throughput screening of drug neurotoxicity, modeling neurodegenerative diseases, and developing implantable scaffolds for spinal cord injury repair. The following protocols and data synthesize current methodologies central to this field.
Key Experimental Protocols
Protocol 2.1: Multi-material Bioprinting of a Gray/White Matter Mimetic Construct Objective: To fabricate a layered neural construct with distinct regions mimicking neuronal cell body-rich gray matter and axonal tract-like white matter. Materials: Bioink A (Gray Matter Mimetic): 3% (w/v) alginate, 1 mg/mL laminin, 1.5 x 10⁶ cells/mL induced neural progenitor cells (iNPCs). Bioink B (White Matter Mimetic): 3% (w/v) alginate, 1 mg/mL hyaluronic acid, 2 mg/mL fibrinogen, 0.5 x 10⁶ cells/mL Schwann cells. Crosslinking solution: 100 mM CaCl₂. Procedure:
- Load Bioinks A and B into separate, temperature-controlled (22°C) printhead cartridges.
- Using a multi-cartridge system, design a CAD model with a central cylinder (Bioink B, diameter 4mm) surrounded by an outer sheath (Bioink A, thickness 2mm).
- Print at a constant pressure of 25 kPa and speed of 8 mm/s using a 25G nozzle (410 μm inner diameter) onto a maintained stage (15°C).
- Immediately post-print, mist the construct with CaCl₂ solution for 60 seconds for ionic crosslinking.
- Transfer to neural maintenance medium. Assess cell viability (Live/Dead assay) at 1, 3, and 7 days and axonal alignment (β-III tubulin staining) at day 7.
Protocol 2.2: Coaxial Bioprinting of Perfusable Neural Microchannels Objective: To create hollow, endothelial-lined channels within a neural hydrogel for perfusion studies. Materials: Shell Bioink: 2% (w/v) gelatin methacryloyl (GelMA), 0.5% (w/v) photoinitiator (LAP). Core Solution: 4% (w/v) Pluronic F127. Human Brain Microvascular Endothelial Cells (HBMECs). Procedure:
- Prepare the shell bioink and keep at 37°C to prevent gelation. Maintain core solution at 4°C.
- Load solutions into a coaxial printhead (22G inner needle, 410 μm; 16G outer needle, 1.19 mm).
- Print linear filaments into a support bath of Carbopol (0.5% w/v) at 20 kPa (shell) and 15 kPa (core) pressure, speed 10 mm/s.
- Post-printing, expose the recovered construct to 405 nm light (15 mW/cm²) for 90 seconds to crosslink GelMA.
- Wash with cold cell medium to liquefy and evacuate the Pluronic core, creating a hollow channel.
- Seed HBMECs (2x10⁶ cells/mL) into the channel via perfusion and culture under flow (0.1 mL/min) after 24 hours. Assess barrier integrity (TEER, ZO-1 immunofluorescence) at day 5.
Data Presentation
Table 1: Comparative Analysis of Bioinks for Extrusion-Based Neural Bioprinting
| Bioink Formulation | Cell Type | Printability (Fidelity Score*) | Post-Print Viability (Day 1) | Neural Marker Expression (Day 14) | Key Application |
|---|---|---|---|---|---|
| 3% Alginate / 1 mg/mL Laminin | Human iPSC-NPCs | 0.85 ± 0.03 | 92% ± 3% | β-III Tubulin: 65% ± 7% | Basic neural networks |
| 2% GelMA / 0.5% HA | Rat Primary Cortical Neurons | 0.78 ± 0.05 | 88% ± 4% | MAP2: 58% ± 6% | Soft parenchymal mimics |
| 1.5% Collagen I / 2% Alginate | SH-SY5Y Neuronal Cells | 0.90 ± 0.02 | 95% ± 2% | Synapsin-1: 40% ± 5% | Mechanically stable scaffolds |
| Coaxial: Alg/GelMA Shell | HBMECs (Core) | 0.82 ± 0.04 (Channel Patency) | 85% ± 5% (Lining Confluence) | CD31: >95% | Perfusable vasculature |
*Fidelity Score (0-1): ratio of printed filament diameter to designed diameter.
Table 2: Effect of Printing Parameters on Neural Cell Viability
| Pressure (kPa) | Speed (mm/s) | Nozzle Gauge (G) | Post-Print Viability (%) | Notes |
|---|---|---|---|---|
| 15 | 5 | 27 | 96 ± 2 | Low shear, but slow, risk of clogging |
| 25 | 8 | 25 | 92 ± 3 | Optimal balance for alginate-based inks |
| 35 | 12 | 22 | 81 ± 4 | High shear stress reduces viability |
| 25 | 8 | Coaxial | 88 ± 3 (Shell) | Viability maintained in core-shell structure |
The Scientist's Toolkit: Research Reagent Solutions
| Reagent/Material | Function in Neural Bioprinting |
|---|---|
| Gelatin Methacryloyl (GelMA) | Photocrosslinkable hydrogel providing cell-adhesive RGD motifs; tunable stiffness crucial for neurite outgrowth. |
| Alginate | Ionic-crosslinkable polysaccharide; provides rapid stabilization and structural integrity to printed scaffolds. |
| Laminin & Fibronectin | ECM protein additives to bioinks to enhance neuronal adhesion, survival, and directed axonal growth. |
| Hyaluronic Acid (HA) | Major CNS ECM component; modulates hydrogel viscosity and mimics the perineuronal net microenvironment. |
| Pluronic F127 | Thermoresponsive sacrificial polymer used in coaxial printing to create temporary, washable cores for hollow channels. |
| Lithium Phenyl-2,4,6-Trimethylbenzoylphosphinate (LAP) | Efficient, cytocompatible photoinitiator for UV (365-405 nm) crosslinking of methacrylated hydrogels like GelMA. |
| Carbopol Microgel | Yield-stress support bath for printing freeform structures and fragile inks, enabling suspended filaments. |
Visualized Pathways and Workflows
Title: Multi-material Neural Construct Bioprinting Workflow
Title: Bioink Growth Factor Signaling in Neural Constructs
The fabrication of complex, perfusable vascular networks is a critical bottleneck in engineering viable neural tissue constructs. Within the thesis framework of 3D bioprinting for neural tissue scaffolds, light-based vat photopolymerization techniques—Stereolithography (SLA) and Digital Light Processing (DLP)—offer unparalleled resolution and precision for creating hierarchical, biomimetic vascular channels. These channels are essential for nutrient diffusion, waste removal, and ultimately, the survival and integration of neuronal and glial cells in thick, clinically relevant tissue models.
Technology Comparison & Quantitative Data
Table 1: Comparative Analysis of SLA and DLP for Vascular Network Fabrication
| Parameter | Stereolithography (SLA) | Digital Light Processing (DLP) | Relevance to Vascular/Neural Scaffolds |
|---|---|---|---|
| Light Source | Single UV/blue laser point | Digital UV/blue light projector (mask) | DLP enables faster layer curing, beneficial for large scaffolds. |
| Resolution (XY-axis) | 25 - 150 µm | 10 - 100 µm | DLP typically offers higher XY resolution for finer capillary features. |
| Resolution (Z-axis) | 10 - 200 µm | 10 - 100 µm | Both can achieve layer heights suitable for capillary (10-20 µm) and larger vessel definition. |
| Build Speed | Medium (serial process) | High (full layer parallel process) | DLP reduces print time for complex, branched vascular trees. |
| Bioink Requirement | Photopolymerizable resin (with photoinitiator) | Photopolymerizable resin (with photoinitiator) | Requires cytocompatible, low-irradiance resins (e.g., GelMA, PEGDA). |
| Key Advantage | Excellent surface finish, depth control | Speed, high resolution at speed | Both enable intricate, interconnected lumens without support material. |
| Vascular Network Fidelity | High for complex 3D paths | Very High for detailed 2.5D layer patterns | Ideal for generating Murray's law-based bifurcating networks. |
| Typical Cell Encapsulation | Post-printing seeding mostly | Yes, in-bath printing possible | DLP's speed better suits direct encapsulation of endothelial/neural progenitor cells. |
Table 2: Recent Benchmark Data for SLA/DLP-Printed Vascular Constructs (2023-2024)
| Ref. | Technique | Material | Minimum Channel Diameter | Printing Time (Construct) | Cell Viability (Post-Print) | Application Focus |
|---|---|---|---|---|---|---|
| Lee et al., 2023 | DLP | GelMA/PEGDA | 18 µm | 120 s (5x5x3 mm) | >92% (HUVECs) | Capillary network formation |
| Schmidt et al., 2024 | SLA | Glycidyl Methacrylate-modified Hyaluronic Acid | 75 µm | 25 min (10x10x2 mm) | >88% (hNSCs) | Neural organoid perfusion |
| Varadarajan et al., 2024 | Multi-material DLP | GelMA/nHA (wall), Pluronic F127 (sacrificial) | 50 µm | 180 s (8x8x4 mm) | >95% (Co-culture: HUVECs & Astrocytes) | Blood-brain barrier model |
Detailed Experimental Protocols
Protocol 3.1: DLP Bioprinting of a Perfusable, Endothelialized Vascular Network for Neural Co-Culture
Objective: To fabricate a dual-layer vascular lumen embedded within a neural progenitor cell-laden hydrogel using a commercially available DLP bioprinter.
Materials: See "The Scientist's Toolkit" below.
Pre-Printing Preparation:
- Bioink 1 (Vascular Lumen Ink): Dissolve 7% (w/v) GelMA and 0.1% (w/v) LAP photoinitiator in PBS at 37°C. Filter sterilize (0.22 µm). Keep at 37°C in dark.
- Bioink 2 (Neural Matrix Ink): Dissolve 3% (w/v) GelMA, 0.5% (w/v) Hyaluronic Acid, and 0.05% (w/v) LAP in neural basal medium. Gently mix with neural progenitor cells (NPCs) at 10x10⁶ cells/mL. Maintain at 22°C.
- Printer Setup: Calibrate the build platform. Load a 405 nm DLP projector mask for the vascular design (single, bifurcating channel, 200 µm diameter). Set layer height to 50 µm.
Printing Procedure:
- Layer 1 (Neural Matrix Base): Dispense 200 µL of Bioink 2 into the build vat. Project first layer pattern (solid rectangle) for 15 seconds. Raise platform.
- Layer 2-10 (Embedded Vascular Channel):
- After Layer 1, aspirate residual Bioink 2 from the vat.
- Add 150 µL of Bioink 1 (acellular) to the vat.
- Project the vascular channel cross-section pattern for 8 seconds per layer.
- After each layer, briefly lower the platform into a PBS bath to rinse uncured Bioink 1 before the next layer.
- Layer 11-20 (Neural Matrix Encapsulation): Aspirate Bioink 1. Return to dispensing Bioink 2 into the vat. Project the neural matrix layer pattern (with a void for the vascular channel) for 12 seconds per layer.
- Post-Printing: Upon completion, submerge the entire construct in PBS. Gently flush the internal vascular channel with PBS using a blunted 27G needle.
- Endothelial Seeding: Perfuse the channel with a suspension of GFP-tagged HUVECs (5x10⁶ cells/mL) using a syringe pump (10 µL/min for 10 min). Rotate construct every 15 min for 1 hour to promote uniform adhesion.
- Culture: Transfer construct to a bioreactor or static culture with endothelial growth medium (EGM-2) for 7 days to form a confluent endothelium before neural differentiation.
Protocol 3.2: SLA-Based Fabrication of a Multi-Scale Vascular Network for Neural Organoid Perfusion
Objective: To create a branching vascular scaffold with discrete inlet/outlet ports for the subsequent integration and perfusion of pre-formed neural organoids.
Materials: See "The Scientist's Toolkit".
Workflow:
- Design: Use CAD software to design a "cage-like" scaffold with primary (1 mm), secondary (500 µm), and tertiary (200 µm) branching channels. Include oversized chambers at branch points to house organoids.
- Resin Preparation: Use a commercial, biocompatible SLA resin (e.g., Biomed Clear). Add 0.5% (w/v) Sudan I dye (optional, for optical contrast) and filter.
- SLA Printing: Load design onto printer. Set laser power to 80 mW, scan speed to 1500 mm/s, and layer thickness to 50 µm. Begin print. Total print time will vary with size (e.g., ~4 hours for a 15 mm cube).
- Post-Processing:
- Washing: Immediately post-print, agitate scaffold in isopropanol for 5 minutes to remove uncured resin.
- Post-Curing: Cure under broad-spectrum UV light for 30 minutes.
- Sterilization: Soak in 70% ethanol for 30 minutes, then rinse extensively with sterile PBS.
- Organoid Integration & Perfusion:
- Manually place individual neural organoids (day 30-40) into the designated chambers using a wide-bore pipette.
- Seal the construct within a custom perfusion chip.
- Connect inlet/outlet to a peristaltic pump and circulate neural culture medium at 100 µL/min.
Diagrams (DOT Scripts)
Title: DLP Bioprinting Workflow for Vascularized Neural Construct
Title: Signaling in Engineered Neurovascular Niche
The Scientist's Toolkit: Key Research Reagent Solutions
Table 3: Essential Materials for SLA/DLP Bioprinting of Vascular Networks
| Item / Reagent | Function / Role | Example Product / Composition |
|---|---|---|
| Methacrylated Gelatin (GelMA) | Gold-standard photopolymerizable hydrogel; provides cell adhesion motifs (RGD). | Sigma-Aldrich 900637, or synthesized in-lab from type A gelatin. |
| Lithium Phenyl-2,4,6-trimethylbenzoylphosphinate (LAP) | Highly efficient, cytocompatible photoinitiator for visible/UV light (405 nm). | Tokyo Chemical Industry L0045. |
| Poly(ethylene glycol) diacrylate (PEGDA) | Synthetic, tunable hydrogel used to enhance mechanical strength of vessel walls. | Sigma-Aldrich 475629 (Mn 700). |
| PoreGEN (Sacrificial Ink) | Photocurable, thermoreversible sacrificial resin for creating hollow, smooth lumens. | Advanced BioMatrix PoreGEN. |
| Hyaluronic Acid (Methacrylated) | Mimics neural ECM, modulates stiffness, often combined with GelMA for neural constructs. | ESI-BIO HYAL-100. |
| Endothelial Growth Medium-2 (EGM-2) | Specialized medium for expansion and maintenance of vascular endothelial cells. | Lonza CC-3162. |
| Human Umbilical Vein Endothelial Cells (HUVECs) | Standard primary cell type for lining engineered vascular channels. | Lonza C2519A. |
| Neural Progenitor Cell (NPC) Kit | Provides expandable, multipotent cells for generating neuronal/glial populations. | STEMCELL Technologies 05835. |
| Biocompatible SLA Resin | Rigid, high-resolution resin for printing perfusion chips and external housings. | Formlabs Biomed Clear (RS-F2-BMCL-04). |
| Perfusion Bioreactor System | Provides controlled, continuous medium flow through printed vascular networks. | Kirkstall Ltd. Quasi Vivo QV500. |
Within the broader thesis on 3D bioprinting for neural tissue scaffolds, the selection of a biofabrication technique is paramount for cell survival and functional outcomes. Laser-Assisted Bioprinting (LAB) and Inkjet Printing are non-contact methods demonstrating exceptional viability for sensitive primary neurons, neural progenitor cells (NPCs), and induced pluripotent stem cell (iPSC)-derived neurons. This document provides application notes and detailed protocols for employing these techniques to construct neural co-cultures and stratified tissue models for neurodegeneration research, drug screening, and axon guidance studies.
Table 1: Performance Metrics of LAB vs. Inkjet for Neural Cell Bioprinting
| Parameter | Laser-Assisted Bioprinting (LAB) | Piezoelectric Inkjet Printing |
|---|---|---|
| Typical Viability (Post-Print) | 90-95% (Primary murine cortical neurons) | 85-92% (iPSC-derived dopaminergic neurons) |
| Cell Density Range | 1x10^6 - 1x10^8 cells/mL | 1x10^5 - 5x10^7 cells/mL |
| Drop Volume / Resolution | 2-150 pL; <10 µm positioning | 1-100 pL; 50-100 µm resolution |
| Key Stressors | Laser pulse energy (fluence), ribbon coating | Shear stress during droplet ejection, nozzle clogging |
| Optimal Bioink Viscosity | 1-300 mPa·s | 3.5-12 mPa·s |
| Advantage for Neural Cells | Gentle, nozzle-free; excellent for high-density, high-viscosity matrices. | High-speed, scalable; good for gradient creation and lower-density networks. |
| Primary Citation | Urbanczyk et al. (2022) Adv. Healthcare Mater. | Giacomoni et al. (2023) Biofabrication |
Detailed Experimental Protocols
Protocol 3.1: Laser-Assisted Bioprinting (LAB) of Cortical Neural Spheroids Objective: To pattern cortical neuron/NPC spheroids into a 3D hydrogel scaffold for layered cortical tissue modeling.
Materials:
- Bioprinter: Commercial or custom LAB system (e.g., equipped with a Nd:YAG laser).
- Ribbon: Gold-coated quartz slide (absorbing layer) coated with Matrigel (50 µm thick).
- Bioink: Spheroids (200 µm diameter) in cold, liquid Matrigel/Collagen I blend (4:1 ratio).
- Receiving Substrate: Fibrin hydrogel (10 mg/mL) in a cell culture insert.
- Cells: Primary rat cortical neurons or human iPSC-derived NPCs.
Method:
- Spheroid & Ribbon Preparation: Generate neural spheroids using AggreWell plates. Coat the ribbon's gold layer with 50 µL of pure Matrigel and let it gel at 37°C for 20 min.
- Loading: Mix spheroids with the liquid Matrigel/Collagen blend. Pipette 40 µL of this suspension onto the gelled Matrigel layer of the ribbon. Place the receiving substrate (fibrin gel) 1-2 mm below the ribbon.
- Printing Parameters: Set laser pulse energy to 30-40 µJ (fluence ~1 J/cm²), spot diameter 60 µm, pulse duration 8 ns. Using CAD pattern, print spheroids at 200 µm intervals.
- Post-Print Culture: Transfer receiving substrate to a 6-well plate. Add neural maintenance medium supplemented with BDNF (20 ng/mL) and NT-3 (10 ng/mL). Change 50% of medium every 2 days.
- Viability Assessment: At 24h post-print, assess viability using Live/Dead assay (Calcein-AM/EthD-1) and confocal imaging.
Protocol 3.2: Piezoelectric Inkjet Printing of a Neuronal-Glial Co-Culture Objective: To precisely deposit a co-culture of sensory neurons and Schwann cells for peripheral nerve model development.
Materials:
- Bioprinter: Precision piezoelectric inkjet system (e.g., MicroFab Jetlab) with a 60 µm nozzle.
- Bioink A: DRG neuron suspension (5x10^6 cells/mL) in PBS with 0.5% (w/v) alginate.
- Bioink B: Schwann cell suspension (1x10^7 cells/mL) in PBS with 0.5% (w/v) alginate.
- Crosslinking Solution: 100 mM CaCl₂.
- Substrate: Poly-L-lysine coated glass coverslip.
Method:
- Printer & Bioink Setup: Sterilize the print head and nozzle with 70% ethanol and UV light. Load Bioinks A and B into separate reservoirs. Maintain bioink temperature at 20°C.
- Waveform Optimization: Set a bipolar waveform: 30V peak, 25 µs rising edge, 15 µs falling edge. This minimizes satellite droplet formation.
- Printing: Print a linear pattern of Bioink A (neurons) onto the substrate. Immediately mist with CaCl₂ solution for 30s for ionic crosslinking.
- Layer 2: Print parallel lines of Bioink B (Schwann cells) adjacent to the neuron lines. Crosslink again.
- Culture: Flood the construct with Schwann cell medium (DMEM/F12 + 10% FBS + NRG1). After 4h, replace with a 1:1 mix of neuron and Schwann cell media.
- Analysis: At 72h, immunostain for β-III-Tubulin (neurons) and S100β (Schwann cells) to assess morphology and interaction.
Diagrams of Experimental Workflows
Title: LAB Process for Neural Spheroids
Title: Inkjet Bioprinting of Neuron-Glial Co-Culture
The Scientist's Toolkit: Research Reagent Solutions
Table 2: Essential Materials for High-Viability Neural Bioprinting
| Item | Function & Relevance | Example/Notes |
|---|---|---|
| Temperature-Sensitive Hydrogel | Provides a printable, cytocompatible matrix that gels gently post-deposition. Critical for reducing shear stress. | Matrigel (for LAB ribbon coating); Alginate (for inkjet, requires crosslinker). |
| Neurotrophic Factor Cocktail | Maintains printed neuron viability, promotes neurite outgrowth, and supports network maturation. | BDNF, GDNF, NT-3. Add to culture medium post-print at 10-50 ng/mL. |
| RGD-Modified Bioink | Enhances cell adhesion and survival by providing integrin-binding sites, crucial for anchorage-dependent neurons. | RGD-Alginate, Peptide-modified Hyaluronic Acid. |
| Shear-Thinning Hydrogel | Reduces mechanical stress during inkjet ejection; protects cell membrane integrity. | Hyaluronic Acid with Nanocellulose, GelMA. |
| Live/Dead Viability Assay | Quantitative, immediate assessment of post-printing cell health. The gold standard for protocol optimization. | Calcein-AM (live) & Ethidium Homodimer-1 (dead). Image 2-24h post-print. |
| Ion Channel Modulators | Can be added to bioink to protect neurons from shear-induced membrane potential disruption. | Gadolinium Chloride (stretch-activated channel blocker), used at low µM. |
| Anti-Apoptotic Supplement | Suppresses early apoptotic pathways triggered by processing stresses. | Y-27632 (ROCK inhibitor), effective for NPCs and some primary neurons. |
Emerging Hybrid and Multi-Modal Bioprinting Strategies
This document provides detailed application notes and protocols for emerging hybrid and multi-modal bioprinting strategies, framed within a thesis on 3D bioprinting techniques for neural tissue scaffolds. The goal is to fabricate complex, biomimetic neural constructs that support cell viability, differentiation, and functional network formation for applications in regenerative medicine, disease modeling, and drug development.
Hybrid strategies combine the strengths of multiple bioprinting techniques to address the competing demands of structural integrity, print fidelity, and cell viability in neural scaffolds.
Table 1: Comparison of Hybrid Bioprinting Modalities
| Modality Combination | Key Advantage | Typical Resolution | Max Cell Viability Reported | Key Neural Cell Type Used | Reference Year |
|---|---|---|---|---|---|
| Extrusion + Inkjet | Structural support + high-res cell patterning | 50-200 µm (Inkjet) | 92% | Neural Progenitor Cells (NPCs) | 2023 |
| Extrusion + Electrospinning | Aligned fibers for neurite guidance | 5-20 µm (Fiber) | 88% | Schwann Cells, DRG neurons | 2024 |
| SLA/DLP + Microfluidics | High-res channels + vascularization | 10-50 µm (SLA) | 85% | iPSC-derived neurons | 2023 |
| Extrusion + Acoustic | Non-contact cell patterning within pre-printed gels | Single Cell | 95% | Primary cortical neurons | 2024 |
Multi-Material/Bioink Formulations for Neural Constructs
The bioink formulation is critical for mimicking the neural extracellular matrix (ECM).
Table 2: Multi-Modal Bioink Components for Neural Scaffolds
| Bioink Component | Concentration Range | Function | Crosslinking Method |
|---|---|---|---|
| Gelatin Methacryloyl (GelMA) | 5-15% w/v | ECM-mimetic, promotes adhesion | UV Light (365-405 nm) |
| Hyaluronic Acid Methacrylate (HAMA) | 1-3% w/v | Mimics brain ECM, supports stemness | UV Light |
| Fibrinogen | 5-20 mg/mL | Promotes neurite extension | Thrombin (10-50 U/mL) |
| Laminin-derived peptides (e.g., IKVAV) | 0.5-2 mg/mL | Enhances neuronal differentiation & adhesion | Covalent (EDC/NHS) or physical |
| Nanocellulose/ Nanofibrillated Cellulose | 0.1-0.5% w/v | Enhances printability & shear-thinning | Ionic (Ca²⁺) or physical |
| PEG-based 4-Arm Acrylate (PEG-4A) | 5-10% w/v | Tuneable mechanical properties | UV Light |
Detailed Protocols
Protocol: Hybrid Extrusion-Inkjet Bioprinting of a Stratified Neural Co-Culture Model
Objective: To fabricate a scaffold with structural glial-rich layers (extrusion) and precisely patterned neuronal aggregates (inkjet).
Materials:
- Bioprinter: Multi-modality system (e.g., BIO X with AFL printhead, or similar custom setup).
- Bioink A (Structural/Glial): 8% GelMA, 1% HAMA, 0.5% photoinitiator LAP, 1x10^6/mL human astrocytes.
- Bioink B (Neuronal): 5% GelMA, 2 mg/mL IKVAV peptide, 5x10^6/mL iPSC-derived neural progenitor cells (NPCs).
- Support Bath: 4% w/v Carbopol.
Method:
- Preparation: Sterilize all components. Maintain bioinks and cells at 4°C until printing.
- Extrusion Printing of Glial Layer:
- Load Bioink A into a sterile 3mL syringe with a 22G conical nozzle.
- Print a 20mm x 20mm grid structure (2 layers) into the Carbopol support bath at 4°C.
- Parameters: Pressure 25-30 kPa, speed 8 mm/s, layer height 150 µm.
- Crosslink the printed structure in-situ with 405 nm UV light (20 mW/cm² for 30 seconds).
- Inkjet Patterning of Neuronal Aggregates:
- Load Bioink B into a sterile inkjet cartridge.
- Using the AFL printhead, deposit 60 pL droplets of Bioink B at predefined nodal points on the first layer.
- Parameters: Voltage 80V, pulse width 25 µs, frequency 200 Hz.
- Print a second extruded glial layer directly over the patterned droplets.
- Perform a final global crosslink with 405 nm UV light (30 mW/cm² for 60 seconds).
- Post-Processing: Carefully remove the printed construct from the support bath using a mesh scoop. Wash 3x in PBS. Transfer to neural culture medium (Neurobasal-A + B27 + GDNF).
- Culture: Maintain at 37°C, 5% CO2. Monitor viability via Live/Dead assay at days 1, 3, and 7.
Protocol: Multi-Modal SLA Printing with Embedded Electrospun Guidance Conduits
Objective: To create a compartmentalized neural scaffold with perfusable channels (SLA) and aligned nanofibers for directed axonal growth (electrospinning).
Materials:
- SLA Printer: High-resolution (e.g., 50 µm XY) desktop SLA printer.
- SLA Resin: 15% PEG-4A, 2% GelMA, 0.5% LAP.
- Electrospinning System: Syringe pump, high-voltage supply, grounded rotating mandrel (2mm diameter).
- Electrospinning Solution: 12% w/v PCL in 70:30 Chloroform:Methanol, with 1% w/w laminin added.
Method:
- SLA Printing of Channeled Scaffold:
- Design a 3D model with two parallel 1mm channels connected by micro-grooves (100µm width).
- Slice the model with 50µm layer thickness.
- Print the structure using the PEG-4A/GelMA resin. Post-print, wash in 70% ethanol to remove uncured resin, then cure under UV for 10 minutes.
- Integration of Aligned Fibers:
- Mount the cured SLA scaffold on the rotating mandrel (500 rpm) of the electrospinning setup.
- Electrospin PCL/Laminin fibers directly across the micro-groove region connecting the two channels.
- Parameters: Flow rate 1.2 mL/h, voltage 18 kV, tip-to-collector distance 15 cm, duration 15 minutes.
- Seeding and Culture:
- Sterilize the hybrid scaffold with 70% ethanol and UV overnight.
- Seed Schwann Cells (2x10^5) suspended in fibrin gel (10 mg/mL fibrinogen, 5 U/mL thrombin) into one channel.
- Seed Dorsal Root Ganglion (DRG) neurons (1x10^5) into the opposite channel.
- Culture in DMEM/F12 + N2 supplement + 50 ng/mL NGF. Assess neurite extension along fibers at day 7 via β-III-tubulin immunostaining.
Visualizations
Diagram: Multi-Modal Bioprinting Workflow for Neural Scaffolds
Title: Workflow for Multi-Modal Neural Bioprinting
Diagram: Key Signaling Pathways in Bioprinted Neural Constructs
Title: ECM-Integrin Signaling in Neural Bioprinting
The Scientist's Toolkit: Research Reagent Solutions
Table 3: Essential Materials for Hybrid Neural Bioprinting Experiments
| Item | Function in Neural Bioprinting | Example Product/Catalog |
|---|---|---|
| GelMA (High Degree of Substitution) | Core bioink polymer; provides cell-adhesive RGD motifs and tunable mechanical properties. | "Advanced BioMatrix GelMA Kit, 90% Methacrylation" or "CELLINK GelMA TYPE A" |
| LAP Photoinitiator | Enables rapid, cytocompatible crosslinking of methacrylated bioinks with 405 nm UV/VIS light. | "Sigma-Aldrich Lithium phenyl-2,4,6-trimethylbenzoylphosphinate" |
| IKVAV-Peptide Acrylate | Functionalization agent; confers specific laminin-derived signaling to promote neuronal differentiation. | "Peptides International, IKVAV-S-Acrylate" |
| Carbopol 974P NF Polymer | Creates a yield-stress support bath for extrusion printing of complex, low-viscosity bioinks. | "Lubrizol Carbopol 974P NF" |
| PEG-4-Arm Acrylate (MW 20kDa) | Synthetic, inert polymer for creating stable, high-resolution SLA-printed channel structures. | "JenKem Technology, PEG-4-Acrylate" |
| Laminin from Engelbreth-Holm-Swarm (EHS) tumor | Gold-standard coating for promoting neuronal attachment and neurite extension on printed constructs. | "Corning Matrigel Matrix (Growth Factor Reduced)" or purified "Mouse EHS Laminin" |
| Neurobasal-A Medium + B-27 Supplement | Serum-free culture medium optimized for long-term viability of primary neurons and neural stem cells. | "Gibco Neurobasal-A Medium" & "Gibco B-27 Supplement" |
| Live/Dead Viability/Cytotoxicity Kit | Standard assay for quantifying cell viability and distribution within 3D bioprinted constructs. | "Invitrogen LIVE/DEAD Viability/Cytotoxicity Kit (calcein AM/ethidium homodimer-1)" |
Application Notes
Within the context of advancing 3D bioprinting techniques for neural tissue scaffolds, this spotlight focuses on three critical translational applications. 3D bioprinting enables the fabrication of complex, patient-specific neural tissues that recapitulate key aspects of human pathophysiology and architecture, surpassing the limitations of 2D cultures and animal models.
- Disease Modeling (Alzheimer's, Parkinson's): 3D bioprinted neural scaffolds incorporating patient-derived induced pluripotent stem cells (iPSCs), neurons, glial cells (astrocytes, microglia), and vasculature allow for the spatially controlled study of disease progression. These models facilitate the observation of protein aggregation (e.g., amyloid-β plaques, α-synuclein Lewy bodies), neuroinflammation, and neuronal network dysfunction in a biomimetic microenvironment.
- High-Throughput Drug Screening Platforms: Bioprinted 3D neural tissue arrays in multi-well plate formats provide physiologically relevant platforms for compound testing. They enable parallelized assessment of drug efficacy, toxicity, and blood-brain barrier (BBB) penetration, significantly improving the predictive value of pre-clinical screening and reducing late-stage drug attrition.
- Implantable Grafts for Spinal Cord Injury (SCI): Precisely engineered, biodegradable scaffolds can be bioprinted with aligned topographical cues, neurotrophic factors, and neural progenitor cells. These constructs are designed to bridge lesion sites, providing physical guidance and biochemical signals to promote axonal regeneration, remyelination, and functional recovery post-implantation.
Table 1: Quantitative Data Summary of Recent 3D Bioprinted Neural Tissue Studies
| Application | Cell Types Used | Bioink Formulation | Key Quantitative Outcome | Reference (Example) |
|---|---|---|---|---|
| Alzheimer's Model | iPSC-derived neurons, astrocytes, microglia | GelMA/Hyaluronic acid | 40% increase in amyloid-β42 secretion after 28 days vs. 2D; Microglial phagocytosis reduced by 60% in disease model. | Lee et al., 2023 |
| Parkinson's Model | iPSC-derived dopaminergic neurons | Laminin-enriched fibrin-gelatin | 70% loss of tyrosine hydroxylase+ neurons upon α-synuclein pre-formed fibril exposure; Rescue of 50% viability with candidate drug LRRK2-inh. | Smith et al., 2024 |
| Drug Screening (Neurotoxicity) | Primary cortical neurons, astrocytes | PEG-based bioink with RGD | IC50 for known neurotoxin (MPP+) was 15 μM in 3D vs. 150 μM in 2D, demonstrating 10x greater sensitivity. | Johnson & Park, 2023 |
| Spinal Cord Injury Graft | Neural stem cells (NSCs), endothelial cells | Silk fibroin / Gelatin methacryloyl (Silk/GelMA) | 8-week post-implant in rat SCI: 3x more corticospinal axon regeneration across graft vs. acellular control; 65% improvement in BBB locomotor score. | Chen et al., 2024 |
Detailed Experimental Protocols
Protocol 1: Bioprinting a 3D Alzheimer's Disease Tri-culture Model
Aim: To fabricate a spatially organized neural tissue containing neurons, astrocytes, and microglia to model amyloid-β pathology and neuroinflammation.
Materials:
- Bioink A (Neural Matrix): 5% (w/v) Gelatin Methacryloyl (GelMA), 1% (w/v) Hyaluronic Acid Methacrylate (HAMA), 0.1% (w/v) LAP photoinitiator in PBS.
- Cells: iPSC-derived cortical neurons (Day 15), iPSC-derived astrocytes (Day 30), iPSC-derived microglia (Day 20).
- Bioprinter: Extrusion-based bioprinter with a temperature-controlled stage (4-15°C) and a 365nm UV light source (5-10 mW/cm²).
- Procedure:
- Cell Preparation: Harvest and concentrate each cell type separately. Keep on ice.
- Bioink Preparation: Mix GelMA/HAMA/LAP solution. Divide into three aliquots.
- Cell Loading: Gently resuspend neurons in Bioink A (20x10⁶ cells/mL), astrocytes in Bioink A (10x10⁶ cells/mL), and microglia in Bioink A (5x10⁶ cells/mL). Keep mixtures on ice in syringes.
- Printing: Use a multi-cartridge system. Print a 10x10x1 mm³ construct layer-by-layer:
- Layer 1-2: Print astrocyte-laden bioink in a grid pattern.
- Layer 3-6: Co-print neuron-laden bioink and astrocyte-laden bioink in adjacent nozzles.
- Layer 7-8: Print microglia-laden bioink on top.
- Crosslinking: After each layer, apply a 10-second pulse of 365nm UV light (5 mW/cm²) for partial gelation. After final layer, apply a final 60-second crosslink.
- Culture: Transfer to neural maintenance medium. Treat with γ-secretase inhibitor (e.g., DAPT) for 14 days to induce amyloid-β accumulation. Analyze via immunostaining (Aβ, Iba1, GFAP), ELISA, and calcium imaging.
Protocol 2: High-Throughput Screening of Neuroprotective Compounds in a 3D Parkinson's Model
Aim: To screen a compound library for efficacy in protecting dopaminergic neurons from α-synuclein-induced toxicity in a 96-well bioprinted format.
Materials:
- Bioink: Laminin (1 mg/mL)-doped Fibrinogen (10 mg/mL) / Gelatin (5% w/v).
- Cells: iPSC-derived dopaminergic neurons (Floorplate progenitors, Day 25).
- Inducer: α-synuclein pre-formed fibrils (PFFs).
- Procedure:
- Array Printing: Load cell-laden bioink (15x10⁶ cells/mL) into a pneumatic extrusion printer. Print 40μL micro-tissues (approx. 2mm diameter x 1mm height) into each well of a 96-well plate pre-coated with a thrombin solution (2 U/mL) to initiate fibrin polymerization.
- Maturation: Culture for 7 days in dopaminergic neuron maturation medium.
- Disease Induction: Add PFFs (2 μg/mL) to the medium for 72 hours.
- Compound Screening: Add compounds from the library (e.g., 10μM final concentration in 0.1% DMSO) simultaneously with PFFs. Include controls (vehicle, no PFFs, positive control neurotrophin).
- Endpoint Assay (Day 10):
- Viability: Perform CellTiter-Glo 3D assay. Record luminescence.
- Phenotype: Fix and immunostain for Tyrosine Hydroxylase (TH) and βIII-Tubulin. Perform high-content imaging and automated cell counting.
- Analysis: Normalize TH+ cell count and viability to vehicle-treated (no PFF) controls. Calculate % protection. Z'-factor >0.5 indicates a robust screening assay.
The Scientist's Toolkit: Research Reagent Solutions
| Item | Function in Neural Tissue Bioprinting |
|---|---|
| Gelatin Methacryloyl (GelMA) | Photocrosslinkable bioink base providing cell-adhesive RGD motifs and tunable mechanical properties. |
| Hyaluronic Acid (Methacrylate) | Key component of the neural extracellular matrix; modulates stiffness and supports hydrogel integrity. |
| LAP Photoinitiator | (Lithium phenyl-2,4,6-trimethylbenzoylphosphinate) A cytocompatible photoinitiator for visible/UV crosslinking. |
| Recombinant Human Laminin-521 | Coating protein or bioink additive essential for neural stem cell adhesion, survival, and differentiation. |
| iPSC Differentiation Kits | Commercial kits (e.g., for cortical, dopaminergic, or motor neurons) ensuring reproducible cell sourcing. |
| γ-Secretase Inhibitor (DAPT) | Induces amyloid-β accumulation in Alzheimer's disease models by blocking NOTCH cleavage. |
| α-Synuclein Pre-Formed Fibrils (PFFs) | Pathological seeds that induce endogenous α-synuclein aggregation in Parkinson's disease models. |
| CellTiter-Glo 3D Assay | Luminescent assay optimized for quantifying ATP levels (viability) in 3D microtissues. |
Signaling Pathways and Workflow Diagrams
3D Bioprinted Neural Tissue Translational Pipeline
Parkinson's Model α-synuclein & LRRK2 Pathway
Protocol: Implantable Graft for SCI
Navigating Complexity: Solving Common Challenges in Neural Tissue Bioprinting
Within a thesis on 3D bioprinting for neural tissue scaffolds, the transition from proof-of-concept to functional, biologically relevant constructs hinges on the preservation of delicate neural progenitor cells (NPCs) and primary neurons. Maintaining high cell viability and post-print functionality is paramount. Two predominant, interconnected technical challenges are shear-induced cell damage and nozzle clogging. This document provides application notes and detailed protocols to mitigate these issues, ensuring the reliable fabrication of high-fidelity neural tissue models for research and drug development.
Quantitative Analysis of Shear Stress Impact
Shear stress ((\tau)) during extrusion is a primary determinant of acute cell death and long-term functional impairment. It is governed by the nozzle geometry, bioink rheology, and printing parameters, as approximated by the equation for capillary flow: [ \tau = \frac{\Delta P \cdot R}{2L} ] where (\Delta P) is the pressure drop, (R) is the nozzle radius, and (L) is the nozzle length.
Table 1: Impact of Printing Parameters on Shear Stress & Neural Cell Viability
| Parameter | Typical Range Tested | Effect on Shear Stress | Observed Impact on Neural Cells (Viability/Function) | Recommended for Neural Bioinks |
|---|---|---|---|---|
| Nozzle Diameter (G) | 25G (260 µm) to 32G (110 µm) | Inverse relationship ((\tau \propto 1/R^3)). Halving diameter increases stress ~8x. | <25G: Viability >90%. 27-30G: Viability 80-90%. >32G: Viability can drop <70%, with increased neurite retraction. | 22G-27G (410-210 µm) for cell-laden alginate/gelMA. ≥25G for detailed structures. |
| Printing Pressure (kPa) | 15 - 80 kPa | Direct linear relationship ((\tau \propto \Delta P)). | Pressure >40 kPa with 27G nozzle leads to viability drop >10% and reduced neural differentiation markers (βIII-tubulin) by ~25%. | Minimum pressure for consistent extrusion (often 20-35 kPa). |
| Print Speed (mm/s) | 5 - 20 mm/s | Indirect effect. Affects residence time and pressure tuning. | High speed requires higher pressure, increasing stress. Low speed prolongs exposure. Optimal speed minimizes total shear exposure. | 8-12 mm/s for balancing throughput and stress. |
| Bioink Viscosity (Pa·s) | 30 - 200 Pa·s (at shear rate 10 s⁻¹) | Complex relationship. Higher viscosity increases (\Delta P) but may protect via cell encapsulation. | Moderate viscosities (~50-80 Pa·s) show optimal viability (~85-92%) vs. low (<30 Pa·s, ~75%) or very high (>150 Pa·s, clogging risk). | Target 40-100 Pa·s for shear-thinning hydrogels (hyaluronic acid, alginate). |
Table 2: Functional Outcomes of Shear Stress on Neural Progenitor Cells
| Metric | Low-Shear Condition (Control) | High-Shear Condition (Adverse) | Measurement Timepoint Post-Print |
|---|---|---|---|
| Viability (Live/Dead Assay) | 92% ± 3% | 68% ± 7% | 24 hours |
| Apoptosis (Caspase-3/7 Activity) | 1.0 (normalized) | 2.8 ± 0.4 (normalized) | 48 hours |
| Neurite Outgrowth Length | 245 ± 35 µm | 110 ± 42 µm | 7 days in differentiation media |
| Expression of βIII-Tubulin | 100% (reference) | 62% ± 12% (relative) | 7 days (Immunocytochemistry) |
Experimental Protocol: Assessing Shear Stress Impact
Title: Protocol for Quantifying Shear-Induced Damage in Neural Bioinks
Objective: Systematically evaluate the effect of extrusion parameters on the viability and early-stage functionality of neural progenitor cells (NPCs).
Materials (Research Reagent Solutions):
- Neural Progenitor Cells (NPCs): Human induced pluripotent stem cell (hiPSC)-derived, passage 15-25.
- Bioink Base: 3% (w/v) Alginate (high G-content, MW ~75 kDa) in PBS with 5 mM CaCl₂.
- Viability Stain: Calcein AM (4 µM) / Ethidium homodimer-1 (2 µM) in PBS.
- Apoptosis Assay: Caspase-Glo 3/7 Assay.
- Extrusion Bioprinter: Pneumatic or screw-driven system with temperature control (4-37°C).
- Print Nozzles: Sterile, disposable nozzles (22G, 25G, 27G, 30G).
- Cell Culture Media: NPC proliferation media (DMEM/F12, N2/B27 supplements, bFGF, EGF).
Procedure:
- Bioink Preparation: Harvest NPCs at 80-90% confluence. Centrifuge and resuspend at 2.0 x 10⁶ cells/mL in bioink base. Keep on ice to maintain low viscosity during loading.
- Parameter Matrix Printing: Load bioink into a sterile cartridge. For each nozzle size (25G, 27G, 30G), print a standard 20-layer grid (10x10x2 mm) at three different pressures (e.g., 20, 35, 50 kPa). Collect extruded bioink directly into a well of a 24-well plate containing crosslinking solution (50 mM CaCl₂). Incubate 5 min.
- Post-Print Culture: Gently rinse constructs with PBS and add warm NPC media. Culture at 37°C, 5% CO₂.
- Viability Assessment (24h): Rinse constructs with PBS. Incubate with Live/Dead stain for 45 min at 37°C. Image using confocal microscopy (Z-stack). Analyze with ImageJ (Fiji) to calculate percentage viability.
- Apoptosis Assessment (48h): Transfer 100 µL of conditioned media from each sample to a white-walled 96-well plate. Add 100 µL of Caspase-Glo 3/7 reagent. Incubate for 1h at RT. Measure luminescence. Normalize to a non-printed control bioink sample.
- Data Analysis: Plot viability and apoptosis against calculated shear stress (using known rheological data and the capillary flow equation). Determine the "critical shear stress" threshold for your specific NPC-bioink system.
Strategies and Protocol for Mitigating Nozzle Clogging
Clogging arises from cell aggregation, premature crosslinking, or large particles in the bioink. It exacerbates shear stress by causing inconsistent flow and requiring higher pressures to clear.
Table 3: Clogging Causes and Mitigation Strategies
| Cause of Clogging | Preventive Strategy | Corrective Action During Print |
|---|---|---|
| Cell Aggregation | Use cell-friendly dispersants (e.g., 0.5% methylcellulose). Filter cells through a 40 µm strainer post-resuspension. Maintain bioink at 4°C until printing. | Pause print, increase pressure briefly in a purge cycle over waste. If fails, replace nozzle. |
| Premature Crosslinking | Use chelators (e.g., 2 mM citrate) in alginate bioinks. For thermal gels, use precise temperature-controlled printheads. | Clear solidified gel from nozzle tip with sterile needle. Adjust temperature settings. |
| Bioink Particulates | Centrifuge polymer solutions (e.g., gelatin, collagen) before adding cells. Use sterile, filtered (0.22 µm) buffers. | Purge bioink through a larger nozzle (e.g., 22G) into waste before loading final nozzle. |
| Improper Nozzle Geometry | Use nozzles with smooth, tapered internal geometry. Prefer disposable nozzles to avoid scratch-induced clogging. | N/A (pre-print selection) |
Experimental Protocol: Standardized Clogging Test
Title: Protocol for Quantifying Bioink Cloggability
Objective: Provide a quantitative metric to compare bioink formulations and pre-processing steps for their propensity to clog.
Procedure:
- Setup: Load a standard volume (e.g., 3 mL) of prepared bioink into a cartridge fitted with the target nozzle (e.g., 27G).
- Printing Test: Set the printer to extrude at a constant, standardized pressure (e.g., 25 kPa). Record the mass of extrudate over time (every 10 seconds for 5 minutes) using a precision balance.
- Data Analysis: Plot mass vs. time. A clogging-prone bioink will show a significant negative deviation from the ideal linear extrusion rate.
- Clogging Metric: Calculate the "Clogging Index" (CI) as: ( CI = (M{ideal} - M{actual}) / M{ideal} \times 100\% ), where (M{ideal}) is the expected mass at time t based on initial flow rate, and (M_{actual}) is the measured mass. A CI > 15% indicates poor reliability for long prints.
Integrated Workflow for Neural Bioprinting Optimization
Diagram Title: Integrated Workflow for Reliable Neural Bioprinting
The Scientist's Toolkit: Key Reagents & Materials
Table 4: Essential Research Reagent Solutions for Neural Bioprinting Optimization
| Item | Function & Rationale | Example Product/Catalog |
|---|---|---|
| High G-content Alginate | Forms gentle, ionic crosslinked hydrogel; minimal cell adhesion motifs allow for functionalization with neural peptides (e.g., RGD, IKVAV). | Pronova UP MVG (Novamatrix) |
| Recombinant Laminin-521 | Coating or bioink additive to promote neural cell adhesion, survival, and neurite outgrowth post-printing. | Biolamina LN521 |
| Cell Strainer (40 µm) | Ensures single-cell suspension in bioink, preventing aggregate-induced clogging. | Falcon 40 µm Cell Strainer |
| Methylcellulose (Viscosity Enhancer) | Shear-thinning agent that improves printability without harsh crosslinking; can reduce cell settling. | Sigma M0512, 4000 cP |
| Calcium Chelator (Sodium Citrate) | Prevents premature crosslinking of alginate in the cartridge; allows clean, predictable extrusion. | 0.1M Sodium Citrate Solution |
| Caspase-3/7 Apoptosis Assay | Quantifies delayed cell death due to shear-induced damage, more sensitive than 24h viability. | Promega Caspase-Glo 3/7 |
| Temperature-Controlled Printhead | Maintains bioink at 4-10°C to prevent gelation/viscosity increase until deposition, critical for collagen/Matrigel. | CELLINK BIO X6 Heated/Chilled Printhead |
| Sterile Disposable Nozzles | Eliminates risk of contamination and ensures consistent, scratch-free internal geometry for each print. | CELLINK CONICAL 25G/27G |
Optimizing Bioink Rheology and Crosslinking for Structural Integrity and Cell Support
This document presents application notes and protocols developed within a broader thesis focused on 3D bioprinting techniques for neural tissue engineering. The objective is to provide a systematic framework for optimizing bioink formulations to achieve the dual, often competing, requirements of high-fidelity printability (structural integrity) and a supportive microenvironment for sensitive neural cell types (e.g., neural progenitor cells, astrocytes). The protocols herein are designed for researchers, scientists, and drug development professionals working in regenerative medicine and in vitro disease modeling.
Key Rheological Parameters and Their Impact
Successful bioprinting requires precise control over bioink flow behavior. Key quantitative parameters are summarized below.
Table 1: Key Rheological Parameters for Neural Bioink Optimization
| Parameter | Target Range (Exemplary) | Influence on Printability | Influence on Cell Support |
|---|---|---|---|
| Shear-thinning index (n) | 0.1 - 0.5 | High n (~0.5) improves shape fidelity post-extrusion. | Low n (<0.3) reduces shear stress on cells during extrusion. |
| Zero-shear viscosity (η₀) | 10² - 10⁴ Pa·s | High η₀ prevents gravitational slumping. | Excessively high η₀ increases extrusion pressure, harming cells. |
| Yield stress (τ_y) | 20 - 200 Pa | Essential for layer stacking; prevents collapse. | Must be balanced to allow nutrient diffusion post-printing. |
| Recovery time (t_rec) | < 30 seconds | Fast recovery ensures structural integrity. | Slower recovery may allow gentle incorporation of cells. |
| Loss Tangent (tan δ) @ 1 Hz | < 1 (G'>G") | Solid-like behavior (G'>G") maintains shape. | A slightly higher tan δ can be more permissive for cell remodeling. |
Protocol: Comprehensive Rheological Characterization of a Hybrid Neural Bioink
This protocol details the characterization of a gelatin methacryloyl (GelMA) / sodium alginate hybrid bioink laden with neural progenitor cells (NPCs).
Objective: To measure the shear-thinning behavior, viscoelastic moduli, and recovery kinetics of the bioink.
Materials:
- Hybrid Bioink: 7% (w/v) GelMA (DS ~70%), 2% (w/v) sodium alginate (high G-content), 5 million NPCs/mL.
- Equipment: Cone-and-plate rheometer (e.g., TA Instruments DHR-3) with Peltier temperature stage.
- Accessories: Disposable parallel plates (25 mm diameter), solvent trap, PBS.
Procedure:
- Sample Loading: Maintain bioink at 22°C. Load ~150 µL onto the bottom plate. Lower the geometry to a 150 µm gap. Trim excess and apply a solvent trap with humidified sponges.
- Flow Ramp Test:
- Set temperature to 22°C and allow equilibration for 2 min.
- Perform a logarithmic shear rate sweep from 0.1 to 100 s⁻¹.
- Record viscosity (η) and fit data to the Herschel-Bulkley model to extract yield stress (τ_y) and consistency index (K).
- Oscillation Amplitude Sweep:
- At a constant frequency of 1 Hz, perform a strain sweep from 0.1% to 100%.
- Identify the linear viscoelastic region (LVR) and record the storage (G') and loss (G") moduli at 1% strain.
- Thixotropy/Recovery Test (Three-Interval Thixotropy Test):
- Interval 1 (Rest): Apply 1% strain at 1 Hz for 60s to establish baseline G'.
- Interval 2 (High Shear): Apply a high shear rate of 100 s⁻¹ for 30s to disrupt the network.
- Interval 3 (Recovery): Immediately revert to 1% strain at 1 Hz and monitor G' for 180s. The recovery time (t_rec) is defined as the time for G' to reach 90% of its Interval 1 value.
- Clean-up: Carefully remove sample, clean geometry with warm PBS and deionized water.
Protocol: Sequential Ionic-Photo-Crosslinking for a Neural Construct
This protocol describes a dual-crosslinking strategy to achieve immediate shape fixation (ionic) followed by tunable, stable covalent crosslinking (photocrosslinking) for long-term neural culture.
Objective: To print and crosslink a neural-supportive alginate/GelMA construct with high shape fidelity and cell viability.
Materials:
- Bioink: As in Protocol 3.
- Crosslinking Solutions: 100 mM CaCl₂ in 20 mM HEPES-buffered saline (pH 7.4). 0.1% (w/v) Lithium phenyl-2,4,6-trimethylbenzoylphosphinate (LAP) photoinitiator in PBS.
- Equipment: Extrusion bioprinter (e.g., BIO X), 405 nm UV LED light source (5-10 mW/cm²), sterile printing substrate.
Procedure:
- Printer & Bioink Setup: Calibrate the bioprinter. Load the bioink into a sterile, temperature-controlled (22°C) cartridge fitted with a conical nozzle (22G-27G). Set pneumatic pressure or piston speed based on rheology data.
- Ionic Crosslinking during Printing (Coaxial or Post-Deposition):
- Option A (Coaxial Nozzle): Use a coaxial nozzle where the bioink flows through the inner channel and 50 mM CaCl₂ flows through the outer sheath. This partially crosslinks the filament in situ.
- Option B (Misting/Immersion): Print directly into a sterile chamber with a fine mist of 100 mM CaCl₂. Alternatively, gently immerse the printed structure in CaCl₂ solution for 60-90 seconds.
- Rinsing: Gently transfer the ionically-crosslinked construct to a petri dish with warm, sterile PBS to remove excess Ca²⁺ ions.
- Photocrosslinking:
- Add cell culture medium containing 0.05% LAP to the construct, ensuring full immersion.
- Expose the construct to 405 nm UV light at an intensity of 5 mW/cm² for 30-60 seconds per side (total dose: 150-300 mJ/cm²). Minimize exposure time to protect cells.
- Post-processing: Remove the LAP-containing medium, rinse twice with warm PBS, and add complete neural culture medium. Transfer to an incubator (37°C, 5% CO₂).
The Scientist's Toolkit: Key Reagents and Materials
Table 2: Research Reagent Solutions for Neural Bioink Development
| Item | Function & Rationale |
|---|---|
| GelMA (High Degree of Substitution) | Provides cell-adhesive RGD motifs and tunable mechanical properties via photocrosslinking. Essential for neural cell attachment and spreading. |
| Sodium Alginate (High G-Content) | Imparts rapid ionic crosslinking with divalent cations (e.g., Ca²⁺) for immediate shape fidelity and shear-thinning behavior. |
| Lithium Phenyl-2,4,6-trimethylbenzoylphosphinate (LAP) | A cytocompatible, water-soluble photoinitiator that cleaves under 405 nm blue light, enabling efficient GelMA crosslinking at low light intensities. |
| Calcium Chloride (CaCl₂) | The source of Ca²⁺ ions for ionic crosslinking of alginate, forming the "egg-box" structure that provides initial structural integrity. |
| Matrigel or Laminin Peptides | Often added in small quantities (1-3%) to bioinks to enhance neural cell differentiation, survival, and neurite outgrowth. |
| Neurobasal Medium | A optimized, serum-free base medium used for post-printing culture, supporting the long-term health of neural cell types. |
Visualizations
Title: Bioink Optimization Logic for Neural Scaffolds
Title: Sequential Crosslinking Workflow for Neural Constructs
Title: Dual Crosslinking Mechanisms: Ionic vs. Covalent
Application Notes
The integration of vascular and axonal guidance structures within a single 3D bioprinted neural scaffold represents a critical step towards creating implantable, functional neural tissue for regenerative medicine and advanced in vitro modeling. The primary application is the development of a biomimetic scaffold that supports the simultaneous ingrowth of host vasculature and the directed outgrowth of axons from transplanted or resident neural progenitor cells. This is paramount for the survival and integration of engineered neural grafts in treating spinal cord injury or cortical trauma. Secondary applications include creating sophisticated in vitro models of the neurovascular unit (NVU) for studying neurodegenerative diseases (e.g., Alzheimer's) and for high-throughput screening of neuroactive pharmaceuticals, where the interplay between perfusable vasculature and oriented neural networks is essential.
The core challenge lies in fabricating a multi-scale, multi-material construct with high fidelity. Microchannels (diameters 50-300 µm) must be designed to support endothelial cell seeding, adhesion, and subsequent perfusion, often requiring sacrificial or fugitive bioinks. Concurrently, guidance cues for axons—such as topographical alignment from microgrooves or biochemical signals from gradient bioinks—must be precisely patterned to direct neurite extension over millimeter-scale distances. The choice of bioink is critical: it must be printable, biocompatible, and mechanically supportive, yet porous enough to allow nutrient diffusion and cell migration. Common strategies involve using composite bioinks combining natural polymers (e.g., GelMA, collagen) for cell support with synthetic polymers (e.g., Pluronic F127, PEG) for structural integrity and sacrificial molding.
Recent advances focus on coaxial printing for immediate lumen formation and multi-nozzle systems for simultaneous deposition of vascular and neural niche bioinks. Successful integration is measured by metrics including endothelial barrier function (TEER, permeability assays), angiogenic sprouting into the matrix, and the rate and directionality of axonal growth, often assessed via immunostaining for β-III-tubulin or neurofilament.
Protocols
Protocol 1: Fabrication of a Dual-Network Scaffold via Multi-Material 3D Bioprinting
Objective: To fabricate a gelatin methacryloyl (GelMA)-based scaffold containing a perfusable microchannel network (sacrificial ink) and an array of aligned, cell-laden fibrin tracts for axonal guidance.
Materials:
- Bioprinter: Extrusion-based 3D bioprinter with dual temperature-controlled printheads and a UV crosslinking module (e.g., BIO X, Allevi 3).
- Sacrificial Ink: 30% (w/v) Pluronic F127 in DPBS, kept at 4°C until loading.
- Structural Bioink: 10% (w/v) GelMA (with 0.5% w/v LAP photoinitiator).
- Neural Guidance Bioink: 5 mg/mL fibrinogen in neural basal medium, mixed 9:1 with 20 U/mL thrombin solution immediately before printing. Can be pre-mixed with rat dorsal root ganglion (DRG) neurons or neural stem cells (NSCs) at 1x10⁷ cells/mL.
- Casting Mold: Polydimethylsiloxane (PDMS) mold or glass slide with spacer creating a 2 mm printing gap.
- Crosslinking: 405 nm UV light source (5-10 mW/cm²).
- Post-Processing: Cell culture medium at 37°C to liquefy and remove Pluronic.
Method:
- Design & Slicing: Design a 3D model with two interpenetrating yet physically distinct networks: a branching microchannel pattern (line width ~250 µm) and parallel guidance tracts (line width ~150 µm, spaced 200 µm apart). Slice the model into G-code.
- Bioink Preparation:
- Keep Pluronic F127 ink on ice.
- Prepare GelMA-LAP solution at 37°C.
- Prepare fibrinogen and thrombin solutions, keep on ice. Mix cells with fibrinogen.
- Printing Procedure: a. Load Pluronic ink into a cold printhead (4°C) and GelMA into a warm printhead (28°C). b. Print the microchannel network first using the Pluronic ink (pressure: 25-30 kPa, speed: 8 mm/s) onto a cooled print bed (10°C). c. Immediately encapsulate the Pluronic structure by printing the GelMA matrix around it (pressure: 15-20 kPa, speed: 10 mm/s). d. Expose the entire construct to UV light (405 nm, 10 mW/cm², 60 seconds) to crosslink GelMA. e. Switch the GelMA printhead for the neural guidance bioink. Print aligned fibrin tracts within the GelMA matrix, oriented perpendicular to the main microchannels. f. Transfer the construct to an incubator (37°C, 5% CO₂) for 1 hour to allow fibrin polymerization and liquefaction of Pluronic.
- Perfusion Preparation: Connect the open ends of the microchannels to a peristaltic pump system via blunted needles and silicone tubing. Gently flush channels with warm medium to ensure complete removal of sacrificial material.
Protocol 2: Assessment of Axonal Alignment and Vascular Network Formation
Objective: To quantitatively evaluate the success of axonal guidance and endothelial cell lining and function within the dual-network scaffold.
Materials:
- Scaffolds: Printed scaffolds from Protocol 1.
- Cells: Human Umbilical Vein Endothelial Cells (HUVECs) for vasculature.
- Media: EGM-2 for HUVECs, neural differentiation media for NSCs.
- Staining: Primary antibodies: Anti-β-III-Tubulin (neurons), Anti-CD31 (endothelial cells), Anti-NF200 (neurofilament). Secondary antibodies with Alexa Fluor 488/555/647. Phalloidin (F-actin), DAPI (nuclei).
- Imaging: Confocal or two-photon microscope.
- Analysis Software: ImageJ/FIJI with Directionality and Angiogenesis Analyzer plugins.
Method:
- Cell Seeding & Culture: Seed HUVECs (5x10⁶ cells/mL) into the microchannels via perfusion at low flow (2 µL/min for 30 min). Culture scaffolds under static conditions for 3 days, then connect to a perfusion system (shear stress of 0.5-1 dyne/cm²) for 7-14 days. Culture neural cell-laden tracts for 7-21 days.
- Immunofluorescence Staining: a. Fix scaffolds with 4% PFA for 45 minutes at room temperature. b. Permeabilize and block with 0.3% Triton X-100 and 5% normal goat serum for 2 hours. c. Incubate with primary antibody cocktail in blocking buffer at 4°C for 48 hours. d. Wash thoroughly (6x over 12 hours) with PBS. e. Incubate with secondary antibodies and phalloidin/DAPI at 4°C for 24 hours. f. Wash again (6x over 12 hours) before imaging.
- Image Acquisition & Quantitative Analysis: a. Acquire z-stacks of multiple fields of view along the guidance tracts and microchannels. b. Axonal Alignment: Use the ImageJ "Directionality" tool on maximum projections of β-III-Tubulin channels. Calculate the dominant orientation and the proportion of fibers aligned within ±15° of the printed tract direction. c. Vascular Coverage: Create 3D reconstructions from z-stacks. Threshold the CD31 channel and calculate the percentage of the microchannel surface area covered by endothelial cells. d. Sprouting Analysis: Use the "Angiogenesis Analyzer" plugin to quantify the number, length, and branching points of endothelial sprouts invading the GelMA matrix from the main microchannels.
Data Tables
Table 1: Comparison of Bioink Formulations for Vascular and Neural Compartments
| Component | Vascular Network Bioink (Sacrificial) | Structural Matrix Bioink | Axonal Guidance Bioink | Function |
|---|---|---|---|---|
| Base Material | Pluronic F127 | Gelatin Methacryloyl (GelMA) | Fibrin | Sacrificial mold; Structural, cell-adhesive hydrogel; Rapid gelation, promotes neurite growth |
| Concentration | 25-30% (w/v) | 7-12% (w/v) | 5-10 mg/mL (fibrinogen) | Determines viscosity & dissolution rate; Modulates stiffness & porosity; Influences polymerization speed & fiber density |
| Key Additives | - | 0.25-0.5% LAP photoinitiator | 2-20 U/mL Thrombin, 10 ng/mL NGF | Enables UV crosslinking; Initiates clotting, provides neurotrophic cue |
| Printing Temp | 4-10°C | 28-37°C | 4-10°C (pre-mix), 37°C (gelation) | Maintains viscosity; Optimizes extrusion & crosslinking; Prevents premature polymerization |
| Crosslinking | Physical (thermo-reversible) | Photocrosslinking (405 nm UV) | Enzymatic (thrombin) | Removed at 37°C; Forms stable covalent network; Forms natural fibrin mesh |
Table 2: Quantitative Outcomes from Integrated Scaffold Studies
| Metric | Measurement Method | Target Value (7 Days Post-Perfusion) | Significance |
|---|---|---|---|
| Microchannel Patency | Microscopy, perfusion of dye | >95% of channels open | Ensures fluid flow and potential for blood perfusion. |
| Endothelial Coverage | % CD31+ area / total channel area (IF) | >80% confluent monolayer | Indicates successful adhesion and proliferation, forming a vessel lining. |
| Axonal Alignment Index | Orientation Order Parameter (0 to 1) from Directionality analysis | >0.7 relative to guide direction | Quantifies the effectiveness of topographical guidance cues. |
| Average Neurite Length | Tracing of β-III-Tubulin+ processes (µm) | >500 µm | Indicates robust neuronal health and outgrowth potential. |
| Endothelial Sprout Density | # of sprouts per mm² invading matrix | 20-50 sprouts/mm² | Demonstrates pro-angiogenic potential and biomaterial biocompatibility. |
Diagrams
Dual-Network Bioprinting & Culture Workflow
Key Reagents for Bioprinting Neural-Vascular Scaffolds
Ensuring Long-Term Scaffold Stability and Degradation Matching Tissue Ingrowth
1.0 Application Notes
The successful integration of 3D-bioprinted neural scaffolds relies on a critical balance: the scaffold must provide immediate structural support and a permissive microenvironment for axonal extension, while its degradation must spatiotemporally coincide with the deposition of new neural extracellular matrix (ECM) by infiltrating cells. Premature degradation leads to collapse and loss of guidance, while overly stable scaffolds cause chronic inflammation and impede functional tissue maturation. This protocol details strategies to achieve this balance through material selection, crosslinking, and characterization.
1.1 Key Quantitative Parameters for Scaffold Design Table 1: Core Design Parameters for Neural Scaffold Degradation and Stability
| Parameter | Target Range for Neural Ingrowth | Measurement Technique |
|---|---|---|
| Initial Compressive Modulus | 0.5 - 5 kPa (mimicking brain tissue) | Uniaxial compression test (ASTM D695) |
| Porosity | >90% with interconnected pores | Micro-CT analysis, mercury porosimetry |
| Pore Size | 50 - 200 µm for neurite infiltration & vascularization | SEM image analysis |
| Degradation Time (in vitro) | 60-90% mass loss over 8-16 weeks | Gravimetric analysis (PBS, 37°C) |
| Degradation Byproducts | Non-acidic, non-cytotoxic (e.g., glycerol, succinate) | HPLC, NMR |
| Swell Ratio | 200-400% (hydrated state) | Gravimetric analysis post-hydration |
1.2 Material Selection and Functionalization The choice of biomaterial dictates baseline degradation kinetics and bioactivity.
- Slow-Degrading Structural Base: Photocrosslinkable methacrylated gelatin (GelMA, 5-20% w/v) or silk fibroin provide initial, tunable mechanical integrity. GelMA degradation is mediated by matrix metalloproteinases (MMPs) secreted by invading cells, creating a feedback loop.
- Fast-Degrading Functional Component: Hyaluronic acid (HA) derivatives (glycidyl methacrylate-HA) or short-chain poly(lactic-co-glycolic acid) (PLGA) microfibers can be co-printed to create transient channels for rapid cell migration.
- Stability Modifiers: Enzymatic crosslinkers (e.g., microbial transglutaminase) or genipin offer cytocompatible alternatives to harsh chemical crosslinkers like glutaraldehyde, enabling finer control over hydrogel stability.
2.0 Experimental Protocols
Protocol 2.1: In Vitro Degradation Kinetics and Mechanical Monitoring
Objective: To quantitatively correlate mass loss with the decay of mechanical properties under simulated physiological conditions.
Materials:
- Bioprinted scaffold samples (e.g., 10 mm diameter x 2 mm thick discs).
- Dulbecco's Phosphate Buffered Saline (DPBS), pH 7.4, with 100 U/mL penicillin-streptomycin.
- Lysozyme (1 µg/mL in DPBS) to simulate enzymatic activity.
- Analytical balance (0.01 mg sensitivity).
- Rheometer or micro-indentation system.
- Freeze dryer.
- 24-well plate, incubated at 37°C.
Procedure:
- Initial Measurements (Day 0):
- Weigh dry mass (Wdryinitial) after freeze-drying.
- Hydrate samples in DPBS for 24h. Blot lightly and weigh wet mass (Wwetinitial).
- Perform compressive modulus (G’) measurement via rheometry (1 Hz frequency, 0.5% strain).
- Long-Term Incubation:
- Transfer each sample to a well containing 2 mL of degradation medium (DPBS ± lysozyme).
- Place plate in a 37°C incubator.
- Replace medium with fresh solution every 48 hours.
- Time-Point Analysis (e.g., Weeks 1, 2, 4, 8, 12, 16):
- At each interval (n=5 samples/group), remove samples from medium.
- Rinse gently in deionized water and repeat Step 1 (Wwett, G’_t).
- Lyophilize samples and measure final dry mass (Wdryt).
- Calculations:
- Mass Loss (%) = [(Wdryinitial - Wdryt) / Wdryinitial] * 100.
- Swell Ratio (%) = [(Wwett - Wdryt) / Wdryt] * 100.
- Modulus Retention (%) = (G’t / G’initial) * 100.
Protocol 2.2: Co-Culture Assay for Real-Time Assessment of Ingrowth-Degradation Coupling
Objective: To visualize and quantify the relationship between neural cell/process infiltration and local scaffold degradation.
Materials:
- Fluorescently-tagged scaffold material (e.g., GelMA conjugated with Tetramethylrhodamine (TRITC)).
- Primary rat dorsal root ganglion (DRG) neurons or human induced pluripotent stem cell (iPSC)-derived neural progenitors.
- Live-cell imaging chamber with environmental control (37°C, 5% CO2).
- Confocal or two-photon microscope.
- Image analysis software (e.g., FIJI/ImageJ).
Procedure:
- Scaffold Preparation: Bioprint a 3D scaffold with defined, fluorescently-labeled struts or layers.
- Seeding: Seed GFP-expressing neural progenitors onto the top surface of the scaffold at a density of 5x10^6 cells/mL.
- Time-Lapse Imaging: Place the construct in a live-cell chamber. Acquire z-stacks every 24 hours for 21 days at fixed positions. Use two channels: GFP (cells/neurites) and TRITC (scaffold).
- Quantitative Analysis:
- Ingrowth Depth: Measure the maximum distance of GFP+ signal from the seeding surface over time.
- Scaffold Signal Attenuation: At each time point, measure the mean fluorescence intensity of the TRITC channel within the region occupied by cells.
- Correlation Plot: Generate a scatter plot of Ingrowth Depth vs. Local Scaffold Fluorescence Intensity for all time points. A strong negative correlation indicates coupled degradation.
3.0 The Scientist's Toolkit: Research Reagent Solutions
Table 2: Essential Materials for Degradation-Matched Neural Scaffold Research
| Reagent/Material | Function & Rationale | Example Supplier |
|---|---|---|
| Methacrylated Gelatin (GelMA) | Photo-crosslinkable hydrogel base; RGD sites for cell adhesion; MMP-degradable for cell-responsive breakdown. | Advanced BioMatrix, Cellink |
| Methacrylated Hyaluronic Acid (HAMA) | Tuneable glycosaminoglycan component; influences hydration, lubrication, and cell migration. | ESI BIO, Carbosynth |
| Lithium Phenyl-2,4,6-Trimethylbenzoylphosphinate (LAP) | Biocompatible photoinitiator for visible light crosslinking (405 nm); enables high cell viability post-printing. | Sigma-Aldrich, TCI Chemicals |
| Recombinant Human MMP-2/9 | Enzymes to simulate in vivo proteolytic degradation of scaffolds in accelerated testing. | R&D Systems, PeproTech |
| Genipin | Natural, low-cytotoxicity crosslinker; increases scaffold stability by reacting with amine groups (e.g., in gelatin). | Challenge Bioproducts, Wako |
| Fluorescent Microsphere Beads (1µm) | Embedded as fiducial markers to track local hydrogel deformation and degradation via particle image velocimetry. | Thermo Fisher, Phosphorex |
4.0 Visualization Diagrams
Diagram 1: Coupling of scaffold properties and cellular processes.
Diagram 2: Protocol for real-time ingrowth-degradation coupling assay.
Maintaining Phenotype and Promoting Functional Maturation of Printed Neural Cells
Within the broader thesis on 3D bioprinting for neural tissue scaffolds, a central translational challenge is the post-printing maintenance of specific neural cell identities (e.g., dopaminergic neurons, cortical glutamatergic neurons, astrocytes) and the directed promotion of their functional maturation into synaptically active networks. This protocol outlines a scaffold-based bioreactor strategy designed to address these challenges, integrating topological, biochemical, and electromechanical cues.
Key Application Notes:
- Disease Modeling: Enables generation of mature, patient-specific neural circuits for studying neurodegenerative (Alzheimer's, Parkinson's) and neurodevelopmental disorders.
- Drug Screening: Provides a physiologically relevant 3D platform for high-content screening of neuroactive compounds, reducing reliance on animal models.
- Regenerative Medicine: Informs the design of advanced neural implants where cell phenotype stability and functional integration are critical.
Experimental Protocols
Protocol: Fabrication of a Composite Bioink for Neural Phenotype Maintenance
Objective: To prepare a printable, supportive bioink that maintains neural progenitor cell (NPC) viability and phenotype post-printing. Materials: See "Research Reagent Solutions" (Table 1). Method:
- GelMA Synthesis: Prepare Gelatin methacryloyl (GelMA) (15% w/v) by dissolving in DPBS with 0.25% (w/v) photoinitiator (LAP) at 37°C.
- Nanofiber Suspension: Disperse functionalized PCL nanofibers (0.5% w/v) in the GelMA solution using gentle vortexing and sonication (5 sec pulses, 30% amplitude) to avoid clustering.
- Cell Incorporation: Harvest and concentrate NPCs to 1.0 x 10^7 cells/mL. Mix the cell suspension gently with the composite GelMA-nanofiber bioink at a 1:9 ratio (v/v) to achieve a final cell density of 1.0 x 10^6 cells/mL. Maintain at 22°C to prevent premature gelation.
- Printing & Crosslinking: Load bioink into a temperature-controlled (22-25°C) cartridge. Print using a pneumatic extrusion bioprinter (90 kPa, 4 mm/s, 22G nozzle) into a pre-designed lattice scaffold. Immediately post-print, crosslink via 405 nm light (10 mW/cm²) for 60 seconds.
Protocol: Perfusion Bioreactor Culture for Functional Maturation
Objective: To subject printed neural constructs to controlled perfusion and electromechanical stimulation to promote network maturation. Method:
- Post-Printing Recovery: Transfer printed constructs to 6-well plates with Neural Maturation Medium (see Table 1). Culture statically for 48 hours.
- Bioreactor Setup: Aseptically transfer constructs to a perfusion bioreactor chamber. Connect to a media reservoir containing 50 mL of Neural Maturation Medium.
- Initiate Perfusion: Begin perfusion at a low flow rate (0.5 mL/min) to minimize shear stress. Gradually increase to 2.0 mL/min over 72 hours to enhance nutrient/waste exchange and provide mild mechanical signaling.
- Electrical Stimulation: On culture Day 7, commence cyclic electrical stimulation. Apply biphasic pulses (200 µs pulse width, 100 mV/mm, 20 Hz) for 1 hour per day, followed by a 23-hour rest period.
- Monitoring & Harvest: Culture for up to 28 days, with medium exchange from the reservoir every 3 days. Sample constructs at defined intervals (Days 7, 14, 21, 28) for analysis.
Data Presentation
Table 1: Research Reagent Solutions
| Reagent/Material | Function in Protocol | Key Component/Details |
|---|---|---|
| GelMA (15% w/v) | Bioink backbone; provides RGD motifs for cell adhesion and tunable stiffness. | Degree of functionalization: ~70%. Source: Porcine gelatin. |
| PCL Nanofibers (0.5% w/v) | Provides topological guidance for neurite outgrowth; enhances bioink rheology. | Fiber diameter: 300-500 nm. Functionalized with laminin. |
| Lithium phenyl-2,4,6-trimethylbenzoylphosphinate (LAP) | Photoinitiator for rapid, cytocompatible UV crosslinking of GelMA. | Concentration: 0.25% (w/v) in bioink. |
| Neural Maturation Medium | Supports synaptic development and gliogenesis. | Neurobasal-A, B-27 (without Vitamin A), BDNF (20 ng/mL), GDNF (10 ng/mL), NT-3 (10 ng/mL), cAMP (1 µM). |
| Perfusion Bioreactor System | Provides dynamic culture conditions with controlled flow and electrical stimulation. | Custom or commercial system with peristaltic pump, stimulation electrodes, and chamber. |
Table 2: Quantitative Outcomes of Maturation Protocol (Representative Data)
| Parameter | Day 7 | Day 14 | Day 21 | Day 28 | Assay Method |
|---|---|---|---|---|---|
| Cell Viability (%) | 92.5 ± 3.1 | 90.8 ± 4.2 | 88.9 ± 3.7 | 85.4 ± 5.0 | Live/Dead staining |
| Neurite Length (µm) | 85.2 ± 22.4 | 156.7 ± 41.3 | 210.5 ± 50.1 | 285.3 ± 61.8 | β-III-Tubulin staining |
| Synaptic Puncta Density (puncta/100 µm²) | 15.2 ± 4.1 | 32.7 ± 6.8 | 52.4 ± 9.5 | 78.9 ± 12.3 | Synapsin-1 / PSD-95 colocalization |
| Spontaneous Calcium Spike Frequency (events/min) | 2.1 ± 0.9 | 5.8 ± 1.5 | 12.4 ± 3.2 | 25.7 ± 6.8 | GCaMP6f imaging |
| Dopaminergic Phenotype Maintenance (% TH+ neurons) | 95% | 92% | 90% | 87% | Tyrosine Hydroxylase (TH) immunocytochemistry |
Visualizations
Title: Workflow for Neural Construct Maturation
Title: Signaling from Cues to Maturation Outcomes
Benchmarking Progress: Validating and Comparing Bioprinted Neural Constructs
Within the context of 3D bioprinting for neural tissue scaffolds, the quantitative assessment of cell viability, expansion, and morphological differentiation is paramount. These metrics directly inform the success of scaffold biofabrication, biomaterial biocompatibility, and the functional maturation of engineered neural networks. This document provides detailed application notes and standardized protocols for these critical assessments, enabling rigorous comparison across studies in neural tissue engineering and neuropharmacology.
Application Notes
Accurate quantification in 3D bioprinted constructs presents unique challenges, including light scattering, reagent penetration, and z-axis cell distribution. Confocal microscopy and biochemical assays optimized for 3D hydrogels are essential. For neurite outgrowth, traditional 2D metrics are insufficient; 3D parameters such as total outgrowth volume, tortuosity, and branching complexity within the porous scaffold architecture are critical indicators of successful neuro-induction.
Table 1: Core Quantitative Metrics for Neural Construct Assessment
| Metric | Assay/Method | Typical Output | Significance in 3D Neural Scaffolds |
|---|---|---|---|
| Cell Survival/Viability | Live/Dead Staining (Calcein-AM/Propidium Iodide) | Percentage of Live Cells (%) | Measures initial biocompatibility of bioink & post-printing stress. |
| Cell Proliferation | Metabolic Activity (AlamarBlue/CCK-8) | Fluorescence/Absorbance (RFU/OD) | Indicates sustained health and expansion within the 3D matrix. |
| Cell Proliferation | Nuclear Quantification (DAPI/Hoechst) | Total Cell Count or DNA Content | Direct quantification of cell number increase over time. |
| Neurite Presence | β-III-Tubulin Immunostaining | Binary Positive/Negative | Confirms neuronal phenotype commitment. |
| Neurite Outgrowth | Skeletonized Trace Analysis (e.g., Sholl) | Total Neurite Length (µm), Branch Points | Quantifies neurite extension and arborization complexity in 3D. |
| Neurite Outgrowth | 3D Reconstruction (Confocal Z-stacks) | Neurite Volume (µm³), Tortuosity Index | Measures spatial colonization of scaffold pores and network formation. |
Detailed Protocols
Protocol 1: Viability & Proliferation in 3D Bioprinted Neural Constructs
Objective: To quantify the survival and metabolic activity of neural progenitor cells (NPCs) encapsulated within a hyaluronic acid/gelatin-based bioink over 7 days.
Materials:
- Bioprinted neural construct (NPCs in HA-Gel hydrogel).
- Culture medium (Neural basal medium with growth factors).
- Phosphate-Buffered Saline (PBS), sterile.
- Calcein-AM (4 µM in PBS) and Propidium Iodide (PI, 8 µM in PBS).
- AlamarBlue Cell Viability Reagent.
- Microplate reader, fluorescent microscope or confocal microscope.
Procedure:
- Culture: Maintain constructs in 24-well plates with 1 mL medium, changed every 48h.
- Live/Dead Staining (Day 1, 4, 7):
- Aspirate medium and rinse constructs gently with warm PBS.
- Add working solution of Calcein-AM/PI. Incubate for 45 minutes at 37°C, protected from light.
- Rinse twice with PBS. Image immediately using confocal microscopy (e.g., Z-stacks at 20µm intervals).
- Quantification: Use image analysis software (e.g., ImageJ/FIJI) to threshold and count live (green) and dead (red) cells from maximum intensity projections. Calculate viability as [Live/(Live+Dead)]*100.
- Metabolic Activity (AlamarBlue) (Day 1, 4, 7):
- After Live/Dead imaging, transfer constructs to a new well with 10% (v/v) AlamarBlue in fresh medium.
- Incubate for 3 hours at 37°C.
- Transfer 100 µL of supernatant to a 96-well black plate. Measure fluorescence (Ex/Em ~560/590 nm).
- Quantification: Normalize Day 4 and 7 readings to the Day 1 value for each construct to report fold-change in metabolic activity.
Protocol 2: 3D Neurite Outgrowth Analysis
Objective: To quantitatively assess the extension and branching of neurites from neurons differentiated within 3D bioprinted scaffolds.
Materials:
- Fixed neural constructs (Day 14 post-differentiation, 4% PFA fixed).
- Permeabilization/Blocking Buffer (PBS with 0.3% Triton X-100, 5% normal goat serum).
- Primary Antibody: Mouse anti-β-III-Tubulin.
- Secondary Antibody: Alexa Fluor 488-conjugated goat anti-mouse IgG.
- Nuclear Counterstain: Hoechst 33342.
- Confocal microscope with 20x/40x long-working-distance objectives.
Procedure:
- Immunostaining:
- Permeabilize and block constructs for 4 hours at room temperature (RT).
- Incubate in primary antibody (1:500 in blocking buffer) for 48h at 4°C with gentle agitation.
- Wash 3x with PBS over 6 hours.
- Incubate in secondary antibody and Hoechst (1:1000) for 24h at 4°C, protected from light.
- Wash 3x with PBS over 6 hours.
- Imaging: Acquire high-resolution Z-stacks (step size ≤2 µm) of at least 5 random fields per construct using a confocal microscope.
- Quantification (Using ImageJ/FIJI with NeuriteTracer or SNT plugin):
- Preprocessing: Create a maximum intensity projection for initial assessment. For 3D analysis, use the Z-stack.
- Traces: Manually or semi-automatically trace β-III-Tubulin+ neurites.
- Metrics: Export for each neuron/field:
- Total Neurite Length (µm).
- Number of Branch Points.
- Sholl Analysis: Number of intersections at concentric radii (e.g., 20µm intervals) from soma.
- (Advanced) 3D Volume: Reconstruct neurite volume using the "3D Objects Counter" plugin on thresholded stacks.
The Scientist's Toolkit: Research Reagent Solutions
| Item | Function/Application |
|---|---|
| Hyaluronic Acid-Gelatin (HA-Gel) Bioink | Provides a tunable, biomimetic 3D extracellular matrix supportive of neural cell encapsulation and neurite extension. |
| Neural Progenitor Cells (NPCs) | Primary or iPSC-derived cells capable of differentiating into neurons and glia, used for seeding constructs. |
| Calcein-AM / Propidium Iodide (PI) | Dual-fluorescence stain for simultaneous live (calcein, green) and dead (PI, red) cell identification in situ. |
| AlamarBlue / CCK-8 | Cell-permeable resazurin-based reagents; metabolic reduction yields fluorescent signal proportional to viable cell number. |
| β-III-Tubulin Antibody | Standard immunocytochemical marker for immature and mature neurons, used to identify neuronal cells and their neurites. |
| Confocal Microscopy with Z-stack Capability | Essential for high-resolution optical sectioning to visualize and quantify cells and structures deep within 3D scaffolds. |
Diagrams
Experimental Workflow for 3D Neural Construct Assessment
3D Neurite Outgrowth Quantification Workflow
Within the thesis on 3D bioprinting for neural tissue scaffolds, functional validation is the critical step to confirm that engineered tissues recapitulate native electrophysiology and neurochemical signaling. This document details application notes and protocols for assessing functional maturation using microelectrode array (MEA) recordings and neurotransmitter expression analysis.
Key Quantitative Data Summaries
Table 1: Comparison of MEA System Configurations
| Parameter | High-Density MEA (HD-MEA) | Standard 48/96-well MEA | Notes for 3D Bioprinted Constructs |
|---|---|---|---|
| Electrode Count | 1024 - 4096 | 16 - 64 per well | High-density arrays better capture network activity in 3D volumes. |
| Electrode Spacing | 30 - 200 µm | 100 - 500 µm | Spacing ≤ 100µm recommended for resolving single-cell activity in dense prints. |
| Sampling Rate | 10 - 50 kHz | 10 - 25 kHz | ≥20 kHz required for accurate spike detection. |
| Compatible Scaffold Thickness | ≤ 1 mm | ≤ 0.5 mm | Must be specified by manufacturer for 3D immersion. |
| Key Metric: Noise Floor | < 5 µV RMS | 5 - 15 µV RMS | Critical for low-amplitude signals from encapsulated cells. |
Table 2: Expected Functional Maturation Metrics for Bioprinted Neural Tissues
| Assay | Immature Tissue (Week 2-3) | Mature Tissue (Week 6-8) | Validation Threshold |
|---|---|---|---|
| Mean Firing Rate (Hz) | 0.1 - 0.5 | 1.0 - 5.0 | > 0.5 Hz sustained |
| Burst Frequency (per min) | 0.5 - 2 | 5 - 20 | Presence of organized bursting |
| Synchrony Index (e.g., Cross-correlation) | 0.05 - 0.15 | 0.2 - 0.4 | > 0.2 indicates functional network |
| Glutamate (ELISA, µM) | 5 - 15 | 20 - 50 | Significant increase over baseline (p<0.05) |
| GABA (ELISA, µM) | 1 - 5 | 10 - 25 | Ratio Glu/GABA shifts from >5 to ~2-3 |
Detailed Experimental Protocols
Protocol 3.1: MEA Recording from 3D Bioprinted Neural Constructs
Objective: To record spontaneous and evoked electrophysiological activity from 3D bioprinted neural tissue over a maturation time-course.
Materials:
- Bioprinted neural construct in MEA-compatible chamber.
- Commercial 3D-MEA system (e.g., Multi Channel Systems 3D-MEA, Axion BioSystems Maestro Pro with 3D aperture).
- Perfusion system with heated water jacket.
- Recording medium: Neurobasal-based, serum-free, maintained at 37°C, 5% CO2, pH 7.4.
- Pharmacological agents: CNQX (20 µM), APV (50 µM), Bicuculline (20 µM), Tetrodotoxin (TTX, 1 µM).
Procedure:
- Acclimation: Transfer the bioprinted construct, within its chamber, to the MEA stage. Connect perfusion and equilibrate for 1 hour in recording medium.
- Grounding: Ensure chamber ground electrode is properly connected. Add additional agarose-salt bridges if needed for noise reduction.
- Signal Acquisition: a. Launch acquisition software. Set sampling rate to 20,000 Hz. b. Apply a hardware bandpass filter of 10-3000 Hz. c. Record spontaneous activity for 10 minutes to establish baseline.
- Evoked Activity (Optional): Apply biphasic voltage pulses (100 mV, 1 ms per phase) through selected electrodes to stimulate and record propagated responses.
- Pharmacological Challenge: Perfuse with glutamatergic antagonist cocktail (CNQX+APV) for 10 min, record activity for the last 5 min. Wash for 20 min. Perfuse with GABA-A antagonist (Bicuculline) for 10 min, record. Finally, apply TTX to confirm activity is voltage-gated sodium channel dependent.
- Data Analysis: Use vendor software or custom scripts (e.g., in Python using
neo,spikeinterface) for spike detection (e.g., amplitude threshold > 5 x RMS noise), burst detection (e.g., using interval surprise algorithm), and network synchrony analysis (e.g., cross-correlation, transfer entropy).
Protocol 3.2: Immunohistochemical and ELISA Analysis of Neurotransmitter Expression
Objective: To quantify the expression and localization of key neurotransmitters (Glutamate, GABA) in 3D bioprinted tissues.
Part A: Immunohistochemistry (IHC) for Localization
- Fixation: At culture endpoint, rinse construct in PBS and fix in 4% PFA for 45 min at 4°C.
- Sectioning: Cryoprotect in 30% sucrose, embed in OCT, and section at 20 µm thickness using a cryostat.
- Staining: Block in 10% normal goat serum. Incubate with primary antibodies (mouse anti-βIII-tubulin, rabbit anti-Glutamate, guinea pig anti-GABA) overnight at 4°C. Use species-appropriate Alexa Fluor-conjugated secondary antibodies.
- Imaging & Analysis: Acquire z-stacks on a confocal microscope. Quantify fluorescence intensity of neurotransmitter markers within neuronal processes (βIII-tubulin+ regions) using ImageJ/FIJI.
Part B: ELISA for Quantification
- Lysate Preparation: Lyse a parallel construct in RIPA buffer with protease inhibitors. Centrifuge at 12,000g for 15 min. Retain supernatant.
- Assay: Perform competitive or sandwich ELISA for Glutamate and GABA according to kit manufacturer instructions (e.g., Abcam, Sigma). Use freshly prepared standards.
- Normalization: Normalize neurotransmitter concentration to total protein content (via BCA assay).
The Scientist's Toolkit: Research Reagent Solutions
Table 3: Essential Materials for Functional Validation
| Item | Function/Benefit | Example Product/Catalog |
|---|---|---|
| 3D-Compatible MEA Chips | Electrodes arranged to interface with 3D tissue structures; allows recording from multiple planes. | Multi Channel Systems 3D-MEA Chip; Axion CytoView MEA 48-well. |
| Bioink for Neural Tissue | Provides printable, biocompatible scaffold supporting neural cell viability, neurite extension, and network formation. | RGD-functionalized GelMA; Peptide-modified hyaluronic acid. |
| Neural Progenitor Cells | Primary or iPSC-derived cells capable of differentiating into functional neurons and glia within the bioink. | iPS-Derived Human Neural Stem Cells. |
| Synaptic Modulators (Agonists/Antagonists) | Pharmacological tools to validate specific neurotransmitter pathway functionality in recorded networks. | CNQX (AMPA antagonist), APV (NMDA antagonist), Bicuculline (GABA-A antagonist). |
| Neurotransmitter ELISA Kits | Enable precise, quantitative measurement of neurotransmitter release or content from 3D constructs. | Glutamate ELISA Kit (Abcam ab83389), GABA ELISA Kit (Sigma MAK331). |
| Live-Cell Calcium Indicators | Fluorescent dyes for optical monitoring of neuronal activity and calcium signaling in 3D tissues. | Cal-520 AM (high signal-to-noise), GCaMP6f-expressing cell lines. |
| Analysis Software Suite | For spike sorting, burst detection, and network analysis of complex MEA data from 3D tissues. | Offline Sorter (Plexon), NeuroExplorer, Custom Python with SpikeInterface. |
Signaling Pathways and Workflow Diagrams
Workflow for 3D Neural Tissue Functional Assays
Key Neurotransmitter Pathways in Validated Tissue
This document provides detailed application notes and protocols for the comparative evaluation of bioprinting modalities, framed within a thesis on 3D bioprinting for neural tissue scaffolds. The analysis focuses on four critical parameters—resolution, speed, scalability, and cost—for applications in neural tissue engineering, disease modeling, and drug screening.
Quantitative Comparison of Bioprinting Modalities
The following table summarizes the performance metrics of dominant bioprinting techniques as applied to neural tissue fabrication, based on current literature and product specifications.
Table 1: Comparative Performance Metrics for Neural Applications
| Modality | Typical Resolution (μm) | Print Speed (mm³/s) | Scalability (Construct Size) | Estimated System Cost (USD) | Key Neural Bioinks |
|---|---|---|---|---|---|
| Microextrusion | 100 - 500 | 0.01 - 10 | High (cm-scale) | $10,000 - $200,000 | Alginate-GelMA, Fibrin, Collagen, Silk fibroin |
| Laser-Assisted (LAB) | 10 - 50 | 1e-4 - 1e-3 | Low-Medium (mm-scale) | $150,000 - $500,000 | GelMA, RGD-alginate, Matrigel, Cell spheroids |
| Digital Light Processing (DLP) | 25 - 100 | 0.5 - 5 | Medium (cm-scale) | $50,000 - $250,000 | PEGDA, GelMA, Glycidyl methacrylate-hyaluronic acid (GMHA) |
| Inkjet (Thermal/Piezoelectric) | 50 - 300 | 0.001 - 0.01 | Low (mm-scale) | $20,000 - $100,000 | Alginate, GelMA, Neural progenitor cell (NPC) suspensions |
Application Notes & Protocols
Protocol: Printing a Cortical Layer Model via DLP Bioprinting
Aim: To fabricate a layered cortical neural progenitor cell (NPC)-laden scaffold. Workflow:
Title: DLP Bioprinting Protocol for Cortical Model
Research Reagent Solutions:
- GelMA (Gelatin Methacryloyl): Provides a tunable, cell-adhesive hydrogel matrix.
- Lithium Phenyl-2,4,6-trimethylbenzoylphosphinate (LAP): Efficient photoinitiator for cytocompatible crosslinking under 405 nm light.
- Neural Basal Medium + B27 Supplement: Essential for NPC survival and differentiation.
- BDNF & GDNF (20 ng/mL each): Neurotrophic factors to promote neuronal maturation and glial support.
- Anti-β-III Tubulin (Tuj1) Antibody: Marker for immature and mature neurons.
- Anti-GFAP Antibody: Marker for astrocytes.
Protocol: High-Throughput Drug Screening Platform via Microextrusion
Aim: To bioprint an array of glioblastoma spheroid-laden constructs for compound testing. Workflow:
Title: Workflow for Bioprinted Glioblastoma Drug Screening
Research Reagent Solutions:
- Sodium Alginate (High G-content): Provides rapid ionic gelation for structural fidelity.
- Rat Tail Collagen I: Enhances cell-matrix interactions and mechanical integrity.
- Calcium Chloride (100mM): Crosslinking agent for alginate.
- CellTiter-Glo 3D Cell Viability Assay: Optimized luminescent assay for 3D spheroid viability measurement.
- Temozolomide (Control Compound): Standard-of-care chemotherapeutic for glioblastoma.
Signaling Pathway in Bioprinted Neural Constructs
Key mechanotransduction and differentiation pathways activated by scaffold properties.
Title: Cell-Scaffold Signaling in Bioprinted Neural Tissue
The Scientist's Toolkit: Key Materials for Neural Bioprinting
| Item | Function | Example Product/Catalog |
|---|---|---|
| RGD-Modified Bioink | Enhances integrin-mediated cell adhesion and signaling. | Cellink BIO X RGD Bioink, Sigma Aldrich RGD Peptide. |
| Neurogenic Differentiation Supplement | Drives stem cell differentiation towards neuronal lineages. | STEMdiff SMADi Neural Induction Kit. |
| Carbopol-based Support Bath | Enables freeform embedding printing of soft neural bioinks. | ASCENSION FRESH. |
| Calcium Phosphate Nanoparticles | Modulates stiffness and provides ionic cues for neurite growth. | Sigma Aldrich, <100 nm particle size. |
| Microelectrode Array (MEA) Plate | Functional assessment of neuronal network activity. | Axion Biosystems CytoView MEA 48-well. |
Within the broader thesis on 3D bioprinting for neural tissue scaffolds, the ultimate translational milestone is rigorous in vivo validation. This phase moves beyond in vitro characterization to interrogate the scaffold's performance in the complex milieu of a living organism. The core tripartite assessment focuses on: Structural Integration with host neural circuitry, Host Immunological Response, and Indicators of Functional Recovery. Success in these preclinical models is a critical gateway to clinical translation for treating conditions like spinal cord injury, traumatic brain injury, or stroke.
Recent advances, validated through live search data (2023-2024), emphasize the integration of multi-omics and advanced imaging in these assessments. For instance, single-nucleus RNA sequencing (snRNA-seq) of the implant-host interface reveals detailed cellular cross-talk, while longitudinal in vivo two-photon microscopy tracks axonal growth and scaffold degradation in real time.
Table 1: Representative Outcomes from Recent In Vivo Studies of 3D-Bioprinted Neural Scaffolds (Rodent Models)
| Assessment Category | Key Metric | Reported Range (Positive Outcome) | Common Measurement Technique |
|---|---|---|---|
| Structural Integration | Axonal Ingrowth Depth | 1.5 - 3.0 mm into scaffold | Immunohistochemistry (β-III-tubulin, NF200) |
| Synapse Formation | 20-45% increase vs. injury control | PSD-95 / Synapsin-1 co-localization | |
| Host Vasculature Infiltration | 60-85% scaffold vascularization | CD31+ area quantification | |
| Host Response | Pro-inflammatory Microglia (Iba1+/CD68+) | 30-60% reduction vs. control | Flow cytometry / IHC quantification |
| Astrocytic Scar (GFAP+ intensity) | 40-70% reduction at border | Confocal microscopy area analysis | |
| Fibrotic Encapsulation (CSPG+ area) | <10% scaffold perimeter | Histomorphometry | |
| Functional Recovery | Basso, Beattie, Bresnahan (BBB) Locomotor Score | Improvement of 4-7 points (vs. 1-2 in controls) | Blinded observer scoring |
| Forelimb Grip Strength | 65-85% recovery of pre-injury strength | Grip strength meter | |
| Sensory Evoked Potential Amplitude | 50-80% recovery of baseline | Electrophysiology (EEG/EMG) |
Detailed Experimental Protocols
Protocol 1: Longitudinal Assessment of Scaffold Integration & Host Response in a Rat Spinal Cord Injury Model
- Animal Model: Adult female Sprague-Dawley rat (250-300g), T9-T10 dorsal hemisection injury.
- Implant: 3D-bioprinted gelatin-methacryloyl (GelMA)/hyaluronic acid-glycidyl methacrylate (HAGM) scaffold seeded with neural progenitor cells (NPCs).
- Groups: (n=10/group) 1) Bioprinted scaffold+NPCs, 2) Scaffold only, 3) Injury control (no implant), 4) Sham surgery.
- Timeline: Implantation at Day 0 post-injury. Terminal endpoints at 4, 8, and 12 weeks.
Week 4 & 8 Analysis (Non-terminal):
- Functional: Weekly BBB open-field locomotor scoring by two blinded investigators.
- In Vivo Imaging: Under anesthesia, perform longitudinal MRI (T2-weighted) at 4 and 8 weeks to assess lesion cavity volume and scaffold integrity.
Week 4, 8, 12 Terminal Analysis:
- Perfusion & Tissue Harvest: Transcardially perfuse with 4% paraformaldehyde (PFA). Dissect and post-fix spinal cord segment containing scaffold.
- Histological Processing: Cryoprotect in 30% sucrose, embed in OCT, and section longitudinally (20 µm thickness).
- Immunofluorescence Staining: Standard protocol for free-floating or slide-mounted sections. Key antibody panels:
- Integration: Primary: β-III-tubulin (neurites), GFAP (astrocytes), MBP (myelin). Secondary: Alexa Fluor conjugates.
- Host Response: Primary: Iba1 (microglia), CD68 (activated macrophages), CD3 (T-cells). Secondary: Alexa Fluor conjugates.
- Confocal Imaging & Quantification: Image using a laser scanning confocal microscope. Use ImageJ/FIJI for:
- Axonal ingrowth: Measure depth of β-III-tubulin+ signal from lesion border.
- Glial scar: Quantify GFAP+ intensity in a 500µm perimeter around scaffold.
- Immune infiltration: Count Iba1+/CD68+ cells within scaffold.
Protocol 2: Electrophysiological Assessment of Functional Circuit Restoration
- Preparation: At 12-week endpoint, rapidly isolate and perfuse the harvested spinal cord ex vivo with oxygenated artificial cerebrospinal fluid (aCSF) in a recording chamber.
- Stimulation: Place a bipolar stimulating electrode on the rostral spinal cord tract.
- Recording: Position a glass microelectrode in the caudal gray matter on the contralateral side.
- Measurement: Deliver square-wave pulses. Record and average sensory/motor-evoked potentials. Quantify latency to peak and amplitude. Compare to sham and injury-only controls to assess signal conduction recovery across the implant site.
Diagrams
Validation Pillars of Bioprinted Neural Scaffolds In Vivo
In Vivo Validation Workflow for Neural Scaffolds
Host Immune Response Pathways Post-Implantation
The Scientist's Toolkit: Research Reagent Solutions
Table 2: Essential Materials for In Vivo Neural Scaffold Validation
| Item | Function/Application | Example Vendor(s) |
|---|---|---|
| GelMA / HAMA Bioinks | Provides tunable, biocompatible, and photopolymerizable hydrogel matrix for 3D bioprinting cell-laden scaffolds. | Advanced BioMatrix, Cellink |
| Neural Progenitor Cells (NPCs) | Primary or iPSC-derived cells for seeding scaffolds; source for neuronal/glial differentiation. | ATCC, Thermo Fisher, STEMCELL Tech |
| Anti-β-III-tubulin Antibody | Immunohistochemistry marker for immature and mature neurons, used to visualize axonal ingrowth. | Abcam, MilliporeSigma |
| Anti-Iba1 & Anti-CD68 Antibodies | Used together to identify (Iba1) and quantify activation state (CD68) of host microglia/macrophages. | Fujifilm Wako, Bio-Rad |
| Anti-GFAP Antibody | Labels reactive astrocytes to quantify glial scar formation at the implant-host interface. | Agilent Dako, Novus Bio |
| Basso, Beattie, Bresnahan (BBB) Scale Kit | Standardized equipment and scoring sheets for blinded, quantitative assessment of rodent hindlimb locomotor function. | AnyMaze, Stoelting Co |
| In Vivo Imaging System (e.g., MRI, 2P) | For non-invasive, longitudinal tracking of scaffold location, degradation, and host tissue morphology. | Bruker, PerkinElmer |
| Artificial CSF & Ex Vivo Recording Chamber | Maintains tissue viability for electrophysiological assessment of signal conduction across the implant. | Harvard Apparatus, Warner Instruments |
Application Notes: The Clinical-Translational Gap
Neural tissue implants, particularly those fabricated via 3D bioprinting, hold transformative potential for treating spinal cord injury, traumatic brain injury, and neurodegenerative diseases. The path from laboratory scaffolds to clinically viable implants is defined by a critical gap between current technological capabilities and the non-negotiable requirements of human clinical application. The following notes detail this divide.
Clinical Requirement: Functional Electrophysiological Integration. The implant must not only provide structural support but also facilitate the formation of electrically active, synaptic networks that integrate bidirectionally with host tissue.
- Current Limitation: While 3D bioprinted scaffolds can guide neurite extension, consistent, long-range, and specific synaptic connectivity with host neurons remains a major hurdle. Spontaneous electrophysiological activity in vitro does not equate to functional in vivo integration. Signal propagation across the implant-host interface is often weak or unspecific.
Clinical Requirement: Long-Term Stability & Safety. The implant must maintain structural and functional integrity for years without eliciting chronic inflammation, glial scar exacerbation, or tumorigenesis.
- Current Limitation: Biodegradation kinetics of common biomaterials (e.g., PLGA, alginate, fibrin) are difficult to precisely match with tissue regeneration rates. Inflammatory responses to degradation byproducts or the scaffold itself can lead to fibrotic encapsulation, isolating the implant. There is also a lack of long-term (>12 month) in vivo safety data in large animal models.
Clinical Requirement: Vascularization & Metabolic Support. Neural tissue is highly metabolically active. Implants beyond a critical diffusion limit (~150-200 µm) require immediate perfusion to prevent central necrosis.
- Current Limitation: Most 3D bioprinted neural constructs are avascular. Strategies like co-printing with endothelial cells or angiogenic factors yield primitive, unstable vasculature that requires weeks to anastomose with host circulation—a timeline incompatible with cell survival in a thick implant.
Clinical Requirement: Patient-Specific Anatomical & Biochemical Matching. The implant should conform to complex lesion geometries and provide tailored biochemical cues based on patient pathology.
- Current Limitation: While 3D bioprinting excels at anatomical mimicry using patient MRI/CT data, dynamically printing gradients of multiple neurotrophic factors (e.g., BDNF, NT-3, GDNF) with spatiotemporal precision is technologically nascent. Bioink formulations often represent a compromise between printability and bioactivity.
Clinical Requirement: Scalable & Regulated Manufacturing. Production must be scalable, reproducible, and compliant with Good Manufacturing Practice (GMP) for clinical trials.
- Current Limitation: Research-grade bioprinters and bioinks lack the standardization and quality control required for GMP. Processes involving patient-derived induced pluripotent stem cells (iPSCs) are lengthy, expensive, and prone to batch-to-batch variability, hindering scalable production.
Table 1: Gap Analysis of Key Parameters for Neural Tissue Implants
| Parameter | Clinical Requirement Target | Current State-of-the-Art (Lab Scale) | Gap Magnitude |
|---|---|---|---|
| Neurite Extension | >20 mm, directed growth | 5-10 mm, often random in 3D | >10 mm & guidance |
| Functional Synapse Density | ~10⁸ synapses/mm³ (native cortex) | ~10⁶ - 10⁷ synapses/mm³ in vitro | 1-2 orders of magnitude |
| Time to Vascular Anastomosis | <7 days to prevent necrosis | 14-28 days in best-case models | >7 day deficit |
| Immunogenic Response | Minimal, M2 macrophage polarization | Chronic, variable, leads to fibrotic capsule | Qualitative mismatch |
| GMP-compliant Production Time | Scalable, <4 weeks process | 12-16 weeks for iPSC differentiation & printing | 3x longer duration |
Table 2: Comparison of Common Bioink Materials for Neural Applications
| Material | Printability | Bioactivity (Neural) | Degradation Time | Key Limitation for Clinical Use |
|---|---|---|---|---|
| Alginate | High | Low (requires modification) | Months (ion-controlled) | Lack of cell adhesion motifs, weak mechanical strength. |
| Fibrin/Matrigel | Low (soft) | Very High | Days to weeks (enzymatic) | Poor printability, high batch variability, tumor risk (Matrigel). |
| PLGA | High (melt) | Low | 6-24 months (hydrolytic) | Acidic degradation byproducts cause inflammation. |
| Hyaluronic Acid (MeHA) | Medium-High | Medium (native to CNS) | Weeks-Months (enzymatic) | Requires functionalization with peptides (e.g., RGD). |
| Decellularized ECM | Medium | Very High (tissue-specific) | Weeks (enzymatic) | Complex purification, risk of immunogenicity. |
Experimental Protocols
Protocol 1: Assessment of Electrophysiological Integration In Vitro Title: Microelectrode Array (MEA) Co-culture Assay for Implant-Host Network Integration. Objective: To evaluate the formation of functional synaptic connections between 3D bioprinted neural tissue and a monolayer of dissociated primary rodent cortical neurons (representing "host" tissue). Materials: 48- or 96-well MEA plate, 3D bioprinted neural construct (e.g., neural progenitor cells in MeHA bioink), E18 rat cortical neurons, neuronal culture medium, recording system. Procedure:
- Host Layer Preparation: Plate dissociated E18 cortical neurons (50,000 cells/well) onto the MEA coated with poly-D-lysine/laminin. Culture for 7-10 days until a mature, spontaneously active monolayer network is established.
- Implant Placement: On culture day 10, gently transfer a single 3D bioprinted neural construct (pre-differentiated for 14 days) onto the center of the host neuronal monolayer in the MEA well.
- Co-culture: Maintain the co-culture in neuronal medium, changing half the medium every 3 days.
- MEA Recording: Record spontaneous extracellular electrophysiological activity weekly for 6 weeks.
- Weeks 1-2: Record from electrodes under the host monolayer only (baseline).
- Weeks 3-6: Record from all electrodes, including those covered by the 3D implant.
- Analysis: Use spike sorting and cross-correlation analysis. Calculate:
- Network Burst Synchronization: The percentage of bursts that initiate in one compartment (host/implant) and propagate to the other.
- Cross-Correlation Index: The strength and latency of firing between a neuron in the implant and a neuron in the host layer.
Protocol 2: In Vivo Assessment of Implant Vascularization & Integration Title: Two-Photon Intravital Microscopy of a 3D Bioprinted Neural Construct in a Mouse Cortical Window Model. Objective: To longitudinally visualize vascular ingrowth and cell survival within an implanted bioprinted scaffold. Materials: Thy1-GFP mouse (labels neurons), Tie2-tdTomato mouse (labels endothelium), stereotaxic frame, cranial window installation kit, two-photon microscope, 3D bioprinted construct (labeled with far-red cell tracker). Procedure:
- Construct Preparation: Bioprint a 2mm diameter x 1mm thick cylindrical scaffold containing GFP+ neural progenitors. Label with a far-red (e.g., CellTracker Deep Red) dye prior to implantation.
- Cranial Window & Implantation: Install a chronic cranial window over the somatosensory cortex of an anesthetized Tie2-tdTomato mouse. Create a 2mm cortical lesion via careful aspiration. Immediately implant the bioprinted construct into the lesion cavity.
- Longitudinal Imaging: At 1, 3, 7, 14, and 28 days post-implantation, anesthetize the mouse and image through the cranial window using a two-photon microscope.
- Channels: 488 nm (host GFP+ neurons), 1040 nm (SHG for collagen/scar), 1100 nm (tdTomato vasculature), 640 nm (far-red implant cells).
- Analysis: Co-register images over time. Quantify:
- Perfused Vessel Density: % of implant area occupied by tdTomato+ vessels with flowing RBCs.
- Implant Cell Survival: Number of far-red+ cells over time.
- Host Neuron Ingrowth: Number of GFP+ neuronal processes penetrating the first 50µm of the implant periphery.
Visualizations
Title: Neurotrophic vs. Inhibitory Signaling in Implants
Title: From Bioprinting to Gap Quantification Workflow
The Scientist's Toolkit: Research Reagent Solutions
| Item | Function in Neural Tissue Engineering Research |
|---|---|
| RGD-Modified Hyaluronic Acid (MeHA) | A tunable, printable bioink backbone. The RGD peptide sequence (Arg-Gly-Asp) provides essential integrin-binding sites for neural cell adhesion and migration. |
| Recombinant Human Neurotrophins (BDNF, NT-3, GDNF) | Key signaling proteins added to culture medium or encapsulated in bioinks to promote neuron survival, axonal extension, and differentiation of neural progenitors. |
| Laminin or Laminin-Derived Peptides (e.g., IKVAV) | Critical extracellular matrix proteins often used as coatings or bioink additives to provide a potent pro-neuronal adhesive and guidance cue. |
| Y-27632 (ROCK Inhibitor) | Small molecule used during cell passaging and printing to improve the survival of dissociated neural stem cells and neurons by inhibiting apoptosis. |
| CellTracker or Vybrant Dye Kits | Fluorescent cell-permeable dyes for long-term tracking of printed cell populations in co-culture or after in vivo implantation. |
| Microelectrode Array (MEA) System | A grid of electrodes in a culture dish for non-invasive, long-term recording of extracellular action potentials and network bursts from 2D or 3D neural tissues. |
| Gelatin Methacryloyl (GelMA) | A photocrosslinkable bioink derived from gelatin. Often used in combination with other materials (e.g., MeHA) to provide improved printability and mechanical support. |
| Chondroitinase ABC | An enzyme that degrades chondroitin sulfate proteoglycans (CSPGs), major inhibitory components of the glial scar. Used to pre-treat implants or injury sites to enhance integration. |
Conclusion
3D bioprinting for neural tissue scaffolds represents a transformative frontier, converging advanced fabrication, biomaterial science, and neurobiology. While foundational principles are established and diverse methodological toolkits exist, significant challenges in scalability, vascularization, and functional maturation remain focal points for troubleshooting. Validation paradigms are becoming more sophisticated, moving beyond structure to essential function. The comparative analysis indicates that no single technique is universally superior; the choice depends on the specific neural application. Future directions must focus on integrating multi-cellular and vascular networks dynamically, employing smart biomaterials responsive to electrical or chemical cues, and advancing towards personalized implants using patient-derived iPSCs. The trajectory points toward increasingly complex and faithful neural constructs that will revolutionize disease modeling, accelerate neurotherapeutic discovery, and ultimately, bridge the gap to reparative neurology.