Automating Discovery: How Advanced Fluid Control Systems Are Revolutionizing High-Throughput Microfluidic Screening
This article provides a comprehensive guide to automated fluid control systems for high-throughput microfluidic applications.
Automating Discovery: How Advanced Fluid Control Systems Are Revolutionizing High-Throughput Microfluidic Screening
Abstract
This article provides a comprehensive guide to automated fluid control systems for high-throughput microfluidic applications. It explores the core principles driving this technology, examines current methodologies for assay integration, offers solutions for common operational challenges, and benchmarks performance against traditional methods. Designed for researchers and drug development professionals, this resource synthesizes the latest advancements to enable more reliable, efficient, and scalable experimentation at the micro-scale.
The Engine of Miniaturization: Core Principles and Components of Automated Microfluidic Control
Automated fluid control (AFC) is the programmable, precise, and reproducible manipulation of liquids and gases within a system. In the context of High-Throughput Screening (HTS), AFC is the critical enabling technology that transitions assays from manual, low-volume operations in multi-well plates (macro) to integrated, ultra-miniaturized, and continuous-flow microfluidic systems (micro). This evolution is driven by the need for higher throughput, reduced reagent consumption, increased data quality, and the ability to perform complex, multi-step assays with temporal precision.
Application Notes
Macro-Scale AFC: Robotic Liquid Handlers
At the macro scale, AFC is dominated by robotic liquid handlers (e.g., from Tecan, Beckman Coulter, Hamilton). These systems automate the transfer of liquid volumes, typically in the microliter to milliliter range, between plates, reservoirs, and assay detection modules. Their primary role in HTS is in compound library management, reagent dispensing, and cell seeding.
Key Application Notes:
- Compound Library Reformating: Rapid transfer of compounds from master storage plates (e.g., 384-well) to assay-ready daughter plates.
- Cell-Based Assay Setup: Dispensing homogeneous cell suspensions into microplates with high viability and consistent cell number per well.
- Addition of Agonists/Antagonists: Precise timed addition of test compounds or stimulating agents for kinetic assays.
Micro-Scale AFC: Integrated Microfluidics
Micro-scale AFC utilizes microfabricated channels (tens to hundreds of micrometers in width) and integrated active or passive components to manipulate fluids at nanoliter to picoliter scales. This enables entirely new HTS paradigms, such as single-cell analysis, gradient generation, and dynamic perturbation.
Key Application Notes:
- Droplet Microfluidics: Generation of picoliter-scale water-in-oil droplets, each acting as an isolated microreactor. This allows for ultra-high-throughput screening of enzyme kinetics, antibody binding, or single-cell secretions at rates exceeding 10 kHz.
- Continuous-Flow Microfluidics: Precise perfusion of cells or tissues with controlled shear stress and temporal concentration profiles of drugs. Ideal for kinetic pharmacological profiling (e.g., GPCR signaling).
- Digital Microfluidics (DMF): Electrode-based manipulation of discrete droplets on a planar surface. Enables flexible, reconfigurable, and highly parallel assay pathways without pumps or valves.
Quantitative Data Comparison
Table 1: Comparison of AFC Platforms in HTS
| Feature | Robotic Liquid Handlers (Macro) | Droplet Microfluidics (Micro) | Continuous-Flow Microfluidics (Micro) | Digital Microfluidics (Micro) |
|---|---|---|---|---|
| Typical Volume | 1 µL – 1 mL | 1 pL – 10 nL | 10 nL – 1 µL | 100 nL – 10 µL |
| Throughput (samples/day) | 10^3 – 10^5 (wells) | 10^7 – 10^9 (droplets) | 10^1 – 10^3 (parallel channels) | 10^2 – 10^4 (droplet operations) |
| Reagent Consumption | High (µL scale) | Extremely Low (pL scale) | Low (nL scale) | Low (nL scale) |
| Mixing Time | Seconds | Milliseconds | Seconds (diffusive) – ms (active) | Seconds |
| Temporal Resolution | Low (minutes) | Very High (ms) | High (seconds) | Moderate (seconds) |
| Key Strength | Flexibility, standardization | Unmatched throughput, encapsulation | Precise fluid dynamics, perfusion | Reconfigurability, protocol complexity |
| Primary HTS Use | Compound library screening, cell plating | Directed evolution, single-cell genomics | Cell signaling kinetics, toxicity | Synthetic biology, multiplexed assays |
Detailed Experimental Protocols
Protocol 1: Automated Cell Seeding & Compound Addition for a 384-Well FLIPR Assay (Macro-AFC)
Objective: To uniformly seed cells and dispense a compound library for a fluorescence-based intracellular calcium mobilization assay using a robotic liquid handler.
Materials: See "The Scientist's Toolkit" (Section 6).
Procedure:
- System Prime: Sterilize the liquid handler's tubing and tips with 70% ethanol, followed by three rinses with sterile DPBS.
- Cell Suspension Dispensing:
- Load a reservoir with a homogeneous suspension of HEK293-Ga15 cells at 0.5 x 10^6 cells/mL in assay medium.
- Program the robot to aspirate 40 µL of cell suspension using an 8-channel pipetting head.
- Dispense the 40 µL into all wells of a poly-D-lysine coated 384-well microplate. Use a slow dispense rate with a 1 mm tip height from the well bottom to minimize shear.
- Repeat until the plate is filled.
- Incubation: Place the seeded plate in a humidified 37°C, 5% CO2 incubator for 18-24 hours.
- Compound Transfer:
- Thaw the compound source plate (10 mM in DMSO).
- Using a disposable tip head, perform a 1:200 transfer of compound from the source plate to an intermediate plate containing assay buffer (result: 50 µM compound).
- Using a fresh tip head, transfer 20 nL of the 50 µM intermediate solution from the intermediate plate to the assay plate containing cells (final assay concentration: 10 µM, 0.1% DMSO).
- Seal the assay plate and incubate at room temperature for 30 minutes.
- Dye Loading: Using a bulk reagent dispenser, add 20 µL of Fluo-4 AM dye solution (prepared in HBSS with 2.5 mM probenecid) to all wells.
- Assay Read: Incubate for 1 hour, then read on a FLIPR Tetra or equivalent plate reader.
Protocol 2: High-Throughput Single-Cell Encapsulation & Screening via Droplet Microfluidics (Micro-AFC)
Objective: To screen a library of secreted nanobodies from single cells by co-encapsulating individual yeast cells with a fluorescently labeled antigen and a bead-based detection system.
Materials: See "The Scientist's Toolkit" (Section 6).
Procedure:
- Chip Priming: Mount a PDMS droplet generation chip on a microscope stage. Flush all inlets (aqueous 1, aqueous 2, oil) with their respective carrier fluids (HFE-7500 oil with 2% surfactant) to remove air bubbles.
- Sample Preparation:
- Aqueous Phase 1: Resuspend yeast library cells (displaying nanobodies) at 5 x 10^6 cells/mL in PBS with 0.5% BSA.
- Aqueous Phase 2: Prepare a mix of 100 nM AlexaFluor647-labeled antigen and 10 µg/mL anti-flag-coated magnetic beads in PBS-BSA.
- Droplet Generation:
- Load Aqueous 1 and Aqueous 2 into separate syringes and connect to their respective chip inlets via microfluidic tubing.
- Load the carrier oil into a third syringe.
- Using high-precision syringe pumps, set flow rates: Aqueous 1 (1000 µL/hr), Aqueous 2 (1000 µL/hr), Oil (8000 µL/hr). This creates a two-aqueous-in-oil stream that breaks into ~20 µm diameter droplets at the flow-focusing junction. Poisson statistics ensure some droplets contain one cell, one bead, and the antigen.
- Collection & Incubation: Collect droplets in a PCR tube on ice for 10 minutes. Transfer the tube to a thermal cycler and incubate at 25°C for 90 minutes to allow antigen binding and secretion capture.
- Droplet Sorting:
- Re-inject the emulsion into a droplet sorter chip.
- Pass droplets through a laser interrogation point. Measure fluorescence from the AlexaFluor647 channel.
- Apply a dielectrophoretic (DEP) sorting pulse to droplets exhibiting fluorescence above a pre-set threshold (indicating antigen binding by the secreted nanobody).
- Collect the "hit" droplets into a separate tube.
- Recovery & Analysis: Break the sorted droplets using a perfluorooctanol solution. Plate the recovered yeast cells on selective agar plates for outgrowth and sequence analysis of the nanobody gene.
Visualizations
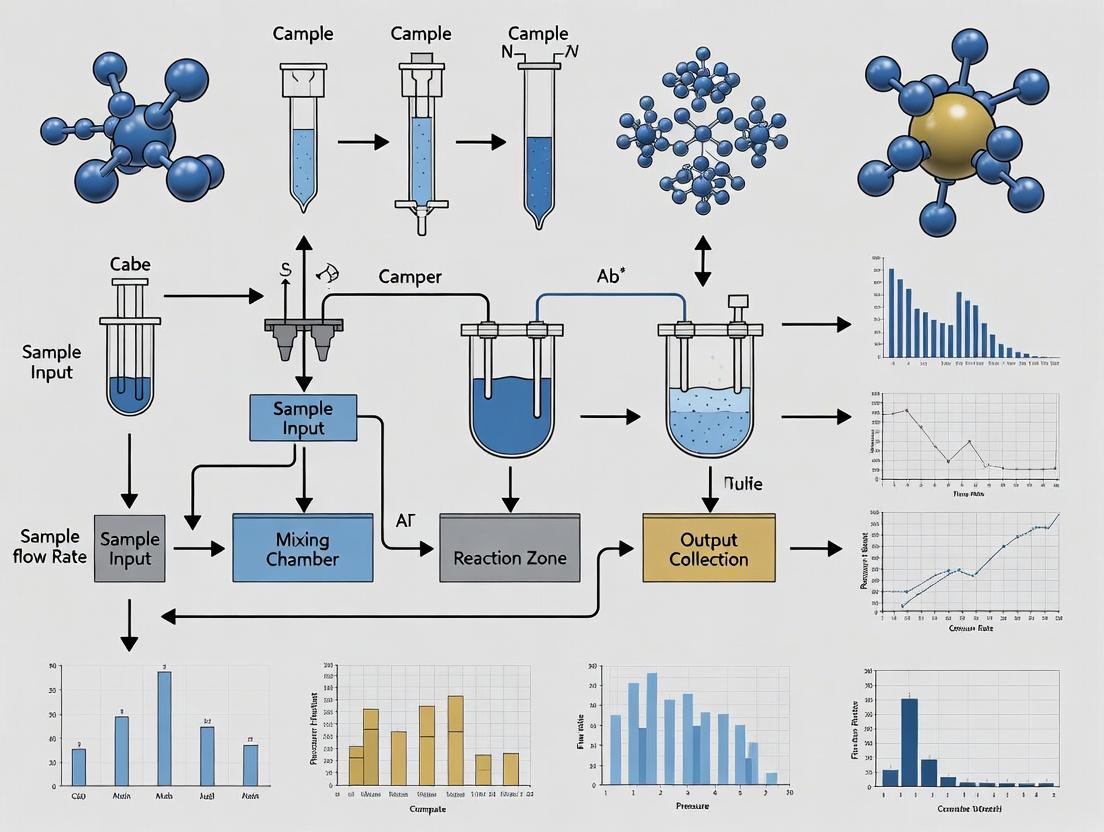
Diagram 1: Automated HTS Workflow from Macro to Micro
Diagram 2: Key Signaling Pathway in a GPCR HTS Assay
The Scientist's Toolkit: Essential Research Reagent Solutions
Table 2: Key Materials for Automated Fluid Control HTS Experiments
| Item | Function/Description | Example Supplier/Catalog |
|---|---|---|
| FLIPR Calcium 6 Assay Kit | Optimized no-wash fluorescent dye for intracellular calcium detection in 384/1536-well plates. | Molecular Devices / R8190 |
| CellCarrier-384 Ultra Plates | Optically clear, tissue-culture treated plates with minimal well-to-well crosstalk for imaging and FLIPR. | PerkinElmer / 6057302 |
| BioRad Droplet Generation Oil | Surfactant-stabilized fluorinated oil for consistent, stable water-in-oil droplet formation. | Bio-Rad / 1864005 |
| Dolomite Microfluidic Chips | PDMS or glass microchips for droplet generation, sorting, and incubation. | Dolomite / 3200284 (Drop Gen) |
| Precision Syringe Pumps | High-accuracy, pulseless pumps for driving fluids in microfluidic systems. | Cetoni / neMESYS |
| Anti-FLAG M2 Magnetic Beads | For capture and detection of FLAG-tagged secreted proteins in droplet assays. | Sigma-Aldrich / M8823 |
| Gibco DPBS, no calcium | Sterile buffer for cell washing and liquid handler priming. | Thermo Fisher / 14190144 |
| Corning Axygen Tips | Low-retention, robotic-compatible pipette tips to ensure volume accuracy. | Corning / TF-300-R-S |
| Perfluoro-octanol (PFO) | Used to destabilize the oil-water interface for droplet breaking and sample recovery. | Sigma-Aldrich / 370533 |
| Arctica HEK293 Cells | Robust, fast-growing cell line engineered for high protein expression, ideal for HTS. | Thermo Fisher / R79507 |
Application Notes for Automated Microfluidic HTS Systems
Within the context of next-generation automated fluid control systems for microfluidic High-Throughput Screening (HTS), the precise integration of pumps, valves, sensors, and interface controllers is paramount. These systems enable complex, multiplexed assays with minimal reagent consumption and maximal reproducibility, directly accelerating drug discovery pipelines. Effective integration facilitates dynamic concentration gradients, precise spatiotemporal control of cell stimuli, and real-time feedback for adaptive experimentation.
Component Functional Analysis & Quantitative Performance Metrics
Table 1: Performance Specifications of Core Fluidic Components
| Component Type | Sub-Type/Model Example | Critical Parameter | Typical Range/Value (Current Systems) | Key Application in Microfluidic HTS |
|---|---|---|---|---|
| Pumps | Syringe Pump (High-Precision) | Flow Rate Resolution | 0.1 – 10 nL/min | Precise cell perfusion, gradient generation. |
| Peristaltic Pump | Pulsation Coefficient | < 2% (with damping) | Bulk reagent & media supply to manifolds. | |
| Pneumatic Pump (PDMS) | Actuation Pressure | 5 – 30 psi | Integrated on-chip multiplexed fluid delivery. | |
| Valves | Solenoid Pinch Valve | Response Time | 10 – 100 ms | High-speed flow path selection. |
| Diaphragm Valve | Dead Volume | < 10 nL | Low-waste, direct interface to microchip. | |
| Quake-Style PDMS Valve | Cycling Frequency | Up to 100 Hz | On-chip multiplexing and cell chamber isolation. | |
| Sensors | In-line Flow Sensor (Thermal) | Accuracy | ±2% of reading | Real-time flow verification for QC. |
| Optical pH Sensor (Fluorophore-based) | Response Time (T90) | < 5 s | Monitoring cell culture microenvironment. | |
| Capacitive Bubble Detector | Detection Size | > 50 µm | Prevents bubble-induced assay artifacts. | |
| Interface Controllers | USB/Ethernet Motion Controller | Digital I/O Channels | 16 – 128 | Coordinated pump/valve actuation sequences. |
| DAQ Board (Analog I/O) | Sampling Rate | 100 kS/s | High-speed sensor data acquisition for feedback. | |
| Embedded Microcontroller (e.g., Arduino, Raspberry Pi) | Protocol Storage | SD Card, 32 GB | Standalone operation of repetitive assay steps. |
Experimental Protocols
Protocol 1: Establishing a Dynamic Concentration Gradient for Cell Signaling Studies Objective: To automate the generation of a time-varying ligand gradient across a microfluidic cell culture chamber to study receptor activation dynamics. Materials: See "Scientist's Toolkit" below. Method:
- Priming: Load ligand stock (10 µM in buffer) and buffer-only solution into dedicated 1 mL glass syringes mounted on dual, synchronized high-precision syringe pumps. Connect syringes via low-dead-volume tubing to a 2:1 microfluidic mixing chip.
- System Purge: Program the interface controller to execute a purge routine: set both pumps to 50 µL/min for 60 seconds, with the outlet valve open to waste. This removes air bubbles.
- Gradient Profile Programming: In the control software (e.g., Python, LabVIEW), define a gradient profile. Example: a 10-minute linear ramp from 0% to 100% ligand concentration, followed by a 5-minute plateau, then an exponential decay phase.
- Valve Sequencing: Configure the controller to switch the output selector valve from "Waste" to "Cell Chamber" at the start of the gradient profile.
- Real-Time Monitoring: The in-line fluorescence sensor (for fluorophore-tagged ligand) monitors gradient fidelity. Sensor data is acquired by the DAQ board at 10 Hz and logged.
- Termination: At protocol end, the controller switches the selector valve back to "Waste" and commands pumps to reverse briefly (5 µL/min, 10 sec) to relieve pressure.
Protocol 2: High-Throughput Compound Addition & Viability Imaging Objective: To sequentially deliver 96 distinct compounds from a source plate to 96 parallel microfluidic cell culture units and initiate live-cell imaging. Materials: See "Scientist's Toolkit" below. Method:
- System Configuration: A 96-channel peristaltic pump array is connected to a 96-well compound plate via a disposable tip manifold. Each channel feeds into a separate microfluidic culture chamber. An 8×12 multiplexed pneumatic valve array controls flow to each chamber.
- Priming and Calibration: The controller initiates a priming sequence, flowing assay media through all channels at 5 µL/min for 5 minutes. A baseline flow rate check is performed using integrated thermal flow sensors on 10% of channels.
- Automated Compound Addition: The controller iterates through a pre-programmed sequence: a. Position the manifold over well A1 of the compound plate. b. Activate peristaltic pump channel 1 and open pneumatic valve 1 for a precise duration (e.g., 30 sec at 2 µL/min) to deliver ~1 µL of compound. c. Close valve 1, move manifold to well A2, and repeat for channel 2. d. The cycle repeats for all 96 wells with <2 sec between operations.
- Stimulation and Imaging: After compound delivery, all valves open to perfusion mode, delivering fresh media via syringe pumps. The controller sends a TTL trigger signal to an automated inverted microscope to begin a time-lapse viability imaging protocol (e.g., every 15 min for 48 hours).
- Data Synchronization: All actuation events (valve on/off, pump start/stop) are time-stamped and logged by the controller, synchronized with the microscope's image metadata file.
System Integration & Control Logic Visualization
HTS Fluid Control System Architecture
Dynamic Gradient Generation with Feedback Workflow
The Scientist's Toolkit: Research Reagent Solutions & Essential Materials
Table 2: Key Materials for Microfluidic HTS Fluid Control Experiments
| Item | Function & Relevance to Fluid Control Systems |
|---|---|
| High-Purity, Low-Protein-Binding Tubing (e.g., PTFE, FEP) | Minimizes analyte loss and non-specific adsorption during small-volume transport, crucial for accurate dosing in nanoliter-scale assays. |
| Degassed, Filtered (0.22 µm) Cell Culture Media/Assay Buffer | Prevents bubble formation within microchannels (which disrupts flow sensors and harms cells) and maintains sterility in automated perfusion systems. |
| Fluorophore-Conjugated Tracer Molecules (e.g., FITC-Dextran) | Serves as a quantitative flow and concentration standard for in-line optical sensor calibration and gradient verification. |
| Passivation Solution (e.g., 1% Pluronic F-127, BSA) | Pre-programmed flushing protocol passivates fluidic paths, reducing surface interactions that could skew compound concentration in dose-response assays. |
| Calibration Standards for Sensors (pH Buffers, Known Viscosity Fluids) | Essential for periodic automated calibration routines executed by the interface controller to ensure data integrity over long-term HTS campaigns. |
| Disposable, Sterile Microfluidic Manifolds/Reservoirs | Interfaces between macro-scale pumps/valves and micro-scale chips. Disposability prevents cross-contamination between different compound libraries or cell lines. |
The Role of Pressure-Driven vs. Displacement-Driven Flow in Automation
Application Notes
Within automated fluid control systems for microfluidic High-Throughput Screening (HTS), the choice between pressure-driven and displacement-driven flow is fundamental. This decision impacts assay reproducibility, shear stress on cells or biomolecules, response time, and compatibility with complex device architectures.
Pressure-Driven Flow (e.g., Obtained via Regulated Gas or Syringe Pumps):
- Principle: Fluid flow is induced by applying a pressure difference across a fluidic channel. The resulting flow rate is dependent on this pressure and the hydraulic resistance of the system.
- Automation Fit: Ideal for applications requiring rapid switching of flow directions, multiplexing many inlets to a common outlet, or interfacing with porous materials (e.g., organ-on-chip). It is highly responsive and easily integrated into automated platforms using electronic pressure controllers.
- Key Consideration: Flow rate is sensitive to changes in resistance (e.g., channel deformation, clogging). In constant-pressure mode, any resistance change causes a flow rate variation, which can be detrimental for precise dosing.
Displacement-Driven Flow (e.g., Obtained via Positive Displacement Piston or Peristaltic Pumps):
- Principle: Fluid is directly displaced by the physical movement of a boundary (piston, diaphragm, or roller), delivering a defined volumetric flow rate relatively independent of downstream resistance.
- Automation Fit: Critical for applications demanding precise volumetric delivery, such as reagent addition for dose-response curves or sample injection into analytical systems. It provides superior accuracy for known, stable fluidic resistances.
- Key Consideration: May generate pulsatile flow (mitigated with dampeners) and is less agile for rapidly switching between multiple fluid sources. Compliance in the system (e.g., elastic tubing) can reduce response speed.
The integration of both methods is common in advanced HTS workstations, where pressure controllers handle multiplexed reagent selection and priming, while displacement pumps execute precise, resistance-insensitive additions to the microfluidic device.
Table 1: Quantitative Comparison of Flow Generation Methods
| Parameter | Pressure-Driven Flow | Displacement-Driven Flow |
|---|---|---|
| Primary Control Variable | Pressure (Pa) | Volume/Displacement (µL) |
| Dependent Variable | Volumetric Flow Rate (Q) | System Back-Pressure (P) |
| Typical Flow Rate Range | 1 nL/min to >10 mL/min | 10 nL/min to >100 mL/min |
| Response Time | Fast (10-500 ms) | Slower (100 ms to several seconds) |
| Resistance Sensitivity | High (Q ∝ ∆P/R) | Low (Q is directly set) |
| Pulsatility | Typically low | Can be high (piston, peristaltic) |
| Typical CV for Flow Rate* | 1-5% (varies with resistance) | 0.1-2% (for steady resistance) |
| Best For | Dynamic gradients, multiplexing, compliant chips | Precise dosing, syringe exchange, viscous fluids |
CV: Coefficient of Variation. Data synthesized from current manufacturer specifications (e.g., Elveflow, Fluigent, Cetoni) and recent microfluidic automation literature.
Experimental Protocols
Protocol 1: Assessing Shear Stress Uniformity in a Cell Culture Microchannel Objective: To compare the spatial uniformity of wall shear stress generated by pressure vs. displacement-driven flow in a standard 100 µm x 100 µm microchannel.
- Setup: Mount a PDMS microchannel on a microscope stage. Connect the inlet to a fluid reservoir via (A) an electronically regulated pressure controller and (B) a high-precision syringe pump. Prime the system with culture medium.
- Calibration: For the pressure system, use a calibrated in-line flow sensor to establish the pressure-flow rate relationship (P-Q curve). For the displacement system, confirm the set flow rate with the sensor.
- Particle Tracking: Introduce 1 µm fluorescent beads into the medium. Set both systems to target a mean wall shear stress of 0.5 Pa (≈ 1.6 µL/min flow rate).
- Imaging & Analysis: Acquire high-speed video (500 fps) of beads flowing in five distinct channel regions (inlet, center, outlet, and near two side walls). Use TrackMate (Fiji/ImageJ) to determine bead velocities.
- Calculation: Calculate shear rate from the velocity gradient. Multiply by fluid viscosity to obtain shear stress. Compare the coefficient of variation (CV) of shear stress across the five regions for both flow methods.
Protocol 2: Automated Compound Addition for Dose-Response HTS Objective: To automate the generation of a 10-point, 3-fold serial dilution series directly in a microfluidic perfusion chamber.
- System Configuration: Use an automated pressure controller (e.g., with 8-16 independent channels) connected to reservoirs of compound stock and buffer. Connect the common output to a single, high-accuracy displacement syringe pump, which then feeds the microfluidic device.
- Workflow Automation: a. Pressure-Driven Selection: The pressure controller selects and primes the compound stock line. b. Displacement-Driven Precise Delivery: The syringe pump aspirates a precise volume (e.g., 1 µL) of the selected compound. c. Pressure-Driven Buffer Flushing: The controller switches to the buffer line to flush the shared manifold, ensuring no cross-contamination. d. Displacement-Driven Mixing & Delivery: The syringe pump aspirates a defined volume of buffer (e.g., 29 µL), mixing internally to create the first dilution. It then infuses the total 30 µL bolus into the perfusion line at a constant rate. e. Loop: The pressure controller selects the compound line again, and the syringe pump aspirates 1 µL of the previous dilution from the perfusion line to create the next, more dilute step. Repeat.
- Validation: Incorporate a fluorescent tracer in the stock. Use in-line fluorescence detection to validate the concentration and uniformity of each delivered dose step.
Mandatory Visualization
Diagram Title: Flow Method Selection Logic for HTS Automation
Diagram Title: Automated HTS Dilution Protocol Workflow
The Scientist's Toolkit
Table 2: Key Research Reagent Solutions for Microfluidic Flow Control Experiments
| Item | Function/Application |
|---|---|
| Phosphate-Buffered Saline (PBS) with 0.1% v/v Tween 20 | A standard, low-viscosity wetting and priming solution. Reduces bubble formation and adhesion in hydrophobic channels. |
| Fluorescent Nanoparticle Tracking Solution (100 nm beads) | Used for flow visualization and quantitative velocimetry to map shear profiles and validate flow uniformity. |
| Cell Culture Media with Fluorescent Tracer (e.g., FITC-Dextran) | Enables real-time monitoring of concentration gradients and perfusion efficiency in live-cell assays. |
| High-Viscosity Aqueous Glycerol Solutions (e.g., 50% w/w) | Mimics the viscosity of biological fluids (blood, mucus) to test pump performance and shear stress under realistic conditions. |
| Surface Passivation Solution (e.g., 1% w/v Pluronic F-127 or BSA) | Prevents nonspecific adsorption of proteins or compounds to channel walls, critical for accurate concentration delivery. |
| Automation-Compatible Lubricant & Sealant (Silicone-based) | Ensures reliable, leak-free connections for the thousands of actuations required in an HTS campaign. |
Within the thesis on automated fluid control systems for microfluidic High-Throughput Screening (HTS), software integration emerges as the critical linchpin. It transforms disparate hardware components—pumps, valves, sensors, and chip interfaces—into a unified, programmable, and intelligent experimental platform. This central hub enables the precise design, simulation, and reliable execution of complex fluidic protocols essential for drug discovery and biological research.
Application Notes: Core Functional Modules
Effective integration software for microfluidic HTS comprises several interdependent modules.
Table 1: Core Software Modules for Automated Fluid Control
| Module | Primary Function | Key Benefit for HTS |
|---|---|---|
| Graphical Protocol Designer | Drag-and-drop interface for creating fluid handling steps (aspirate, dispense, wash, incubate). | Rapid prototyping of assays without low-level coding. |
| Physics-Based Simulator | Models fluid flow, shear stress, and reagent mixing within virtual chip geometries. | Predicts experimental outcomes and identifies potential failures before physical execution. |
| Device Abstraction Layer | Standardized communication interface for hardware from different manufacturers. | Enables modular, vendor-agnostic system configuration. |
| Real-Time Monitoring & Analytics | Live dashboard displaying pressure, flow rates, and sensor data with automated logging. | Ensures process fidelity and provides traceable data for regulatory compliance. |
| Scheduler & Resource Manager | Coordinates access to shared system resources (e.g., reagent reservoirs, detectors) across multiple queued protocols. | Maximizes throughput and minimizes dead time in screening campaigns. |
Experimental Protocol: Automated Cell Viability Assay on a Microfluidic Chip
This protocol details a standard HTS operation executable via the central software hub.
Objective: To automatically treat an array of cultured cell clusters with a library of compounds and measure viability via a fluorescent live/dead stain.
Software Pre-Protocol:
- In the Graphical Protocol Designer, create a new workflow.
- Define labware: Source plates (compound library, stain reagents), microfluidic chip (with 96 micro-culture chambers), waste reservoir.
- Map fluidic paths: Assign tubing lines and valves from sources to target chambers.
- Set parameters for each step: Flow rates (e.g., 5 µL/min), durations, incubation times.
- Run Simulation to verify fluid volumes, check for unintended mixing, and estimate total run time.
Physical Experimental Protocol:
- Materials: See "The Scientist's Toolkit" below.
- Procedure:
- Priming & Cell Loading: Execute the "Prime All Lines" routine from the software. Introduce cell suspension into all chip chambers via automated pressure control. Initiate a 2-hour incubation period (environmental control logged by software).
- Compound Addition: For each column of the chip, the software directs: a. Select the corresponding compound source well. b. Activate the precise pump to dispense 100 nL of compound into the dedicated inlet. c. Use a programmable, staggered flow sequence to perfuse compound through the target column's chambers for 5 minutes. d. Log the compound ID, timestamp, and actual dispensed volume.
- Incubation: Maintain flow of cell culture medium at a low shear rate (0.2 µL/min) for 24 hours. Software monitors and records environmental conditions (temperature, CO₂ if integrated).
- Viability Staining: Automatically introduce Calcein-AM and EthD-1 stains from their respective reservoirs using a pre-programmed gradient mixing protocol. Incubate for 30 minutes without flow.
- Imaging & Analysis: The software triggers an integrated automated microscope to capture fluorescence images for each chamber. Images are auto-analyzed using an integrated algorithm (live cells: green fluorescence; dead cells: red fluorescence). Data is appended to the protocol's electronic log.
Visualization of the Integrated System Workflow
Diagram 1: HTS microfluidic software integration workflow.
The Scientist's Toolkit: Key Research Reagent Solutions
Table 2: Essential Materials for Microfluidic HTS Protocols
| Item | Function/Description | Example Vendor/Product |
|---|---|---|
| Programmable Syringe Pumps | Provide precise, software-controlled pressure or volume for fluid displacement. | Cole-Parmer (NE-1600 Series), CETONI (neMESYS). |
| Multi-Port Selection Valves | Enable dynamic routing of multiple fluid sources to designated channels. | VICI Valco (Cheminert MHP Series). |
| PDMS or Thermoplastic Microfluidic Chips | Contain micro-channels and chambers for cell culture and reagent manipulation. | Aline (Off-stoichiometry thiol-ene (OSTE) chips), Microfluidic ChipShop. |
| Integrated Environmental Controller | Maintains physiological conditions (37°C, 5% CO₂, humidity) on-chip during live-cell assays. | Okolab (Microscope Cage Incubators), PeCon (Stage Top Incubators). |
| Live/Dead Cell Viability Assay Kit | Two-color fluorescence staining for simultaneous determination of live and dead cells. | Thermo Fisher Scientific (LIVE/DEAD Viability/Cytotoxicity Kit). |
| High-Speed CMOS Camera | Captures time-lapse or endpoint fluorescence/phase-contrast images for automated analysis. | Hamamatsu (ORCA-Fusion), FLIR (Blackfly S). |
| Tubing & Connectors | Chemically inert, low-dead-volume fluidic connections (e.g., PEEK, fluoropolymer). | IDEX Health & Science (PEEK Tubing, NanoPort fittings). |
| Data Acquisition (DAQ) Module | Interfaces analog/digital sensor signals (pressure, pH, temperature) with control software. | National Instruments (CompactDAQ). |
Current Market Leaders and Emerging Technology Platforms (2024)
Application Notes: An Integrated Framework for Microfluidic HTS
This document provides a detailed application framework for deploying automated fluid control systems within microfluidic high-throughput screening (HTS) for drug discovery. The landscape is defined by established market leaders providing robust, integrated systems and agile emerging platforms enabling novel assay modalities.
Table 1: Quantitative Comparison of Key Platform Providers
| Platform/Company | Type | Key Technology | Max Throughput (well/day) | Precision (CV) | Typical Integration | Primary Application Focus |
|---|---|---|---|---|---|---|
| Beckman Coulter Life Sciences | Market Leader | Biomek i-Series + Microfluidic Plug-in Modules | 100,000+ | <5% | Full workstation (Liquid handler, dispensers, readers) | Biochemical & Cell-based HTS |
| Tecan Group Ltd. | Market Leader | Fluent Automation + Plate Readers | 100,000+ | <5% | Modular, flexible workcells | NGS library prep, Cell-based assays |
| PerkinElmer | Market Leader | JANUS G3 + MicrofluidicµCell | 50,000+ | <8% | Integrated fluidics and detection | High-content screening, Spheroid assays |
| Dolomite Bio (Blacktrace Holdings) | Emerging Platform | µEncapsulator Systems | 10,000-50,000 droplets | <3% droplet CV | Stand-alone or with Mitos pumps | Single-cell analysis, Droplet-based PCR |
| Fluidic Logic | Emerging Platform | Programmable Microfluidic ICs | Configurable | <5% | Chip-based, requires control hardware | Combinatorial drug dosing, Gradient generation |
| Sphere Fluidics | Emerging Platform | Cyto-Mine | ~1,000 cells/day (single-cell) | N/A | Integrated imaging and sorting | Antibody discovery, Single-cell cloning |
Experimental Protocol 1: Automated High-Throughput Compound Screening on a Microfluidic 3D Culture Array
Objective: To perform a cytotoxicity screen of a 1,000-compound library against cancer spheroids cultured in a microfluidic array using an integrated fluidic control platform.
Materials & The Scientist's Toolkit
| Item | Function |
|---|---|
| Automated Liquid Handler (e.g., Beckman Biomek i5) | Precursor compound dilution and transfer to assay plate. |
| Microfluidic Spheroid Array Chip (e.g., AIM Biotech DAX-1) | Provides 3D extracellular matrix and perfusion channels for spheroid culture. |
| Programmable Pressure Pump (e.g., Elveflow OB1) | Generates highly stable, pulseless flow for gentle chip perfusion. |
| Microfluidic Interface (e.g., MuxBoard) | Bridges 96-well plate to microfluidic chip, controlled by software. |
| Live-Cell Imaging System (e.g., Molecular Devices ImageXpress) | Automated kinetic imaging of spheroid viability. |
| CellTiter-Glo 3D Reagent | ATP-based luminescent assay for 3D cell viability quantification. |
| On-Chip Perfusion Manifold | Custom or commercial chip-to-pump connection system. |
Procedure:
- Chip Priming & Cell Seeding: Prime the microfluidic channels of the array chip with complete media using the pressure pump at 5 kPa. Prepare a single-cell suspension of the target cell line (e.g., HepG2) at 5x10^6 cells/mL. Load 2 µL of cell suspension per inlet. Allow spheroids to form over 72 hours under continuous perfusion (0.5 kPa).
- Compound Library Preparation: Using the liquid handler, prepare a 10 mM intermediate dilution of compounds in a 384-well mother plate. Further dilute in complete media to a 2X final concentration (e.g., 20 µM) in a 96-well assay plate.
- System Integration & Assay Plate Mapping: Connect the microfluidic chip to the pressure pump via the perfusion manifold. In the control software (e.g., MicroManager), map the addresses of the 96-well assay plate to corresponding inlets on the microfluidic chip.
- Automated Compound Perfusion: Initiate the programmed protocol. The system will sequentially perfuse each compound from the assay plate through designated chip channels at 1 kPa for 48 hours. A control channel receives media only.
- Endpoint Viability Assay: Stop perfusion. Introduce a 1:1 mixture of CellTiter-Glo 3D reagent and media into all channels. Incubate for 30 minutes on an orbital shaker protected from light.
- Luminescence Readout: Transfer the effluent from each outlet to a white-walled microplate. Measure luminescence on a plate reader.
- Data Analysis: Normalize luminescence of compound-treated spheroids to media controls (100% viability). Calculate Z'-factor for assay quality control.
Diagram 1: Automated HTS Workflow
Experimental Protocol 2: Droplet-Based Single-Cell Secretion Analysis Using an Emerging Encapsulation Platform
Objective: To screen hybridoma cells for antigen-specific antibody secretion at the single-cell level using a droplet microfluidics system.
Materials & The Scientist's Toolkit
| Item | Function |
|---|---|
| Droplet Generation Chip (e.g., Dolomite 5 µm Chip) | Hydrodynamically focuses aqueous stream into monodisperse oil-emulsion droplets. |
| Fluidic Connection Cables & Fittings | Provides leak-free connection between syringes, chip, and collection vial. |
| Co-Flow Surfactant Oil (e.g., Dolomite Droplet Generation Oil) | Continuous phase oil containing surfactant to stabilize generated droplets. |
| Fluorescently-Labeled Antigen | Detection probe that binds to secreted antibody within the droplet. |
| Cell-Laden Agarose Gel | Prepares cells in a mild hydrogel to maintain viability during encapsulation. |
| Precision Syringe Pumps (e.g., 2x Nemesys modules) | Drives oil and aqueous phases at precisely controlled flow rates. |
| Dropcaster Collection Module | Stabilizes and stores droplets post-generation for incubation. |
| Droplet Flow Cytometer (e.g., Stratedigm S1000EX) | Analyzes fluorescence of individual droplets at high throughput. |
Procedure:
- Cell & Bead Preparation: Suspend hybridoma cells in 1.5% low-melt agarose at 37°C at a density of 2x10^6 cells/mL. Separately, prepare a solution of 2 µm fluorescent antigen-conjugated beads.
- Droplet Generation Setup: Load the oil phase into a 5 mL syringe on Pump A. Load the cell-agarose-bead mixture into a 1 mL syringe on Pump B. Connect both syringes to the droplet chip via fluidic cables.
- Encapsulation: Initiate flow rates (Oil: 800 µL/hr, Aqueous: 200 µL/hr) to generate ~50 µm droplets at ~4 kHz frequency. Collect droplets in a chilled Eppendorf tube via the Dropcaster.
- Incubation: Place the collected droplets at 37°C, 5% CO2 for 2 hours to allow cells to secrete antibody, which will bind to beads in the same droplet.
- Droplet Analysis: Dilute the emulsion with additional oil and run through the droplet flow cytometer. Use a 488 nm laser to excite the fluorescent antigen on beads.
- Gating & Sorting: Gate on droplet side-scatter. Identify double-positive droplets (containing a cell and a high-fluorescence bead) as hits. These droplets can be sorted for downstream sequencing if using a sort-enabled system.
Diagram 2: Droplet Secretion Assay Pathway
From Protocol to Practice: Implementing Automated Control for Microfluidic HTS Assays
The integration of automated fluid control with standardized chip architectures is a cornerstone of modern microfluidic HTS, enabling reproducible, high-volume experimentation for drug discovery. This protocol details a systematic workflow for interfacing robotic liquid handlers and pressure controllers with prevalent chip designs (e.g., PDMS droplet generators, glass/Si microtiter plate analogs, and thermoplastic organ-on-a-chip devices) to achieve seamless end-to-end assay automation.
Key Integration Workflow and Signaling Logic
System Architecture and Control Pathway
Title: Automated HTS Control System Signal Flow
Experimental Protocols
Protocol A: Interface Setup and Priming for PDMS Droplet Generator Chips
Objective: To establish a leak-free, bubble-free connection between an automated pressure pump and a PDMS-based droplet generation chip, and to prime the device for HTS.
Materials: See Scientist's Toolkit, Table 1.
Method:
- Chip Mounting: Secure the PDMS chip on the temperature-controlled stage (23°C) within the automated manifold. Align the chip's inlet ports with the manifold's gasket-sealed fluidic interconnects.
- Pressure Line Connection: Connect designated output lines from the multichannel pressure controller to the control ports of the chip interface manifold. Ensure tubing is of minimal length to reduce dead volume.
- Priming Sequence (Automated via Orchestrator): a. Command the robotic liquid handler to dispense 50 µL of priming buffer (1% PF-127 in assay buffer) into each reservoir of the chip interface. b. Activate pressure controller. Apply a constant pressure of 5 kPa to all inlets for 120 seconds to wet the channels and displace air. c. Apply a vacuum pulse of -2 kPa for 15 seconds to the outlet line to evacuate any trapped bubbles. d. Ramp the continuous phase inlet pressure to 15 kPa and the dispersed phase inlet to 10 kPa for 30 seconds to establish a stable two-phase flow. Monitor droplet generation via inline microscope camera.
- Validation: The system is ready for assay when droplet size CV < 2% over a 60-second observation period.
Protocol B: Automated Cell Seeding and Compound Addition in a 96-Channel Microfluidic Plate
Objective: To perform simultaneous, uniform cell seeding and subsequent nanoliter-scale compound addition across a 96-unit microfluidic array.
Method:
- Priming and Coating: Using the robotic handler, prime all channels with 20 µL of collagen solution (50 µg/mL). Incubate (37°C, 5% CO₂) for 1 hour via integrated environmental control. Aspirate and wash twice with PBS.
- Cell Seeding: Resuspend cells (e.g., HEK293) at 2.5 x 10⁶ cells/mL in assay medium. Command the robotic handler to aspirate from a reservoir and dispense 1 µL of cell suspension into each of the 96 inlet ports. Use the "liquid following air" technique to ensure precise volume delivery.
- Sedimentation & Adhesion: Program the stage to tilt cyclically (±15°, 0.1 Hz) for 5 minutes to distribute cells evenly. Then, hold static for 20 minutes to allow adhesion. Initulate continuous perfusion (0.5 µL/min per channel) via the pressure controller.
- Compound Addition (72-hour dose-response): After 24 hours, command the robotic handler to transfer compounds from a source 384-well plate. Use a 96-tip head to aspirate 500 nL from source wells and dispense directly into the dedicated compound inlets of the microfluidic plate. The pressure controller then introduces the compound slug into the main channel via a 1:10 perfusion stream.
Quantitative Performance Data
Table 1: Throughput and Reproducibility Metrics for Automated Chip Architectures
| Chip Architecture | Assay Type | Integration Method | Assay Time (hr) | Throughput (Data points/day) | Coefficient of Variation (CV) | Key Automation Benefit |
|---|---|---|---|---|---|---|
| PDMS Droplet Generator | Single-Cell RNA-seq | Pressure-Enabled | 8 | 10,000 droplets | < 3.5% (size) | Encapsulation uniformity |
| 96-Unit Microfluidic Array | Cell Viability (IC₅₀) | Robotic Nanodispenser | 72 | 96 compounds (8-point DRC) | < 8% (luminescence) | Parallel compound handling |
| Thermoplastic Organ-on-Chip | Barrier Integrity (TEER) | Peristaltic Pump Array | 120 | 12 chips, continuous | < 5% (TEER) | Long-term sterile perfusion |
Table 2: Error Rate Analysis by Integration Step
| Workflow Step | Typical Failure Mode | Automated Mitigation | Error Rate (Manual) | Error Rate (Automated) |
|---|---|---|---|---|
| Chip Priming | Bubble Trapping | Programmed vacuum/backflush pulses | 15-20% | < 2% |
| Reagent Dispensing (< 1 µL) | Volume Inaccuracy | Positive displacement tips + liquid sensing | 10-25% CV | < 5% CV |
| Long-term Perfusion (>24h) | Evaporation/Bacterial Growth | Humidified enclosure + inline sterile filter | High risk | Negligible |
| Data Acquisition | Missed timepoints | Scheduled hardware triggers | Operator-dependent | 100% adherence |
The Scientist's Toolkit: Research Reagent Solutions
Table 3: Essential Materials for Automated Microfluidic HTS Integration
| Item | Function/Description | Example Product/Note |
|---|---|---|
| Programmable Multichannel Pressure Controller | Provides precise, automated pressure-driven flow for chips without integrated pumps. Essential for droplet generators. | Fluigent MFCS-EZ or Elveflow OB1. Enables rapid dynamic response. |
| Robotic Liquid Handler with Nanolitter Capability | Accurate dispensing of cells, compounds, and reagents into chip inlets. | Beckman Coulter Biomek i7 with SPT (Sub-Microliter Precision Tip) technology. |
| Universal Microfluidic Interface Manifold | AIMS (Automated Interface Mounting System) to physically and fluidically connect robot and controller to various chip footprints. | CellASIC ONIX2 or custom manifold with pneumatic gasket sealing. |
| Biocompatible, Low-Adhesion Tubing | Minimizes protein/cell adhesion and compound absorption in automated fluid lines. | Tygon 3350 or PTFE tubing for small molecule assays. |
| On-chip/In-line Bubble Trap | Prevents disruptive bubbles from entering microchannels during automated priming and operation. | Darwin Microfluidics inline degasser or integrated PDMS bubble trap. |
| Automated Live-Cell Imaging Environmental Enclosure | Maintains 37°C, 5% CO₂, and humidity during time-lapse imaging integrated into the workflow. | Okolab H301-T-UNIT for microscopes within the robot cell. |
| HTS Scheduling & Device Orchestration Software | Central software to coordinate robot, pressure pump, microscope, and stage. | MetaFlo or custom Python scripts using MicroManager and PyMeasure. |
Validation and Data Acquisition Workflow
Title: Automated HTS Run Validation and QC Loop
This application note details the implementation of automated continuous perfusion within microfluidic High-Throughput Screening (HTS) platforms. It directly supports the core thesis that integrated, automated fluid control systems are essential for generating physiologically relevant, high-quality data in advanced cell-based assays. The protocols and data herein demonstrate the critical advantage of maintaining cellular homeostasis and enabling real-time secretome analysis over static or bolus-feed methods.
The Continuous Perfusion Advantage: Key Quantitative Outcomes
Automated perfusion systems provide precise control over the cellular microenvironment. The summarized data below quantifies the impact on common cell culture parameters compared to static cultures.
Table 1: Impact of Continuous Perfusion on Cell Culture Metrics
| Metric | Static Culture | Continuous Perfusion | Observed Improvement / Change |
|---|---|---|---|
| Glucose Level Stability | Depletes by >60% over 24h | Maintained within ±10% of setpoint | Prevents nutrient starvation & metabolic stress. |
| Lactate Accumulation | Increases by ~8 mM in 24h | Maintained below 2 mM | Reduces waste product inhibition & pH drift. |
| Cell Viability (Day 5) | 70-80% | 92-98% | Enhanced long-term culture health. |
| Protein Secretion Rate | Highly variable, pulsatile | Consistent, stable output | Enables accurate kinetic studies & biomarker detection. |
| Oxygen Concentration | Hypoxic core in 3D spheroids | Uniform, physiologically relevant levels | Improves model fidelity for tissues & tumoroids. |
Core Protocol: Establishing a Perfused Microfluidic HTS Assay
Protocol Title: Automated Perfusion Culture of 3D Tumor Spheroids for Real-Time Cytokine Secretion Analysis.
Objective: To maintain HepG2 spheroids under homeostatic conditions and collect time-resolved supernatant for IL-8 secretion profiling using an integrated automated fluid handling system.
Key Research Reagent Solutions & Materials:
| Item | Function / Rationale |
|---|---|
| Microfluidic Spheroid Chip (e.g., 64-trap array) | Provides physical scaffold for 3D cell aggregation and controlled perfusion flow paths. |
| Programmable, Multi-Channel Syringe Pump | The core automation component. Enables precise, continuous medium infusion and waste withdrawal at user-defined flow rates (e.g., 0.1-1 µL/min). |
| On-chip Bubble Trap | Critical for removing bubbles from perfusion lines, which can block microchannels and cause cell death. |
| Low-protein-binding Tubing & Connectors | Minimizes analyte loss (e.g., cytokines, drugs) due to adhesion to fluidic path surfaces. |
| Live-Cell Imaging Incubation Lid | Maintains 37°C, 5% CO₂ while allowing continuous optical monitoring of spheroid morphology. |
| High-Sensitivity ELISA or MSD Assay Plates | For quantifying low-abundance secreted analytes from the small-volume, diluted perfusate. |
Methodology:
- Spheroid Loading: Inoculate HepG2 cells into the chip's loading ports at 500 cells/trap. Centrifuge briefly (500 rpm, 2 min) to seat cells into traps.
- Static Phase (48h): Place chip in stage-top incubator. Allow spheroids to form without flow.
- Perfusion System Priming & Startup:
- Prime all perfusion lines with complete medium using a high flow rate (5 µL/min) to purge bubbles.
- Connect the chip's inlet to the pump's medium reservoir and the outlet to a cooled (4°C) fraction collector or analysis plate.
- Initiate perfusion at 0.5 µL/hour/spheroid.
- Automated Perfusion & Sampling: Program the fluid control system for:
- Continuous perfusion.
- Scheduled outlet collection (e.g., 6-hour intervals into a 96-well plate).
- Optional automated medium switches (e.g., introduce drug candidate at Day 3).
- Endpoint Analysis: At assay conclusion (e.g., Day 7), perform:
- Live/Dead staining directly on-chip.
- Collect spheroids for RNA/DNA analysis.
- Analyze collected fractions for target analytes.
Visualizing the Integrated Workflow and Signaling Interrogation
Title: Automated Perfusion HTS Workflow
Title: Inflammation Signaling Under Perfusion
Within the framework of a thesis on automated fluid control systems for microfluidic high-throughput screening (HTS), this application note details integrated protocols for compound screening and dose-response analysis. Automated microfluidic platforms enable precise nanoliter-scale reagent handling, rapid mixing, and real-time cell response monitoring, dramatically increasing throughput and data quality while reducing reagent consumption.
Key Protocols
Protocol 2.1: Microfluidic HTS Compound Screening Workflow
Objective: To screen a library of 10,000 compounds for initial bioactivity against a target cancer cell line (e.g., HeLa) using an automated microfluidic array. Materials: See "Scientist's Toolkit" section. Methodology:
- Chip Priming: Mount a 2560-nanowell microfluidic chip (e.g., Fluidigm IFC) on the automated controller. Prime all channels and inlets with cell culture medium using a negative pressure protocol.
- Cell Loading: Introduce a suspension of HeLa cells (density: 2,000 cells/µL) into the cell inlet. Use integrated peristaltic pumps to distribute ~50 nL/cell suspension into each nanowells. Allow cells to adhere for 4 hours at 37°C, 5% CO₂.
- Compound Library Introduction: Dilute the DMSO-based compound library to 1 mM in assay buffer. Using the system's integrated nanoliter injectors, transfer 10 nL of each compound to designated nanowells, achieving a final test concentration of 10 µM. Include controls (DMSO only, Staurosporine 10 µM as positive control for cytotoxicity).
- Incubation & Staining: Incubate for 48 hours. Automatically introduce a live/dead viability stain (Calcein-AM/Propidium Iodide) via the staining inlets.
- Imaging & Analysis: Perform high-content imaging using an on-platform epifluorescence microscope. Automated image analysis software quantifies live (green) and dead (red) cells in each well.
- Hit Selection: Compounds showing >70% inhibition of cell viability relative to DMSO controls are designated as "primary hits."
Protocol 2.2: Microfluidic Dose-Response Profiling
Objective: To generate 10-point dose-response curves for primary hits using logarithmic serial dilution on-chip. Methodology:
- On-Chip Serial Dilution: For each primary hit, prepare a 10 mM stock in DMSO. The automated system uses a cascade-mixer circuit to perform 1:3 serial dilutions directly on-chip, creating ten concentrations from 30 µM to 0.5 nM in assay buffer.
- Parallelized Assay: Each concentration is tested in a dedicated microchannel with 8 replicate nanowells containing cells. The system runs 8 compounds in parallel per chip.
- Real-Time Kinetic Readout: For targets like GPCRs, use cells expressing a fluorescent biosensor (e.g., cAMP FRET). The microfluidic system perfuses compounds while the microscope takes FRET ratio images every 30 seconds for 1 hour.
- Data Fitting: Normalize response data (e.g., viability, FRET ratio) and fit to a four-parameter logistic model using software (e.g., GraphPad Prism) to calculate IC₅₀/EC₅₀ values.
Data Presentation
Table 1: Performance Metrics of Automated Microfluidic HTS vs. Traditional 384-Well
| Parameter | Traditional 384-Well | Automated Microfluidic HTS |
|---|---|---|
| Assay Volume | 50 µL | 60 nL |
| Reagent Cost per Test | $1.20 | $0.02 |
| Cells per Test | 10,000 | 200 |
| Throughput (Tests/Day) | 50,000 | 150,000 |
| Z'-Factor (Viability Assay) | 0.6 ± 0.1 | 0.8 ± 0.05 |
| Data Variability (CV) | 15-20% | 5-8% |
Table 2: Sample Dose-Response Data for Candidate Compound X
| Concentration (log M) | Normalized Response (%) | SEM (n=8) |
|---|---|---|
| -11.0 (0.01 nM) | 98.5 | 1.2 |
| -10.5 | 97.8 | 1.5 |
| -10.0 (1 nM) | 95.2 | 1.8 |
| -9.5 | 85.4 | 2.1 |
| -9.0 (1 µM) | 52.3 | 3.0 |
| -8.5 | 25.1 | 2.5 |
| -8.0 (100 µM) | 10.5 | 1.9 |
| IC₅₀ | 1.2 µM | 95% CI: 1.0-1.4 µM |
Visualizations
Title: HTS and Dose-Response Workflow
Title: GPCR-cAMP-PKA Signaling Pathway for HTS
The Scientist's Toolkit
Table 3: Essential Research Reagent Solutions for Microfluidic HTS
| Item | Function | Example Product/Brand |
|---|---|---|
| PDMS Microfluidic Chip | Contains network of channels/nanowells for cell culture & assay. | Fluidigm IFC, Dolomite Chips |
| Fluid Handling Controller | Automated system for precise pressure/vacuum-driven fluid control. | Fluigent LINEUP, Elveflow OB1 |
| Viability Stain Kit | Live/dead fluorescence differential for cytotoxicity screening. | Thermo Fisher Live/Dead Cell Imaging Kit |
| FRET-based Biosensor | Genetically encoded reporter for real-time signaling kinetics. | cAMP EPAC-FRET sensor (TeSR) |
| ECM Coating Solution | Coats microchannels to promote cell adhesion. | Corning Matrigel |
| Nanoliter-Scale Compound Library | Pre-plated compounds in DMSO compatible with microfluidic injection. | Selleckchem Microformat Library |
| Cell-Compatible Perfusion Medium | Low-evaporation medium for prolonged on-chip culture. | Gibco Phenol-Free CO₂ Independent Medium |
| Data Analysis Suite | Software for HCS image analysis & curve fitting. | PerkinElmer Harmony, GraphPad Prism |
1. Introduction Within the thesis framework of automated fluid control systems for microfluidic High-Throughput Screening (HTS), the integration of droplet-based microfluidics represents a paradigm shift. This application note details the implementation of automated systems for generating, manipulating, and incubating picoliter-to-nanoliter droplets, enabling ultra-high-throughput single-cell analysis, directed evolution, and combinatorial chemistry.
2. Key Quantitative Parameters and Performance Data
Table 1: Droplet Generation System Performance Metrics
| Parameter | Typical Range | Optimal Value (for cell encapsulation) | Notes |
|---|---|---|---|
| Droplet Generation Rate | 100 Hz - 10 kHz | 1-2 kHz | Stable for >6 hours in automated systems. |
| Droplet Volume | 1 pL - 10 nL | ~100 pL (10 µm diameter) | CV < 2% with pressure-driven pumps. |
| Aqueous:Oil Flow Rate Ratio (Qaq:Qoil) | 1:3 to 1:10 | 1:5 | Determines droplet size and spacing. |
| Encapsulation Efficiency (Poisson) | λ ~0.1 - 1.0 | λ = 0.1 (90% empty) | For single-cell assays, λ=0.1 minimizes doublets. |
| Sorting Purity (FADS) | 85% - 99% | >95% | Depends on detection sensitivity and delay calibration. |
| Incubation Stability | >48 hours | 24-48 hours | With 5-10% surfactant (e.g., PFPE-PEG) in carrier oil. |
| Temperature Control (On-chip) | 4°C - 95°C | 37°C (±0.1°C) | Integrated Peltier elements with PID feedback. |
Table 2: Comparison of Actuation Methods for Automated Fluid Control
| Method | Precision (CV) | Responsiveness | Suitability for Droplet Gen. | Suitability for Sorting |
|---|---|---|---|---|
| Syringe Pump (Positive displacement) | < 0.5% | Slow (seconds) | Excellent for stable gen. | Not suitable |
| Pressure-Driven (Regulated) | 1-2% | Fast (milliseconds) | Excellent for rapid tuning | Good (for generation) |
| Dielectrophoresis (DEP) | N/A | Very Fast (µs) | Not used for gen. | Excellent for sorting (> kHz) |
| Piezoelectric Actuator | N/A | Very Fast (µs) | Good for jetting | Excellent for sorting (> 10 kHz) |
3. Detailed Experimental Protocols
Protocol 3.1: Automated High-Throughput Single-Cell Secretion Assay Objective: To encapsulate single cells with antibody-coated beads and fluorescent detection reagents to screen for secreted protein factors after incubation.
Materials: See "Scientist's Toolkit" (Section 5). Automated System Setup:
- Connect all fluidic lines (aqueous inlets: cell suspension, bead suspension, assay buffer; oil inlet) to electronically regulated pressure pumps.
- Prime lines with respective fluids, ensuring no bubbles at the microfluidic chip (PDMS) inlets.
- Mount chip on an automated microscope stage with integrated fluorescent detection and a piezoelectric sorting actuator.
Procedure:
- Droplet Generation:
- Set pressure regulators: Aqueous phases (Paq) = 120 mbar, Oil phase (Poil) = 200 mbar.
- Activate flows. Monitor droplet formation at the flow-focusing junction. Adjust Poil/Paq ratio to achieve target diameter (e.g., 40 µm).
- Confirm droplet monodispersity (CV < 3%) via high-speed imaging.
Encapsulation & Incubation:
- Replace assay buffer line with cell suspension (1 x 10⁶ cells/mL). Poisson statistics (λ=0.1) predict ~10% droplet occupancy.
- Collect droplets in a PCR tube or on-chip incubation chamber.
- Transfer to an automated thermal cycler or on-chip heater. Incubate at 37°C for 6-18 hours.
Detection & Sorting:
- Re-inject incubated droplets into a sorting chip.
- Set detection trigger: Fluorescence threshold > 3x standard deviation of negative control (beads only) droplets.
- Calibrate time delay between detection and sorting actuator (piezoelectric).
- Sort positive droplets at ~500 Hz into a 96-well collection plate prefilled with breaking buffer.
Analysis:
- Break sorted droplets using a perfluorinated alcohol.
- Recover beads/cells for NGS or clonal expansion.
Protocol 3.2: On-Chip Droplet Incubation and Time-Course Imaging Objective: To monitor droplet contents dynamically over time within an automated environmental chamber.
- Generate droplets containing the reaction mix (e.g., enzyme + substrate).
- Direct droplets into a long, serpentine incubation channel (2 m equivalent length) on-chip.
- Maintain constant temperature using an integrated resistive heater and PID controller (37°C ± 0.2°C).
- Program an automated microscope to capture images at the channel inlet, midpoint, and outlet (corresponding to specific incubation times: e.g., 0, 30, 60 min).
- Use real-time image analysis software to quantify fluorescence intensity per droplet over time.
4. System Workflow and Signaling Pathways
Automated Droplet Sorting Control Loop
Secreted Protein Detection Pathway in Droplet
5. The Scientist's Toolkit: Essential Research Reagent Solutions
| Item | Function & Critical Feature |
|---|---|
| Fluorinated Oil (e.g., HFE 7500) | Carrier oil phase. Low viscosity, high oxygen permeability, biocompatible. |
| PFPE-PEG Surfactant (2-5% w/w) | Stabilizes droplets against coalescence during generation and incubation. |
| PDMS Microfluidic Chips | Contains flow-focusing geometry for generation and sorting junctions. |
| Pressure-Driven Fluid Controller | Provides stable, pulsation-free flow rates for generation. |
| High-Speed Camera (> 1000 fps) | For monitoring droplet generation stability and size distribution. |
| Pico-Surf or similar | Ready-to-use surfactant/oil mixtures for specific biological applications. |
| Droplet Generation Oil (Bio-Rad/Qiagen) | Optimized oil-surfactant blends for ddPCR and related techniques. |
| PCR Reagents for ddPCR | Master mixes designed for partition-based digital PCR within droplets. |
| Single-Cell Lysis Buffer | Compatible with surfactant system, releases RNA/DNA without breaking droplets. |
| Droplet Break Buffer (1H,1H,2H,2H-Perfluoro-1-octanol) | Breaks water-in-fluorocarbon oil emulsion for sample recovery. |
Best Practices for Developing Robust and Repeatable Automated Protocols
Introduction Within the framework of automated fluid control systems for microfluidic high-throughput screening (HTS), protocol robustness and repeatability are paramount. These systems enable the precise manipulation of picoliter-to-nanoliter volumes for applications in combinatorial drug screening, single-cell analysis, and organ-on-a-chip assays. This document outlines essential practices and provides detailed protocols to ensure data integrity and operational reliability in microfluidic HTS research.
1. Foundational Principles for Robust Automation
1.1. System Calibration and Validation Consistent performance requires regular calibration of all system components. Quantitative validation data should be recorded before each major experimental campaign.
Table 1: Key Calibration Metrics for Automated Fluidic Systems
| Component | Parameter | Target Tolerance | Validation Frequency |
|---|---|---|---|
| Positive Displacement Pumps | Volume Dispensing Accuracy | ± 2% of set volume | Daily / Per campaign |
| Solenoid Valves | Actuation Response Time | < 10 ms | Weekly |
| Microfluidic Chip Manifold | Intra-well Volume CV | < 5% | Per chip batch |
| Environmental Controller | Temperature Stability | ± 0.5 °C | Continuous logging |
| Imaging System | Pixel Intensity Linearity (R²) | > 0.995 | Monthly |
1.2. Protocol Modularization and Documentation Automated protocols should be constructed from discrete, validated modules (e.g., "prime line," "aspirate cell suspension," "dispense to waste"). Each module must have explicit documentation of its parameters, failure modes, and recovery steps.
2. Detailed Experimental Protocols
2.1. Protocol A: Automated Viability Assay on a Microfluidic Plate This protocol details an automated cell viability screen using a fluorescent live/dead stain on a 96-channel microfluidic device.
Materials & Reagent Solutions
- Microfluidic HTS Device: 96 independent culture chambers (e.g., Cellarium HT plate).
- Automated Fluid Handling System: Integrated pump-valve manifold with temperature control.
- Reagent Reservoir Kit: Sterile, sealed reservoirs for waste, buffer, and compounds.
- Live/Dead Stain Solution: Prepared from commercial viability/cytotoxicity kit (e.g., Calcein AM / Ethidium homodimer-1).
- Cell Culture Medium: Phenol-red-free medium compatible with fluorescence assays.
- Positive Control Solution: 0.1% Triton X-100 in medium for 100% cytotoxicity.
Methodology
- System Priming: Execute the
system_prime_all_linesmodule with sterile PBS at 50 µL/min to purge air and wet all fluidic paths. - Cell Loading:
- Aspirate cell suspension (HeLa, 1x10⁶ cells/mL) from Reservoir 1.
- For each of the 96 channels, dispense 200 nL into the inlet port. Activate the chip's pneumatic sequestration valves to trap cells in individual chambers.
- Allow cells to adhere for 4 hours under controlled flow (0.5 µL/hr of medium).
- Compound Treatment:
- Using pre-diluted stocks in Reservoirs 2-11, execute a
compound_transfermodule to perfuse each channel with a unique test compound for 18 hours.
- Using pre-diluted stocks in Reservoirs 2-11, execute a
- Viability Staining:
- Stop compound flow. Perfuse all channels with 1X Live/Dead stain solution for 25 minutes in the dark (executed by turning off plate reader lights).
- Wash with 5 chamber volumes of fresh, pre-warmed medium.
- Endpoint Imaging & Analysis:
- Initiate the
automated_imagingmodule. Acquire fluorescence images (Calcein: 494/517 nm; EthD-1: 528/617 nm) for each chamber. - Automated image analysis software quantifies live and dead cell counts per chamber.
- Initiate the
2.2. Protocol B: Sequential Drug Addition for Combination Screening This protocol enables complex temporal dosing regimens to study synergistic drug effects.
Methodology
- Establish Baseline: Load target cells (primary hepatocytes) and perfuse with medium for 12 hours. Acquire baseline bright-field images.
- First Drug Addition: Perfuse Drug A (from Reservoir A) at IC₂₀ concentration for 6 hours across all test channels.
- Wash Cycle: Execute
high_flow_wash(10x chamber volume) with drug-free medium for 15 minutes to remove unbound Drug A. - Second Drug Addition: Immediately initiate perfusion with Drug B (from Reservoir B) at a gradient of concentrations (using an on-chip serial dilutor) for an additional 18 hours.
- Viability Readout: Perform Protocol A, steps 4-5.
3. The Scientist's Toolkit: Essential Research Reagent Solutions
Table 2: Key Reagents for Microfluidic HTS Assays
| Reagent / Material | Function in Protocol | Critical Specification |
|---|---|---|
| Fluorinated Ethylene Propylene (FEP) Tubing | Fluid conveyance from reservoirs to chip. | Low protein binding, high chemical resistance. |
| PDMS-free, Chemically Inert Microfluidic Plates | Cell culture and assay vessel. | Avoids small molecule absorption; enables high-content imaging. |
| Pluronic F-127 Passivation Solution | Pre-treatment of fluidic paths. | Minimizes nonspecific cell and protein adhesion. |
| Liquid Detection Sensors | Integrated at key reservoir and waste points. | Prevents pump dry-run and detects occlusions via pressure rise. |
| Ready-to-Use Assay Kit (Lyophilized in plate) | e.g., CellTiter-Glo 3D for 3D microtumors. | Enables direct, in-situ lysis and luminescent readout without fluidic transfer. |
4. Visualization of Workflows and Systems
Title: Automated Sequential Drug Screening Workflow
Title: System Architecture for Automated Microfluidic HTS
Solving the Flow: Troubleshooting Common Issues and Optimizing System Performance
Diagnosing and Resolving Bubble Formation and Occlusion Events
Within automated fluid control systems for microfluidic High-Throughput Screening (HTS), precision and reliability are paramount. Bubble formation and channel occlusions represent two of the most critical failure modes, leading to data corruption, device damage, and significant experimental downtime. These events disrupt laminar flow, alter shear stresses, and compromise the controlled delivery of reagents or cells, directly impacting the validity of screening results in drug development. This document provides application notes and standardized protocols for diagnosing, mitigating, and resolving these events to ensure system integrity and data fidelity.
Table 1: Common Sources and Contributing Factors of Bubbles & Occlusions
| Factor Category | Specific Cause | Typical Scale/Measurement | Primary Impact |
|---|---|---|---|
| Degassing | Saturated buffers at room temp warmed on-chip. | Gas saturation >80% can lead to nucleation. | Bubble growth (>50 µm dia.) at channel expansions or hydrophobic patches. |
| Interfacing | Poor seal between tubing and chip inlet. | Leak rate >0.5 µL/min under pressure. | Air ingress, unpredictable bubble introduction. |
| Surface Chemistry | Channel hydrophobicity post-fabrication. | Contact Angle >90° promotes gas nucleation. | Adhered bubbles causing persistent flow resistance. |
| Particulate Contamination | Aggregated proteins or cell clumps in reagents. | Particles >5% of channel width (e.g., >5 µm in 100 µm channel). | Partial or complete channel blockage, increased upstream pressure. |
| Fluid Switching | Rapid valve actuation with high compliance tubing. | Pressure spikes >10% of setpoint during valve switch. | Transient cavitation and bubble formation. |
Table 2: Diagnostic Signatures from Pressure & Flow Sensors
| Anomaly Type | Upstream Pressure Signature | Flow Rate Signature (vs. Setpoint) | Optical Inspection (Microscope) |
|---|---|---|---|
| Stationary Bubble | Sustained increase (e.g., +20-50%) | Sustained decrease (e.g., -30-70%) | Refractive meniscus visible, stationary. |
| Growing Bubble | Gradual, continuous increase. | Gradual, continuous decrease. | Bubble interface expanding over seconds/minutes. |
| Partial Occlusion | Increased noise/fluctuation. | Erratic or oscillatory flow. | Visible debris, flow perturbation around object. |
| Complete Occlusion | Rapid rise to pressure limit. | Flow drops to near zero. | Channel appears blocked, no particle movement. |
Experimental Protocols
Protocol 1: Proactive System Priming and Degassing
Objective: To prepare fluids and the microfluidic system to minimize bubble nucleation. Materials: See "Scientist's Toolkit" (Section 6). Procedure:
- Fluid Preparation: Degas all aqueous buffers for at least 30 minutes using a vacuum degasser (target: ≤30% saturation). Store degassed fluids in sealed, low-gas-permeability bottles.
- System Priming: Use a high-wetting prime solution (e.g., 0.1% v/v Tween 20 in DI water, filtered at 0.2 µm).
- Disconnect the chip.
- Flush all lines and valves with prime solution at a low flow rate (10 µL/min) for 5 minutes.
- Increase flow rate to 100 µL/min for 1 minute to purge any trapped air.
- Connect the chip and prime channels with the same solution, ensuring outlet waste is flowing.
- Buffer Switching: Switch to your degassed experimental buffers. Use a gradual ramp in flow rate (over 10-15 seconds) when starting flow or changing rates to prevent inertial effects.
Protocol 2: Real-Time Diagnosis via Pressure Monitoring
Objective: To identify and classify bubble/occlusion events using inline pressure sensor data. Materials: Automated fluidic system with upstream pressure sensor, data logger. Procedure:
- Establish Baseline: Under stable flow conditions, record the mean upstream pressure (P_baseline) and standard deviation (σ) for at least 60 seconds.
- Set Alert Thresholds: Configure software alerts for:
- Bubble/Occlusion Alert: Pressure > P_baseline + 5σ for > 2 seconds.
- Critical Occlusion Alert: Pressure > 80% of system maximum safe pressure.
- Event Classification: When an alert triggers:
- Check Flow Rate: If flow is near zero, suspect complete occlusion (Protocol 3).
- If flow is reduced but non-zero: Pause flow and immediately inspect the chip under a microscope. Locate the bubble/occlusion.
- Document: Record the location, size, and pressure profile for future reference.
Protocol 3: Mitigation and Resolution Procedures
Objective: To clear identified bubbles or occlusions and restore normal operation. A. For a Stationary Bubble:
- Reverse Flow Pulse: Immediately stop forward flow.
- Apply a short (1-2 second), low-pressure pulse of reverse flow (10-30% of forward pressure). Caution: Do not reverse biohazardous or contaminating solutions into clean lines.
- Resume forward flow slowly. If the bubble clears, monitor pressure for stability.
- If unsuccessful, proceed to Increased Backpressure Method: Slightly increase the pressure at the system outlet (waste reservoir) by 5-10 kPa to compress the bubble and encourage dissolution.
B. For a Solid Occlusion:
- Pause and Inspect: Determine if the occlusion is movable (cell clump) or fixed (debris at fabrication defect).
- For movable occlusions:
- Apply a series of high-flow-rate pulses (150-200% of operational flow) in forward direction for 0.5 seconds each, separated by 1-second pauses. This can increase shear force to dislodge the clog.
- As a last resort, apply a single, brief reverse flow pulse (as in A.2) to move the occlusion to a larger reservoir.
- For fixed occlusions or if above fails: The run must be aborted. Systematically flush the chip and lines with a strong cleaning solution (e.g., 1M NaOH, 10% Hellmanex) following material compatibility guidelines.
Visualization: Experimental Workflow for Diagnosis & Resolution
Title: Workflow for Diagnosing and Resolving Fluidic Failures
The Scientist's Toolkit: Essential Research Reagent Solutions
Table 3: Key Materials for Bubble & Occlusion Management
| Item Name | Function/Application | Key Consideration |
|---|---|---|
| Vacuum Degasser | Removes dissolved gases from buffers to prevent nucleation. | Essential for cell culture media and warm buffers. |
| 0.1 µm or 0.2 µm Sterile Filters | Removes particulate matter from all reagents prior to loading. | Prevents particulate occlusions; use low protein-binding filters for sensitive reagents. |
| Non-Ionic Surfactant (e.g., Tween 20, Pluronic F-127) | Added to prime solutions (0.01-0.1%) to reduce surface tension and wet channels. | Biocompatible concentration must be validated for each assay. |
| Inline Pressure Sensors (Upstream) | Provides real-time diagnostic data for early event detection. | Must have appropriate pressure range and be chemically compatible. |
| Programmable Valve Controller | Enables automated execution of reverse flow or high-flow pulse mitigation protocols. | Low dead-volume switching minimizes pressure spikes. |
| Channel Cleaning Solution (e.g., 1% Hellmanex, 1M NaOH) | For post-failure system cleanout to remove biological or chemical residues. | Verify chemical compatibility with all wetted materials (chip, tubing, seals). |
Minimizing Dead Volumes and Cross-Contamination in Multiplexed Systems
Within the broader thesis on automated fluid control systems for high-throughput screening (HTS) microfluidic research, the optimization of fluidic pathways is paramount. This application note addresses two critical, interconnected challenges: dead volume minimization and cross-contamination mitigation. Dead volumes, the stagnant fluid pockets within a system, dilute samples, increase reagent costs, and carryover between assays. In multiplexed systems, this directly translates to cross-contamination, compromising data integrity in sensitive applications like drug discovery and molecular diagnostics. This document provides detailed protocols and design principles for researchers and development professionals to enhance the reliability of their microfluidic HTS platforms.
The following tables summarize key quantitative findings from recent literature and commercial system specifications relevant to minimizing dead volumes and cross-contamination.
Table 1: Impact of Dead Volume on Assay Parameters
| Parameter | High Dead Volume System (> 1 µL) | Optimized Low Dead Volume System (< 100 nL) | Reference/Note |
|---|---|---|---|
| Sample Dilution Factor | Can exceed 10% | Typically < 1% | Critical for low-concentration analytes |
| Reagent Consumption per Test | 5-10 µL | 50-200 nL | Direct cost implication for expensive reagents |
| Inter-sample Carryover | > 0.1% | < 0.001% | Measured via fluorescence spike experiments |
| Fluidic System Response Time | 100-500 ms | 10-50 ms | Impacts speed of gradient generation & valve switching |
Table 2: Comparison of Contamination Mitigation Strategies
| Strategy | Principle | Estimated Reduction in Carryover | Key Limitation |
|---|---|---|---|
| Passive Wash (Bulk Solvent Flush) | Flushing common lines with a wash buffer between samples. | 90-99% | High wash volume consumption; ineffective for adsorbed biomolecules. |
| Active Segmentation (Air Gaps) | Using immiscible spacers (air, oil) to separate sample plugs. | 99-99.9% | Requires precise droplet/plug control; can increase complexity. |
| Disposable/Replaceable Fluidic Paths | Using single-use capillaries, connectors, or cartridges. | ~100% | Per-test cost increases; not always environmentally sustainable. |
| Active Wash with Competitive Elution | Flushing with a solution containing a competitive binding agent (e.g., BSA, detergents). | 99.9-99.99% | Requires additional optimization of elution buffer chemistry. |
Experimental Protocols
Protocol 1: Quantitative Measurement of System Dead Volume
Objective: To accurately measure the total dead volume between the sample injection point and the detection point in a microfluidic manifold. Materials: Fluorescent dye (e.g., 10 µM Fluorescein), Buffer (1x PBS, pH 7.4), Microfluidic system with injection valve and detector, Micropipettes, Data acquisition software. Procedure:
- System Priming: Thoroughly prime the entire fluidic path with buffer. Ensure no air bubbles are present.
- Baseline Establishment: Flow buffer at the standard operational flow rate (e.g., 10 µL/min) until a stable baseline signal is recorded at the detector (fluorescence or absorbance).
- Dye Injection: Using the injection valve, rapidly switch a known, small volume (V_inject, e.g., 50 nL) of fluorescent dye into the buffer stream.
- Data Recording: Continuously record the detector output as the dye plug passes through. Capture the entire peak until the signal returns to baseline.
- Data Analysis: Calculate the dead volume (Vdead) by integrating the area under the peak (Apeak) and comparing it to the area from a direct injection of the dye into a vial with known path length. Use the formula: Vdead = (Apeak * Vinject) / Adirect - Vinject. Alternatively, calculate from the mean transit time (Δt) of the peak: Vdead = Flow Rate * Δt.
Protocol 2: Assessing Cross-Contamination via Serial Sample Processing
Objective: To empirically determine carryover between consecutive samples in a multiplexed assay run. Materials: Two distinct sample solutions (Sample A: High-concentration fluorescent tracer, e.g., 1 µM Cy5; Sample B: Buffer only), Wash buffer, Microfluidic multiplexer system. Procedure:
- Initial System Clean: Perform an extensive wash procedure until no background signal is detected.
- Run High-Concentration Sample: Process Sample A through the complete assay workflow (e.g., mixing, incubation, detection). Record the maximum signal output (Signal_A).
- Execute Standard Wash: Perform the system's standard between-sample wash protocol (e.g., flush with 3x system volume of wash buffer).
- Run Blank Sample: Immediately process Sample B (buffer blank) through the identical workflow. Record the maximum signal output (SignalBblank).
- Calculate Carryover: Percentage Carryover = (SignalBblank / Signal_A) * 100%.
- Iterate & Optimize: Repeat steps 1-5, modifying wash volume, wash buffer composition (e.g., adding 0.1% Tween-20), or incorporating air gaps. Compare carryover percentages to identify the optimal protocol.
Visualization: System Design & Workflow
Diagram Title: Microfluidic HTS Manifold with Risk Zones
Diagram Title: Contamination-Aware Wash Protocol Logic
The Scientist's Toolkit: Essential Research Reagent Solutions
Table 3: Key Reagents & Materials for Dead Volume and Contamination Control
| Item | Function in Context | Key Consideration |
|---|---|---|
| Chemically Inert, Low-Volume Tubing (e.g., PEEKsil, FEP) | Forms capillary connections with minimal internal diameter (e.g., 50-100 µm) to reduce dead volume and prevent analyte adsorption. | Balance between pressure rating and flexibility. |
| Nanopositioning Valves (Rotary or Diaphragm) | Enable switching between multiple fluid sources with very low internal volume (<< 100 nL) and minimal cross-port leakage. | Actuation speed and durability for >1 million cycles. |
| Positive Displacement Syringe Pumps | Provide precise, pulseless fluid movement without backflow, essential for accurate volume dispensing and air gap injection. | Ensure compatibility with all solvents/buffers used. |
| Surface Passivation Solutions (e.g., PEG-silane, Pluronic F-127) | Coat internal surfaces to minimize nonspecific binding of proteins or DNA, reducing carryover from adsorption. | Stability of passivation layer under assay conditions. |
| Dynamic Wash Buffers (e.g., with BSA, Tween-20) | Actively displace and elute adsorbed molecules from the fluidic path during between-sample wash steps. | Must not interfere with downstream assays or detection. |
| Immiscible Spacer Fluids (e.g., Fluorinated Oils, Air) | Create physical barriers between sample plugs in droplet or segmented flow systems to prevent diffusion-based carryover. | Compatibility with system materials and detection methods. |
| High-Sensitivity, Low-Flow-Rate Detectors (e.g., Nano-UV Cell, Z-shaped Flow Cell) | Enable accurate detection from ultra-low-volume samples without requiring large post-mixing volumes. | Minimize detector cell volume to maintain plug integrity. |
Calibration Strategies for Precise Volumetric Dispensing and Flow Rate Control
Application Notes
Within the context of automated fluid control systems for microfluidic High-Throughput Screening (HTS) research, achieving precise and reproducible liquid handling is non-negotiable. This document outlines critical calibration strategies for volumetric dispensing and flow rate control, focusing on methods that ensure data integrity in drug development workflows.
The Necessity of Calibration in Microfluidic HTS
Automated fluid control systems, encompassing syringe pumps, pressure controllers, and positive displacement dispensers, are subject to performance drift due to factors like tubing compliance, fluid viscosity, surface chemistry, and component wear. For microfluidic assays where reagent volumes are in the nanoliter to microliter range and flow rates are µL/min, even minor deviations can invalidate screening results. Systematic calibration directly correlates commanded parameters with actual fluidic output, forming the bedrock of quantitative biology and chemistry.
Core Calibration Methodologies
Gravimetric Calibration for Volumetric Dispensing
This is the gold-standard method for verifying dispensed volume accuracy. It involves weighing the mass of liquid dispensed and converting it to volume using the fluid's temperature-dependent density.
Key Considerations:
- Environmental Control: Measurements must be performed in a controlled environment to minimize evaporation and thermal drift.
- Balance Specifications: Use an analytical balance with a resolution at least 100x finer than the smallest dispensed mass (e.g., 0.01 mg resolution for 1 µL of water).
- Fluid Properties: Calibration must be performed with the exact fluid used in the assay or a viscosity-matched surrogate.
Photometric Calibration for Nanoliter Dispensing
For very low volumes (< 100 nL) where gravimetric methods reach their limit, photometric methods using a dye solution (e.g., tartrazine) are employed. The absorbance of a dispensed and diluted dye droplet is measured via a plate reader and compared to a standard curve to determine the actual dispensed volume.
Dynamic Flow Rate Calibration using Microfluidic Sensors
Real-time flow sensor calibration is critical for perfusion or gradient-generation applications. In-line or in-situ sensors (e.g., microfluidic thermal flow sensors, resistive pulse sensors) provide feedback but require calibration against a primary standard, often a gravimetric method or a syringe pump operated in withdrawal mode.
Data Presentation: Calibration Performance Metrics
Table 1 summarizes typical performance metrics and calibration outcomes for common fluid control modalities in HTS.
Table 1: Performance Metrics of Calibrated Fluid Control Systems
| System Component | Calibration Method | Target Volume/Rate | Typical CV (%) Post-Calibration | Key Influencing Factor |
|---|---|---|---|---|
| Positive Displacement Pipette (1 µL) | Gravimetric (H₂O) | 1.0 µL | < 2.0% | Tip wetting, fluid viscosity |
| Syringe Pump (Infusion) | Gravimetric (PBS) | 10 µL/min | < 1.5% | Syringe compliance, tubing ID |
| Pressure-Driven Dispenser | Gravimetric (DMSO) | 50 nL | < 5.0% | Nozzle geometry, fluid surface tension |
| Peristaltic Pump | Volumetric Collection (Duration) | 100 µL/min | < 3.0% | Tubing elasticity, pump head wear |
Experimental Protocols
Protocol 1: Gravimetric Calibration of an Automated Liquid Handler
Objective: To determine the accuracy and precision (CV) of a non-contact disposable tip dispenser across its volume range.
Materials:
- Automated liquid handler with dispensing module.
- Analytical balance (0.01 mg resolution), anti-static draft shield.
- Low-evaporation weighing vessels.
- Ultrapure water.
- Temperature and humidity logger.
Procedure:
- Environmental Equilibration: Allow system, balance, and water to acclimate to the controlled lab environment (e.g., 20-25°C, 40-60% RH) for ≥2 hours.
- Balance Preparation: Level and calibrate the balance. Place an empty weighing vessel on the balance, tare to zero.
- Dispensing and Measurement: a. Program the handler to dispense a target volume (e.g., 1 µL) into the tared vessel. b. Record the mass (m₁). c. Repeat dispensing for n = 10 replicates without taring between dispenses. Record cumulative mass after each dispense. d. Calculate the mass of each individual dispense (mᵢ = cumulative massᵢ - cumulative massᵢ₋₁).
- Data Analysis: a. Convert each mass to volume: Vᵢ = mᵢ / ρ, where ρ is the density of water at the recorded temperature (e.g., 0.9982 g/mL at 20°C). b. Calculate mean volume (V̄), accuracy (% deviation from target), and precision (Coefficient of Variation, CV%).
- Iteration: Repeat steps 3-4 for all critical volume setpoints (e.g., 0.1 µL, 0.5 µL, 5 µL, 10 µL).
Protocol 2: In-Line Flow Sensor Calibration for a Microfluidic Perfusion System
Objective: To generate a calibration curve for a microfluidic thermal flow sensor integrated into a cell culture chip.
Materials:
- Microfluidic HTS platform with integrated thermal flow sensor and pressure-driven pump.
- High-accuracy syringe pump (reference standard).
- Data acquisition system for sensor output (mV).
- Calibration fluid (cell culture medium).
- Waste collection vial.
Procedure:
- System Priming: Flush the entire fluidic path, including the sensor region, with calibration medium to remove air bubbles.
- Setup: Configure the reference syringe pump in withdrawal mode, connected to the waste outlet of the chip. This establishes a precise, known flow rate through the chip and sensor.
- Data Collection: a. Set the reference syringe pump to a specific flow rate (Qref), e.g., 5 µL/min. b. Allow the system to stabilize for 120 seconds. c. Record the average sensor output voltage (Vout) over a 60-second period. d. Repeat for a range of Q_ref values (e.g., 1, 2, 5, 10, 15, 20 µL/min).
- Calibration Curve: Plot Qref (y-axis) vs. Vout (x-axis). Perform linear (or polynomial) regression to obtain the calibration equation: Q = m × V_out + c.
- Validation: Use the platform's pressure pump to generate flows, use the sensor (with calibration equation) to measure the flow, and compare against a gravimetric check.
Mandatory Visualization
Title: Calibration Workflow for Fluid Control Systems
Title: Integrated Calibration in Automated HTS Fluidics
The Scientist's Toolkit: Essential Research Reagent Solutions
Table 2: Key Materials for Fluidic System Calibration
| Item | Function & Rationale |
|---|---|
| Analytical Balance (0.01 mg res.) | Primary instrument for gravimetric calibration. High resolution is critical for sub-microliter volume measurement. |
| Low-Evaporation Weighing Vessels | Minimizes fluid loss during gravimetric measurement, ensuring mass accuracy. |
| Certified Density Standards | Used to verify balance performance and for direct fluid density measurement if unknown. |
| Viscosity Standard Oils | For calibrating pumps and sensors across a range of viscosities mimicking different reagents. |
| Tartrazine or Fluorescein Dye Solution | Provides a uniform, quantifiable signal for photometric calibration of nanoliter dispensers. |
| Microfluidic Flow Sensor (Thermal) | Provides real-time flow rate feedback; requires calibration but enables dynamic control. |
| Precision Syringe Pump (Reference) | Serves as a transfer standard for calibrating other pumps or in-line sensors. |
| Degassed, Ultrapure Water | Standard calibration fluid for aqueous systems; degassing prevents bubble formation. |
| Dimethyl Sulfoxide (DMSO) | Essential calibration fluid for compound management systems, accounting for high viscosity and surface tension. |
| Temperature/Humidity Data Logger | Monitors environmental conditions during calibration, as they directly impact fluid properties and balance performance. |
Application Notes for Automated Microfluidic High-Throughput Screening (HTS) Systems
In automated fluid control systems for microfluidic HTS, software optimization is critical for assay reproducibility, throughput, and viability. This document details protocols for optimizing motion control parameters (acceleration, settling time) and implementing feedback loops to enhance the precision of nanoliter-scale fluid handling.
Key Parameters & Their Impact on Microfluidic Operations
Acceleration and Jerk
Rapid acceleration of syringe pumps or piezoelectric actuators is desirable for throughput but induces inertial fluid effects, leading to overshoot, droplet pinning, or cell shear stress. Optimal acceleration minimizes lag while maintaining laminar flow conditions.
Settling Time
Defined as the time required for a system (e.g., a valve state or pressure level) to stabilize within a defined error band after a commanded change. Insufficient settling time results in volumetric inaccuracy.
Feedback Loop Implementation
Closed-loop control using real-time sensor data (pressure, capacitive droplet detection, optical flow) corrects for system drift and environmental perturbations, essential for long-duration HTS campaigns.
Table 1: Impact of Acceleration Profile on Droplet Generation Consistency
| Acceleration Profile | Droplet CV (%) | Average Settling Time (ms) | Observed Shear Stress (Pa) |
|---|---|---|---|
| Linear (High) | 12.5 | 15 | 8.2 |
| Linear (Low) | 4.1 | 85 | 1.5 |
| S-Curve (Moderate) | 3.8 | 45 | 2.1 |
| S-Curve (Optimized) | 2.2 | 32 | 1.8 |
Table 2: Feedback Loop Performance Comparison for Pressure Control
| Control Method | Steady-State Error (%) | Response to Perturbation | Required Sampling Rate (Hz) |
|---|---|---|---|
| Open-Loop (Pre-calibr.) | 8.5 | Poor | N/A |
| Proportional (P) | 3.1 | Fair | 10 |
| Proportional-Integral (PI) | 1.2 | Good | 50 |
| PID with Filtering | 0.7 | Excellent | 100 |
Experimental Protocols
Protocol 4.1: Characterizing System Settling Time
Objective: Empirically determine the minimum settling time required after a flow rate change to achieve volumetric dispensing accuracy within ±2%. Materials: Microfluidic syringe pump, high-speed camera (≥1000 fps), fluorescence dye, PDMS chip with measurement chamber. Procedure:
- Program the pump to dispense a 100 nL bolus of dye solution at a target flow rate (e.g., 1 µL/s).
- Initiate flow and record using high-speed camera synchronized with pump command signal.
- Using image analysis software, plot meniscus position vs. time.
- Define the settling time as the point where the meniscus velocity enters and remains within a ±2% band of the target velocity.
- Repeat across operational flow rate range (0.1 - 10 µL/s) and for different acceleration parameters.
Protocol 4.2: Implementing a PID Feedback Loop for On-Chip Pressure Regulation
Objective: Stabilize pressure at a membrane valve using an integrated pressure sensor and software PID control. Materials: Pressure-based microfluidic controller, integrated pressure sensor (e.g., Honeywell ASDX), data acquisition (DAQ) card, control software (e.g., Python with PID library). Procedure:
- System Identification: Apply a step input in command voltage to the pressure regulator. Record the pressure sensor output to model the system's time constant and gain.
- Tune PID Gains: Using the Ziegler-Nichols or software-based auto-tuning method, establish preliminary Proportional (Kp), Integral (Ki), and Derivative (Kd) gains.
- Implement Control Loop: In software, set up a real-time loop: a. Read current pressure from DAQ card. b. Calculate error = Setpoint - Current Pressure. c. Compute PID output: Output = Kperror + Ki∫error dt + Kd*(dError/dt). d. Send output voltage to pressure regulator. e. Delay for the defined sampling interval (e.g., 10 ms).
- Validate Performance: Introduce a known disturbance (e.g., partial outlet blockage) and record pressure recovery time and overshoot. Adjust gains to minimize integral absolute error (IAE).
Visualizations
Title: Settling Time Determination Workflow
Title: PID Feedback Loop for Pressure Control
The Scientist's Toolkit: Key Research Reagent Solutions & Materials
Table 3: Essential Materials for Parameter Optimization Experiments
| Item | Function & Relevance to Optimization |
|---|---|
| Programmable Syringe Pump (e.g., Cetoni neMESYS) | Provides software-adjustable acceleration/jerk and settling time parameters; essential for testing motion profiles. |
| High-Speed CMOS Camera (e.g., Phantom Miro) | Enables visualization of fast meniscus movement and droplet formation for empirical settling time measurement. |
| Integrated Pressure Sensor (e.g., Elveflow OB1 MK3+) | Supplies real-time feedback data for closed-loop pressure or flow control implementation. |
| Microfluidic DAQ Card (e.g., National Instruments USB-6001) | Interfaces sensors and actuators with control software for custom feedback loop programming. |
| Viscosity Standard Fluids (e.g., NIST-traceable) | Used to characterize system performance across a range of physiologically relevant fluid properties. |
| PDMS Chip with Embedded Capacitive Sensors | Allows droplet detection and volume verification without optical methods, providing an alternative feedback signal. |
| Control Software Library (e.g., Python Simple-PID) | Provides robust, pre-written PID algorithm structures for rapid implementation and testing of control loops. |
Preventive Maintenance Schedules for Pumps, Valves, and Fluidic Paths
Application Notes In automated fluid control systems for microfluidic High-Throughput Screening (HTS), system integrity and precision are non-negotiable. The miniaturized scale amplifies the impact of particulate contamination, biofilm formation, component wear, and meniscus instability. A proactive, scheduled maintenance protocol is essential to ensure data reproducibility, prevent catastrophic failures during long-duration experiments, and extend the operational lifespan of costly system components. This document outlines evidence-based schedules and protocols framed within the context of an integrated, automated HTS fluidics workstation.
1. Quantitative Maintenance Schedules The following tables consolidate maintenance frequencies derived from manufacturer specifications, empirical studies on microfluidic performance degradation, and consensus from current laboratory practices.
Table 1: Preventive Maintenance Schedule for Key Components
| Component | Task | Frequency | Key Performance Indicator (KPI) to Monitor |
|---|---|---|---|
| Syringe Pump | Inspect & clean piston/seal | Weekly | Volume accuracy (% deviation from setpoint) |
| Full flush & lubrication | Monthly | Pressure stability (CV%) | |
| Complete seal replacement | 6 months | Leak test result (Pass/Fail) | |
| Peristaltic Pump | Replace tubing segment | 100 hours of operation | Flow rate consistency (CV%) |
| Clean roller head | Weekly | Visible debris, motor torque (mA) | |
| Solenoid/Pinch Valve | Cycle test & inspect seat/diaphragm | Daily (pre-run) | Actuation time (ms), Dead volume check |
| Clean fluidic path to valve | Between assays | Contamination (Absorbance at 280nm) | |
| Replace diaphragm or seal | 50,000 cycles | Leak rate (µL/min) | |
| Microfluidic Chip/Path | Flush with cleaning solution | Between experiments | Baseline fluorescence/background signal |
| Deep clean & decontaminate | Weekly | Clogging frequency, Surface contact angle | |
| Pressure decay test | Daily | System integrity (Pressure drop mbar/min) |
Table 2: Cleaning & Decontamination Solutions Protocol
| Solution | Composition | Function | Application Duration | Rinse Agent |
|---|---|---|---|---|
| Routine Flush | 0.1% (v/v) Tween-20 in DI water | Removes hydrophilic residues & reduces bubbles | 10-15 min | DI Water |
| Protein Removal | 1% (v/v) Hellmanex III or 1M NaOH | Degrades proteins & biological films | 30-60 min | DI Water → Buffer |
| Lipid/Solvent Clean | 70% (v/v) Isopropanol or Ethanol | Dissolves lipids & organic solvents | 15-20 min | DI Water |
| Strong Oxidizer | 10% (v/v) Sodium Hypochlorite | Disinfects & removes persistent organics | 5 min (max) | Copious DI Water |
| Final Storage | 1X PBS with 0.05% Sodium Azide | Prevents microbial growth in idle systems | N/A | Flush out before use |
2. Detailed Experimental Protocols
Protocol 2.1: Daily System Integrity and Prime Check
- Pressure Decay Test: Isolate the fluidic path using system valves. Pressurize the system to 20% above typical operating pressure (e.g., 2 bar) using the syringe pump. Hold for 60 seconds. Monitor pressure via in-line sensor. A decay >5% of setpoint indicates a potential leak.
- Prime & Bubble Purge: Prime all lines with appropriate buffer. Execute a high-flow-rate purge (e.g., 500 µL/min for 30 sec) followed by a low-flow-rate stabilization (5 µL/min for 60 sec). Use in-line bubble detector or camera to confirm absence of large bubbles.
- Valve Actuation Test: Command each valve through 10 open/close cycles. Verify commanded vs. actual state via sensor feedback or a downstream flow check.
Protocol 2.2: Weekly Pump Calibration & Performance Verification
- Gravimetric Flow Verification: Set pump to dispense DI water at 5 typical rates (e.g., 1, 10, 50, 100, 500 µL/min) for a set duration. Dispense into a tared microbalance. Calculate actual flow rate: (mass [mg] / time [min]) / density. Compare to commanded rate. Deviation >2% necessitates corrective action (seal check, lubrication, recalibration).
- Syringe Pump Seal Inspection: Retract the piston fully. Inspect the seal for crystallized salts, cracks, or swelling. Clean with isopropanol-moistened lint-free swab. If damaged, replace following manufacturer guidelines.
Protocol 2.3: Microfluidic Path Decontamination Protocol
- Flush: Flush the entire path with 5 system volumes of Routine Flush Solution (Table 2) at high flow.
- Incubate: Stop flow and allow the cleaning solution to sit in the path for the prescribed duration (Table 2).
- Purge: Flush with 10 system volumes of the designated Rinse Agent.
- Verify: Perform a blank run with assay buffer, measuring baseline optical or electrochemical signal. Compare to historical clean-baseline values. Repeat cleaning if background signal is >10% above baseline.
3. Diagrams
Maintenance Workflow for HTS Fluidics
4. The Scientist's Toolkit: Essential Research Reagent Solutions
| Item | Function in Maintenance |
|---|---|
| Hellmanex III / Contrad 70 | Alkaline detergent for removing organic residues and proteins from glass/silicon fluidic paths. |
| PBS, 1X (with 0.05% Sodium Azide) | Biocompatible storage buffer to prevent microbial growth during system idle periods. |
| Tween-20 (Polysorbate 20) | Non-ionic surfactant used in routine flushes to reduce surface tension and prevent bubble adhesion. |
| PTFE/FFKM Ferrule & Seal Kit | Chemically inert replacement seals and fittings for pumps and valves to prevent leaks and swelling. |
| In-line Pressure Sensor (0-10 bar) | Monitors system pressure for decay tests and detects clogs or flow restrictions in real-time. |
| Microbalance (0.1 mg resolution) | Critical for gravimetric verification of pump flow rate accuracy during calibration. |
| Lint-free Wipes & Swabs | For cleaning external and accessible internal components without introducing fibers. |
| Degassed, Filtered (0.2 µm) DI Water | Prevents bubble formation and particulate introduction during cleaning and priming steps. |
Benchmarking Success: Validation Metrics and Comparative Analysis of Automated Systems
In the development of automated fluid control systems for microfluidic High-Throughput Screening (HTS), quantifying performance is essential for adoption in drug discovery. This Application Note details the core KPIs—Precision, Accuracy, Speed, and Reliability—defining their relevance to microfluidic HTS, providing protocols for their measurement, and presenting current benchmark data.
Defining KPIs in Microfluidic HTS Context
- Precision (Reproducibility): The closeness of agreement between repeated dispensing operations of the same volume. Critical for assay consistency, measured by Coefficient of Variation (CV%).
- Accuracy (Trueness): The closeness of a dispensed volume to the intended (setpoint) volume. Ensures correct reagent concentration, measured as percentage deviation from target.
- Speed (Throughput): The number of successful fluidic operations (e.g., droplets generated, wells filled) per unit time. Directly impacts screening campaign duration.
- Reliability (Robustness): The system's ability to perform without failure over an extended period (e.g., 72-hour run), often quantified as Mean Time Between Failures (MTBF) or success rate.
Quantitative Performance Benchmarks for Automated Fluidic Systems
The following table summarizes current performance targets and reported values from leading commercial and research systems.
Table 1: KPI Benchmarks for Microfluidic HTS Fluid Control Systems
| KPI | Metric | Current Industry Target | Reported High Performance (System Type) | Key Influencing Factors |
|---|---|---|---|---|
| Precision | CV% for 1 nL dispense | <5% | <2% (Positive Displacement, Acoustic) | Actuator type, tip material, fluid properties |
| Accuracy | % Deviation from setpoint (10 nL) | ±5% | ±1% (Syringe Pump, Pressure + Flow Sensor) | Calibration method, sensor integration, dead volume |
| Speed | Droplet Generation Frequency | 10,000 Hz | >25,000 Hz (Flow-Focusing Droplet Generator) | Actuator response, channel geometry, pressure slew rate |
| Reliability | Success Rate (72-hr run) | >99.5% | 99.9% (Integrated Digital Valves) | Component wear, clogging susceptibility, software stability |
Experimental Protocols for KPI Assessment
Protocol 3.1: Measuring Precision and Accuracy of Nanoliter Dispensing
Objective: Quantify the precision (CV%) and accuracy (% deviation) of a microfluidic dispensing system. Materials: Automated fluid handler with target actuator (e.g., solenoid valve, piezoelectric), fluorescent dye solution (e.g., 10 µM fluorescein), calibrated analytical balance (0.1 µg sensitivity), low-evaporation microtiter plates, plate reader. Procedure:
- System Priming: Flush the entire fluid path with deionized water, then with fluorescent dye solution to eliminate air bubbles.
- Dispensing Set: Program the system to dispense N=50 replicates of the target volume (e.g., 100 nL) into separate wells of a microtiter plate. Record the mass of the empty plate.
- Gravimetric Analysis: Allow the plate to equilibrate for 5 minutes. Weigh the plate again. Calculate each dispensed mass using the density of the solution.
- Photometric Validation (Optional): Add a uniform buffer volume to all wells and measure fluorescence intensity with a plate reader. Use a standard curve to back-calculate volumes.
- Data Analysis:
- Accuracy: Calculate average dispensed volume. % Deviation = [(Mean Volume - Setpoint Volume) / Setpoint Volume] * 100.
- Precision: Calculate standard deviation (SD) of the 50 volumes. CV% = (SD / Mean Volume) * 100.
Protocol 3.2: Assessing System Throughput and Reliability
Objective: Determine the maximum operational speed and long-term reliability of a droplet generation module. Materials: Pressure-driven droplet generator chip, two high-speed pressure regulators, high-frame-rate camera (≥ 5,000 fps), inline flow sensor, data logging software. Procedure:
- Speed Test Setup: Connect continuous oil and aqueous phase lines to the chip. Set pressures to a baseline stable for droplet generation.
- Step-Wise Frequency Increase: Incrementally increase the modulation frequency of the aqueous phase actuator. Record 1-second videos at each frequency setting.
- Failure Point Detection: Analyze videos to count droplets generated per second. The maximum speed (Hz) is the highest frequency before droplet size variation exceeds ±5% or merging occurs.
- Reliability Marathon Run: Set the system to operate at 80% of its maximum speed. Initiate a 72-hour continuous run, logging pressure and flow sensor data.
- Failure Analysis: Define a failure (e.g., no droplet for >100 ms, pressure spike). Calculate Success Rate = [1 - (Number of Failures / Total Operation Cycles)] * 100. Report MTBF.
Visualizing the KPI Assessment Workflow
Diagram Title: KPI Assessment Workflow for Fluidic Systems
The Scientist's Toolkit: Key Research Reagent Solutions
Table 2: Essential Materials for Microfluidic HTS KPI Validation
| Item | Function in KPI Assessment | Example Product/Chemical |
|---|---|---|
| Fluorescent Tracer Dye | Enables photometric volume verification and droplet detection. | Fluorescein sodium salt, Atto 550 |
| Low-Adhesion Surfactant | Prevents biofouling and clogging during reliability testing. | 1H,1H,2H,2H-Perfluoro-1-octanol (PFO), PFPE-PEG block copolymers |
| High-Viscosity Calibration Oil | Provides stable continuous phase for high-speed droplet tests. | Fluorinated oil (HFE 7500) with 2% surfactant |
| Density Standard Solution | Used for gravimetric calibration to convert mass to volume. | Potassium chloride (KCl) solutions at known density |
| Particle Suspension Standards | Assesses clogging propensity and valve sealing reliability. | Polystyrene microspheres (2µm, 10µm) |
| Non-Reacting Wetting Fluid | For priming and wetting fluid paths to ensure bubble-free operation. | Dimethyl silicone oil (10 cSt) |
Application Notes
High-Throughput Screening (HTS) is a cornerstone of modern drug discovery and systems biology. This analysis compares two principal methodologies: traditional well-plate HTS and emerging automated microfluidics platforms, contextualized within the advancement of automated fluid control systems.
1. Core Technology Comparison Traditional HTS relies on multi-well plates (96- to 1536-well) and robotic liquid handlers to perform assays in discrete, microliter-to-nanoliter volume droplets. Automated microfluidic HTS utilizes integrated networks of microchannels, valves, and pumps to manipulate picoliter-to-nanoliter fluid volumes continuously, enabling high-density, dynamic experimentation.
2. Quantitative Performance Data Summary
Table 1: Comparative System Performance Metrics
| Parameter | Traditional Well-Plate HTS | Automated Microfluidic HTS |
|---|---|---|
| Typical Assay Volume | 1-100 µL | 10 pL - 1 nL |
| Reagent Consumption | High (µg-mg scale) | Ultra-low (pg-ng scale) |
| Throughput (Assays/day) | 10^4 - 10^5 (compound screening) | 10^3 - 10^6 (varies by design) |
| Mixing Time | Seconds to minutes | Milliseconds |
| Data Points per Cell | Often 1-2 (endpoint) | High (real-time, kinetic) |
| Initial Capital Cost | Moderate to High | High |
| Operational Flexibility | High (modular) | Lower (chip-dependent) |
Table 2: Representative Assay Performance (Live Cell Screening)
| Assay Type | Well-Plate (384-well) | Microfluidic (On-chip) |
|---|---|---|
| Cell Viability (IC50) | ~500 cells/well, 5 µL reagent | ~50 cells/chamber, 50 pL reagent |
| Calcium Flux Kinetics | Limited temporal resolution | Sub-second resolution, single-cell tracking |
| Apoptosis (Multiplexed) | Sequential staining, endpoint | Real-time caspase & membrane integrity |
| Gene Expression (qPCR) | Requires cell lysate transfer | Single-cell lysis & RT-PCR on-chip |
3. Key Advantages and Limitations
- Well-Plate HTS: Strengths include standardized protocols, extensive historical data libraries, and flexibility for diverse assay chemistries. Limitations are high reagent costs, significant waste generation, and limited capacity for dynamic, real-time analysis of single cells.
- Automated Microfluidics: Strengths are massive miniaturization and parallelization, precise spatiotemporal control of stimuli, seamless integration of multi-step protocols (culture, treatment, lysis, analysis), and superior single-cell analysis. Primary limitations are chip design complexity, potential for channel clogging, and a current lack of universal standardization.
Experimental Protocols
Protocol 1: Traditional Well-Plate HTS for Compound Cytotoxicity (Endpoint) Objective: Determine the IC50 of a novel kinase inhibitor in a HeLa cell model.
- Cell Seeding: Using an automated liquid handler, seed HeLa cells at 500 cells/well in 30 µL complete medium into a 384-well, tissue-culture treated microplate. Incubate (37°C, 5% CO2) for 24 hrs.
- Compound Dispensing: Prepare a 10-point, 1:3 serial dilution of the test compound in DMSO. Using a pintool or acoustic dispenser, transfer 100 nL of each dilution to designated wells (final DMSO ≤0.5%). Include DMSO-only vehicle and staurosporine (10 µM) controls.
- Incubation: Incubate plate for 72 hours.
- Viability Assay: Add 5 µL of CellTiter-Glo 2.0 reagent directly to each well. Orbital shake for 2 minutes, then incubate in the dark for 10 minutes.
- Detection: Measure luminescence on a plate reader.
- Analysis: Normalize data to vehicle control (100% viability) and calculate IC50 using a 4-parameter logistic model.
Protocol 2: Automated Microfluidic HTS for Real-Time Signaling Kinetics Objective: Monitor NF-κB activation kinetics in single macrophages in response to TNF-α gradient stimulation.
- Chip Priming & Cell Loading: Mount a commercially available programmable microfluidic chip (e.g., with 8000 individual cell chambers) on the automated controller. Prime all channels with serum-free medium. Introduce a suspension of RAW 264.7 macrophages expressing an NF-κB-GFP reporter at 5x10^5 cells/mL into the cell inlet. Use on-chip pneumatic valves to sequentially trap single cells into individual chambers.
- Gradient Generation & Perfusion: Program the fluidic controller to generate a linear concentration gradient of TNF-α (0-100 ng/mL) across a designated chip sector using integrated gradient generators. Perfuse the gradient over the cells for 60 minutes, followed by a washout with medium.
- Real-Time Imaging: Place the chip on a stage-top incubator (37°C, 5% CO2) of a high-speed confocal microscope. Acquire GFP fluorescence images (ex: 488 nm) from 100+ individual cells per condition every 30 seconds for 4 hours.
- On-Chip Fixation & Immunostaining: At experiment end, automatically perfuse 4% PFA for 15 minutes, followed by PBS wash, 0.1% Triton X-100 permeabilization, and an anti-p65 primary antibody. After wash, perfuse a fluorescent secondary antibody.
- Data Extraction: Use image analysis software to track single-cell fluorescence intensity over time. Quantify oscillation frequency, amplitude, and translocation dynamics. Correlate final p65 immunostaining with the kinetic GFP profile.
Mandatory Visualizations
The Scientist's Toolkit: Key Research Reagent Solutions
Table 3: Essential Materials for Comparative HTS
| Item | Function/Description | Example (Well-Plate) | Example (Microfluidic) |
|---|---|---|---|
| Cell Viability Assay | Measures metabolic activity as a proxy for live cells. | CellTiter-Glo 2.0: Luminescent ATP detection for endpoint analysis. | CellTracker Dyes: Fluorescent cytoplasmic dyes for longitudinal tracking. |
| Apoptosis Marker | Detects programmed cell death. | Caspase-Glo 3/7: Add-and-read luminescent caspase activity assay. | Fluorescent Annexin V / PI: Real-time staining for phosphatidylserine exposure & membrane integrity. |
| Gene Reporter | Visualizes specific pathway activation. | Luciferase Reporter Vectors: Requires lysis for bulk luminescent readout. | GFP/Luciferase Fusion Reporters: Enables live-cell kinetic imaging & bioluminescence. |
| Extracellular Matrix | Provides surface for cell adhesion. | Corning Matrigel: Coated manually or robotically onto wells. | µ-Slide I Laminin Coat: Patterned or uniformly coated microchannels. |
| Critical Buffer | Maintains physiology during perfusion. | 1X PBS: Used for dilution and wash steps. | HBSS with 10mM HEPES: Common perfusion buffer for on-chip live-cell assays. |
Application Notes
Automated fluid control systems are revolutionizing high-throughput screening (HTS) in microfluidic research, enabling precise manipulation of picoliter to nanoliter volumes. This case study presents a head-to-head comparison of three prevalent automated microfluidic platforms: pressure-driven continuous flow, digital microfluidics (DMF, electrowetting-on-dielectric), and acoustic droplet ejection (ADE). The evaluation focuses on throughput (samples/hour) and reagent consumption (μL/assay) for a standardized cell-based viability assay, contextualized within drug discovery workflows. Key findings indicate that while DMF and ADE systems offer superior reagent conservation, optimized pressure-driven systems achieve the highest absolute throughput for large compound libraries, underscoring a critical trade-off in system selection.
Experimental Protocols
Protocol 1: Pressure-Driven Continuous Flow HTS Assay
Objective: Execute a 1536-well cell viability assay using an integrated pressure-driven microfluidic plate filler and washer.
- Plate Priming: Prime all fluidic lines with assay buffer (PBS + 0.1% BSA) using system prime command. Dispense 2 μL/well to bottom of assay plate.
- Compound Transfer: Using a 50 nL pneumatic pintool, transfer compounds from a 10 mM DMSO stock library to the assay plate. Final DMSO concentration: 0.5%.
- Cell Dispensing: Dispense 20 μL/well of HeLa cell suspension (2,000 cells in media containing 1% FBS) using a peristaltic pump-driven microfluidic manifold.
- Incubation: Incub plate for 48 hours at 37°C, 5% CO2.
- Reagent Addition & Readout: Using the same manifold, add 5 μL/well of CellTiter-Glo 2.0 reagent. Incubate for 10 minutes, then read luminescence on a plate reader.
Protocol 2: Digital Microfluidics (DMF) HTS Assay
Objective: Perform a 96-format droplet-based viability assay on an electrowetting-on-dielectric cartridge.
- Cartridge Preparation: Load 150 μL reservoirs with compound stocks (in DMSO), cell suspension (5,000 cells/mL), and assay reagents (CellTiter-Glo 2.0) into designated ports.
- Droplet Actuation & Merging: Program the electrode array to dispense and transport a 500 nL droplet of cells to each reaction site. Dispense and merge a 25 nL compound droplet. Final DMSO concentration: 0.5%.
- On-Cartridge Incubation: Activate a dedicated array of electrodes to shuttle the merged droplet within a humidified, heated (37°C) zone for 48 hours.
- Endpoint Assay: Transport the incubated droplet to merge with a 500 nL droplet of CellTiter-Glo 2.0 reagent.
- Readout: After 10 minutes, transport the final droplet to a transparent electrode for luminescence readout via an integrated detector.
Protocol 3: Acoustic Droplet Ejection (ADE) HTS Assay
Objective: Conduct a 384-well viability assay using non-contact, soundwave-based compound and reagent transfer.
- Source Plate Preparation: Fill a 384-well polypropylene source plate with 10 μL/well of compound in DMSO (10 mM). Prepare separate source plates for cells and reagent.
- Ejection Protocol Setup: In the instrument software, define transfer maps: 2.5 nL compound to assay plate, followed by 20 μL cells, then 5 μL reagent.
- Compound Transfer: Using focused acoustic energy, eject 2.5 nL droplets from the source plate directly to the bottom of the destination assay plate.
- Cell & Reagent Dispensing: Eject 20 μL droplets of cell suspension (2,000 cells) from a cell source plate into each well. Post-incubation (48h), eject 5 μL of CellTiter-Glo 2.0.
- Incubation & Readout: Incubate assay plate as in Protocol 1. Read luminescence post-reagent addition.
Comparative Data
Table 1: Throughput and Consumption Comparison
| Platform | Assay Format | Total Assay Time | Throughput (Samples/Hour) | Reagent Consumption per Assay (μL) | Cell Suspension Used (μL) |
|---|---|---|---|---|---|
| Pressure-Driven Flow | 1536-well | 5 hours | 307 | 27.0 | 20 |
| Digital Microfluidics (DMF) | 96-droplet | 8 hours | 12 | 1.025 | 0.5 |
| Acoustic Droplet Ejection (ADE) | 384-well | 6 hours | 64 | 27.5 | 20 |
Table 2: Key Performance Metrics
| Platform | Minimum Dosing Volume | Dosing Precision (%CV) | Dead Volume (Setup Consumables) | Walk-Away Automation |
|---|---|---|---|---|
| Pressure-Driven Flow | 50 nL | <8% | High (~500 μL/line) | Full |
| Digital Microfluidics (DMF) | 2 nL | <5% | Very Low (~5 μL/reservoir) | Full |
| Acoustic Droplet Ejection (ADE) | 2.5 nL | <4% | Low (~20 μL/source well) | Full |
Diagrams
Title: Platform Selection Logic for HTS
Title: Pressure-Driven Assay Workflow
The Scientist's Toolkit: Key Research Reagent Solutions
| Item | Function in HTS Microfluidics |
|---|---|
| CellTiter-Glo 2.0 Assay | Homogeneous, luminescent ATP quantitation for cell viability; compatible with low-volume formats due to single-addition, "no-wash" protocol. |
| DMSO-Tolerant Microfluidic Surfactants (e.g., Pico-Surf) | Prevents droplet coalescence in emulsion-based systems and maintains interfacial stability in the presence of organic solvents like DMSO. |
| Low-Protein-Binding Assay Buffer (PBS + 0.1% BSA) | Used for priming and dilution in pressure-driven systems to minimize analyte adhesion to tubing and chip surfaces, ensuring accurate dispensing. |
| Electrowetting-on-Dielectric (EWOD) Oil (e.g., 1cSt Silicone Oil) | Fills DMF cartridges as an immiscible phase to surround and enable actuation of aqueous reagent droplets. |
| Acoustically Tuned Source Plates | Specialized polypropylene plates with optimized fluid properties for reliable, precise droplet ejection via acoustic energy. |
| Precision Pneumatic Pintools | For contact transfer of sub-microliter compound volumes from source to assay plates in pressure-driven systems; requires precise tip cleaning protocols. |
The transition from manual, low-throughput prototype assays to fully industrialized, automated high-throughput screening (HTS) presents significant challenges in scalability, reproducibility, and data integrity. This document details application notes and protocols for scaling microfluidic HTS workflows within automated fluid control systems, a core pillar of modern drug discovery.
Application Notes: Key Scalability Considerations
Quantitative Analysis of Scale-Up Parameters
The following table summarizes critical parameters that evolve during the scaling process from prototype to industrialized screening.
Table 1: Scaling Parameters from Prototype to Industrialized HTS
| Parameter | Prototype Phase (1-10 chips) | Pilot Scale (10-100 chips) | Industrialized HTS (>1000 chips) |
|---|---|---|---|
| Throughput (assays/day) | 10 - 100 | 100 - 10,000 | 50,000 - 100,000+ |
| Reagent Consumption per Assay | ~10 µL | ~1-5 µL | <1 µL |
| Data Points Generated | 10^2 - 10^3 | 10^4 - 10^5 | 10^6 - 10^7 |
| Process Step Automation | 20-40% | 60-80% | >95% |
| Mean Time Between Failures (MTBF) | 10-50 hours | 100-500 hours | >1000 hours |
| Coefficient of Variation (CV) Target | <15% | <12% | <10% |
Research Reagent Solutions & Essential Materials Toolkit
Table 2: Essential Research Reagent Solutions for Scalable Microfluidic HTS
| Item | Function & Rationale |
|---|---|
| Surface Passivation Reagent (e.g., PEG-silane, Pluronic F-127) | Coats microfluidic channels to prevent non-specific adsorption of proteins or small molecules, critical for maintaining assay robustness at scale. |
| Precision Syringe Pumps (nL/min to µL/min range) | Provide accurate, pulse-free fluid delivery for both pressure-driven and positive displacement flow control in automated systems. |
| Fluorinated Oil with Surfactant (for droplet-based HTS) | Forms stable, biocompatible emulsions for ultra-high-throughput droplet microfluidics, enabling single-cell or single-compartment assays. |
| Lyophilized Master Mix Beads | Pre-formulated, stable assay reagents in pellet form for automated liquid handlers, reducing preparation time and variability. |
| Cell Viability Fluorogenic Probe (e.g., Calcein AM) | Enables real-time, in-line monitoring of cell health within microfluidic chambers during prolonged screening campaigns. |
| On-chip Lysis Buffer with RNase/DNase Inhibitors | Allows immediate stabilization of cellular contents post-treatment for downstream 'omics analysis directly from the screening platform. |
| Dynamic Range Standard (Fluorescent or Luminescent) | Embedded in each plate or chip batch for inter-run normalization and quality control across thousands of data points. |
Detailed Experimental Protocols
Protocol: Scale-Up of a Cell-Based Viability Assay
Title: Automated, Scalable Protocol for a 384-Chip Microfluidic Cytotoxicity Screen.
Objective: To execute a concentration-response cytotoxicity screen of a 10,000-compound library against a cancer cell line using an integrated automated fluid control system.
Materials:
- Automated microfluidic plate handler (e.g., HighRes Biosolutions STARlet).
- 384-well microfluidic cartridge array (e.g., Dolomite Microfluidic Chip).
- Precision multiplexed pressure controller (e.g., Elveflow OB1).
- In-line fluorescence imaging cytometer.
- Candidate cell line (e.g., A549).
- Test compound library (10 mM in DMSO).
- Cell culture medium, assay buffer.
- Viability indicator dye (e.g., SYTOX Green).
Methodology:
- System Priming & QC: Initiate automated system wash protocol with 70% ethanol followed by sterile PBS. Prime all fluidic lines. Execute a blank run with dye-only solution to measure baseline fluorescence and check for clogging (CV must be <5% across all 384 inlets).
- On-chip Cell Seeding:
- The handler dispenses a 5 µL cell suspension (200 cells/µL) into each chip's inlet reservoir.
- The pressure controller applies a calibrated vacuum (-200 mbar) to the chip's outlet for 90 seconds, pulling cells into the 64-nL culture chambers. System verifies chamber occupancy (>85%) via low-mag brightfield imaging.
- Compound Dispensing & Treatment:
- The library reformatter prepares a 100 nL aliquot of each compound from the source library into a intermediate plate.
- A nano-dispenser transfers 20 nL of compound (or DMSO control) into each chip's dedicated compound inlet. Final on-chip dilution in medium is 1:250, creating a 40 µM starting concentration.
- A 7-point, 1:3 serial dilution is performed on-chip via controlled mixing of compound and medium streams over 30 seconds.
- The diluted compound stream is perfused over the captured cells for 48 hours at 37°C and 5% CO2.
- Endpoint Staining & Imaging:
- Automatic perfusion of 1 µM SYTOX Green in buffer for 20 minutes.
- A wash step (buffer perfusion for 5 minutes) removes unbound dye.
- The imager scans each chamber at 10x magnification (GFP channel). Image analysis software counts total cells (brightfield) and dead cells (SYTOX-positive).
- Data Acquisition & Primary Analysis:
- For each chamber, viability is calculated as:
(Total Cells - SYTOX+ Cells) / Total Cells. - Concentration-response curves are fitted on-the-fly using a 4-parameter logistic model.
- Z'-factor is calculated for each 16-chip plate using high (vehicle) and low (20 µM Staurosporine) controls. Plates with Z' < 0.5 are flagged for repetition.
- For each chamber, viability is calculated as:
Visualizations
Diagram: Automated HTS Workflow Scalability
Scalable HTS Workflow from Prototype to Production
Diagram: Integrated Fluid Control System Architecture
Architecture of an Integrated Automated Fluid Control System
1. Introduction: The Financial Calculus in High-Throughput Screening (HTS) Within the context of transitioning from manual or semi-automated workflows to fully automated fluid control systems for microfluidic HTS, a rigorous cost-benefit analysis is imperative. This application note provides a structured framework and experimental protocols to quantify the initial capital expenditure against the long-term operational savings, enabling data-driven investment decisions for research and drug development laboratories.
2. Quantitative Data Summary: A 5-Year Projection The following tables synthesize current market and operational data for a standard HTS workflow processing 100,000 compounds annually.
Table 1: Initial Investment Breakdown for Automated Microfluidic Fluid Control System
| Component | Cost Range (USD) | Notes |
|---|---|---|
| Microfluidic Dispensing Unit | $120,000 - $200,000 | Positive displacement, nanoliter precision. |
| Integrated Robotic Arm | $80,000 - $150,000 | For plate handling and integration with incubators/readers. |
| System Control Software & License | $20,000 - $40,000 | Includes workflow programming suite. |
| Installation & Calibration | $10,000 - $20,000 | Vendor professional services. |
| Year 1 Consumables Stock | $15,000 - $25,000 | Specialized tips, microfluidic chips, tubing. |
| Total Estimated Initial Investment | $245,000 - $435,000 |
Table 2: Annual Operational Cost Comparison (Baseline: 100k compounds/year)
| Cost Center | Manual/Semi-Automated Workflow | Automated Microfluidic System | Annual Savings (Automated) |
|---|---|---|---|
| Reagent Consumption | $250,000 | $50,000 | $200,000 |
| Labor (FTE Allocation) | $150,000 (0.5 FTE) | $30,000 (0.1 FTE) | $120,000 |
| Consumables (Tips, Plates) | $40,000 | $25,000 | $15,000 |
| Liquid Waste Disposal | $5,000 | $1,000 | $4,000 |
| Total Annual Operational Cost | $445,000 | $106,000 | $339,000 |
Table 3: 5-Year Total Cost of Ownership (TCO) Analysis
| Metric | Manual/Semi-Automated | Automated System |
|---|---|---|
| Initial Investment | $50,000 | $340,000 (mean) |
| Cumulative 5-Year Operational Cost | $2,225,000 | $530,000 |
| 5-Year TCO | $2,275,000 | $870,000 |
| Net Savings over 5 Years | - | $1,405,000 |
| Payback Period | - | Approx. 14 months |
3. Experimental Protocols for Validating Operational Savings
Protocol 1: Quantifying Reagent Utilization Efficiency Objective: To empirically measure the reduction in reagent volume per assay point using an automated microfluidic dispenser versus a traditional peristaltic pump system. Materials: Target assay reagents (e.g., kinase, cell viability), source microplates, 1536-well assay plates, microfluidic dispenser, traditional bulk dispenser, plate reader. Methodology:
- Prepare a 10x concentrated assay reagent master mix.
- Arm A (Microfluidic): Program the automated system to dispense a 50 nL bolus of the master mix directly into 1,536 wells, followed by 450 nL of buffer via a separate integrated channel.
- Arm B (Traditional): Use a bulk dispenser to add 5 µL of a 1x working solution to each well.
- Initiate the biochemical reaction and measure the endpoint signal (e.g., fluorescence) for both arms.
- Calculate the signal-to-background (S/B) and Z'-factor for both plates.
- Analysis: Compare total reagent volume used per plate (Arm A: ~0.077 mL; Arm B: ~7.68 mL). Validate that the S/B and Z' > 0.5 are equivalent, confirming equal assay quality at <1% reagent usage.
Protocol 2: Benchmarking Workflow Labor Time Objective: To document hands-on time (HOT) and walk-away time for a complete assay run. Materials: Cell suspension, assay reagents, two identical 1536-well plates, automated system with scheduler, manual pipettors and tube sets. Methodology:
- Design a cell-based assay protocol with steps: cell dispensing, compound addition, incubation, reagent addition, and reading.
- Arm A (Automated): Load all labware and reagents onto the deck. Program and initiate the unattended workflow. Record the total HOT (loading/unloading) and total run time.
- Arm B (Manual): Perform each step sequentially using manual multi-channel pipettes and bulk dispensers. Record HOT for each step and total elapsed time.
- Analysis: Calculate the percentage reduction in HOT (typically >80%). Quantify the increase in researcher capacity (e.g., plates processed per FTE per week).
4. Signaling Pathway & Workflow Visualization
Title: Financial Decision Flow for Automation ROI
Title: Comparative HTS Workflow Cost Pathways
5. The Scientist's Toolkit: Key Research Reagent Solutions Table 4: Essential Materials for Automated Microfluidic HTS Implementation
| Item | Function & Rationale |
|---|---|
| Low-Adhesion Microfluidic Chips | Silicone or polymer chips with optimized surface chemistry to prevent protein/compound adsorption, ensuring accurate nanoliter dispensing. |
| Concentrated Assay Master Mixes | 10-100x reagent concentrates compatible with on-chip dilution, enabling >90% volume savings over traditional 1x working solutions. |
| DMSO-Tolerant Tubing & Valves | Chemically inert fluidic paths that prevent swelling and ensure precision with organic solvents common in compound libraries. |
| High-Precision Nanoliter Tips | Disposable or washable tips with integrated capacitance sensing for volumetric accuracy verification at sub-microliter scales. |
| Cell-Compatible Hydrogels | For encapsulating and patterning cells within microfluidic channels in 3D cultures, enhancing biological relevance in HTS. |
| Real-Time Flow Sensors | Integrated sensors providing feedback for closed-loop flow control, critical for data integrity and protocol reproducibility. |
Conclusion
Automated fluid control systems are no longer a luxury but a cornerstone of modern, robust microfluidic HTS. By mastering the foundational principles, implementing rigorous methodologies, proactively troubleshooting, and validating against clear benchmarks, researchers can unlock unprecedented reproducibility and scale. The convergence of precision engineering, intelligent software, and micro-scale biology promises to accelerate drug discovery, personalize medicine through sophisticated organ-on-a-chip models, and democratize access to high-throughput experimentation. The future lies in increasingly integrated, AI-optimized, and walk-away automated platforms that will further transform biomedical research.