From Design to Reality: How Self-Assembling Biomimetic Materials Are Revolutionizing 3D Bioprinting
This comprehensive review examines the transformative role of self-assembling biomimetic materials in advancing 3D bioprinting applications.
From Design to Reality: How Self-Assembling Biomimetic Materials Are Revolutionizing 3D Bioprinting
Abstract
This comprehensive review examines the transformative role of self-assembling biomimetic materials in advancing 3D bioprinting applications. We explore the foundational principles of bioinspired molecular design, detailing key material classes like peptides, proteins, and DNA nanostructures. Methodological approaches for integrating these dynamic materials into bioprinting workflows are analyzed, including layer-by-layer and co-printing strategies. The article critically addresses common challenges in structural integrity, cellular integration, and printing fidelity, presenting optimization techniques. Finally, we evaluate current validation benchmarks and comparative performance against traditional hydrogels, concluding with future implications for tissue engineering, disease modeling, and personalized drug development.
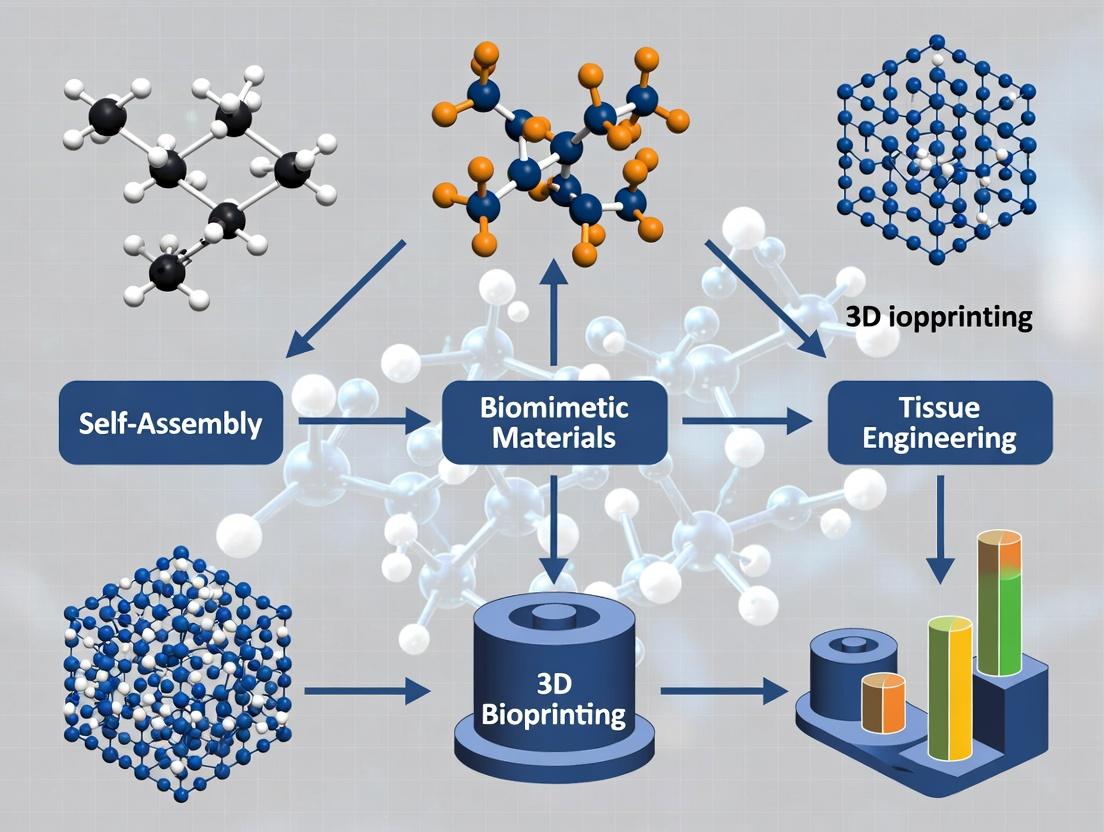
The Blueprint of Life: Core Principles of Self-Assembling Biomimetic Materials for Biofabrication
Self-assembly is a process where components, pre-programmed via molecular and supramolecular interactions, autonomously organize into ordered, functional structures without external guidance. In 3D bioprinting, harnessing this intrinsic biological principle enables the fabrication of biomimetic tissues with hierarchical complexity that rival native extracellular matrices. This application note details protocols and analytical methods for leveraging self-assembling peptides and polymer systems in bioprinting applications for drug screening and tissue engineering.
Core Self-Assembly Mechanisms & Molecular Triggers
Self-assembly in biomaterials is governed by precise, non-covalent interactions. Key triggers include:
- pH Change: Alters charge states of amino acid side chains, triggering hydrophobic collapse or beta-sheet formation.
- Ionic Strength: Screens electrostatic repulsion, allowing attractive forces (e.g., van der Waals, π-π stacking) to dominate.
- Enzymatic Cleavage: Reveals cryptic self-assembling domains from precursor molecules.
- Thermal Induction: Modulates solubility and kinetic energy to favor ordered aggregation.
- Molecular Recognition: Specific lock-and-key interactions (e.g., biotin-streptavidin, DNA hybridization).
Quantitative Comparison of Common Self-Assembling Systems
Table 1: Characteristics of Key Self-Assembling Biomaterial Systems
| System / Acronym | Core Building Block | Primary Trigger | Typical Fiber Diameter | Storage Modulus (G') | Key Applications in Bioprinting |
|---|---|---|---|---|---|
| RADA16-I | Peptide (Ac-RADARADARADARADA-CONH₂) | Ionic Strength / pH | 10-20 nm | 1-10 kPa | Neural repair, cell encapsulation bioink |
| Q11 | Peptide (QQKFQFQFEQQ) | Ionic Strength | 5-15 nm | 0.5-5 kPa | Vaccine delivery, sustained release scaffolds |
| Peptide Amphiphiles (PAs) | Peptide conjugated to alkyl tail | pH | 6-10 nm | 2-15 kPa | Bone regeneration, vascularization |
| Elastin-Like Polypeptides (ELPs) | Protein polymer (VPGXG)n | Temperature (T>LCST) | 50-500 nm | 0.1-2 kPa | Drug delivery, thermally responsive inks |
| Hyaluronic Acid (HA) / Heparin Systems | Glycosaminoglycans | Electrostatic Coacervation | 100-1000 nm | 0.01-1 kPa | Growth factor binding, viscoelastic bioinks |
Application Notes & Protocols
Protocol: Formulation and Printability Assessment of a RADA16-I-Based Bioink
Aim: To prepare a self-assembling peptide hydrogel bioink suitable for extrusion bioprinting and characterize its rheological and mechanical properties.
Materials (Research Reagent Solutions):
- RADA16-I Peptide Powder: Synthetic, >95% purity. The core self-assembling unit.
- Sucrose (10% w/v in PBS): Provides osmolarity and printability enhancement via viscosity modulation.
- Sterile PBS (1x, pH 7.4): Ionic trigger and solvent. Filter sterilized (0.22 µm).
- Cell Suspension (e.g., NIH/3T3 fibroblasts): Model cell line for viability assessment.
- Sterile Sodium Hydroxide (10 mM) and HCl (10 mM): For fine pH adjustment.
- Sterile Syringe (3 mL) and Blunt-end Nozzle (22-27G): For ink extrusion.
Method:
- Peptide Solution Preparation:
- Dissolve RADA16-I powder in sterile, deionized water to a final concentration of 1.0% (w/v). Vortex for 30 seconds.
- Adjust the pH to 7.4 using small volumes of 10 mM NaOH or HCl. Sterilize by passing through a 0.22 µm syringe filter. Store on ice to prevent premature assembly.
- Bioink Formulation:
- Mix the sterile 1% RADA16-I solution with an equal volume of 10% sucrose in PBS. This yields a final bioink of 0.5% RADA16-I, 5% sucrose in 0.5x PBS.
- For cell-laden printing, centrifuge your cell pellet, resuspend in a small volume of 10% sucrose/PBS, and gently mix with the RADA16-I solution to the desired final cell density (e.g., 1-5 x 10^6 cells/mL).
- Gelation & Printing:
- Transfer bioink to a sterile syringe fitted with a nozzle.
- The increase in ionic strength upon mixing triggers self-assembly. Incubate the loaded syringe at 37°C for 5-7 minutes to initiate gelation.
- Print using an extrusion bioprinter. Recommended parameters: Pressure 15-25 kPa, speed 5-10 mm/s, layer height 0.15-0.2 mm.
- Post-Printing Stabilization:
- Immediately after printing, immerse the construct in complete cell culture media. The media further triggers assembly and provides nutrients.
- Incubate at 37°C, 5% CO₂ for 30 minutes to form a stable hydrogel.
Assessment:
- Rheology: Perform time sweep (oscillation, 1% strain, 1 rad/s) to monitor storage (G') and loss (G'') modulus evolution after ionic trigger.
- Printability: Calculate filament collapse and spreading ratio from top-view images of a printed grid.
- Cell Viability: Assess using Live/Dead assay at 1, 24, and 72 hours post-print.
Protocol: Co-Assembly System for Growth Factor Delivery
Aim: To create a heparin-binding peptide amphiphile (PA) co-assembling system for the sustained presentation of Vascular Endothelial Growth Factor (VEGF).
Materials (Research Reagent Solutions):
- Heparin-Binding PA (HB-PA): e.g., C16-VVVAAAEEEK-(PEG)₄-KKKKLRAL peptide. Contains alkyl tail (C16), matrix-binding domain, heparin-binding sequence.
- Standard PA (S-PA): C16-VVVAAAGGG. Provides structural backbone.
- Heparin Sodium Salt: Sulfated glycosaminoglycan for growth factor binding.
- Recombinant Human VEGF₁₆₅: Target growth factor.
- DMEM/F-12 Medium: For cell culture assays.
Method:
- Micelle Preparation:
- Dissolve HB-PA and S-PA separately in ultrapure water at 1% (w/v) by brief sonication (5 min, water bath sonicator).
- Mix solutions to achieve a final ratio of 1:9 (HB-PA:S-PA). This ensures sparse presentation of heparin-binding sites.
- Growth Factor Loading:
- Prepare a solution of heparin (100 µg/mL) in PBS.
- Add VEGF to the heparin solution at a molar ratio of 1:1 (VEGF:Heparin). Incubate for 15 min at RT to form complex.
- Gently mix the VEGF-Heparin complex with the mixed PA solution. Final VEGF concentration should be 50 ng/mL in the total mixture.
- Gelation:
- Adjust pH to 7.4 with NaOH. Add cell culture medium (1:1 v/v) to provide physiological ions.
- Incubate at 37°C for 1 hour. A self-supporting hydrogel will form via β-sheet assembly of the PA fibers, incorporating the VEGF-Heparin complex.
- Application: The gel can be used as a pre-formed matrix in a well plate for cell migration assays or incorporated as a sacrificial bioink component during multi-material bioprinting.
Assessment:
- Release Kinetics: Use ELISA to quantify VEGF release into supernatant over 14 days.
- Bioactivity: Perform human umbilical vein endothelial cell (HUVEC) tubulogenesis assay on Matrigel in the presence of the release supernatant.
The Scientist's Toolkit
Table 2: Essential Research Reagents for Self-Assembly Bioprinting
| Reagent / Material | Function & Role in Self-Assembly | Example Supplier / Catalog Consideration |
|---|---|---|
| Self-Assembling Peptides (RADA16-I, Q11, KLD-12) | Core structural component; forms nanofibrous hydrogel matrix via β-sheet formation. | Bachem, CPC Scientific, Genscript (Custom Synthesis) |
| Peptide Amphiphile (PA) Kits | Simplified access to alkyl-tailed peptides for rapid nanofiber formation. | Sigma-Aldrich (Custom Design), Ambiopharm |
| Recombinant Growth Factors (VEGF, BMP-2, FGF-2) | Bioactive cargo for controlled release; often binds to self-assembled structures. | PeproTech, R&D Systems |
| Heparin Sodium Salt | Polyanionic glycosaminoglycan; mediates growth factor binding and release kinetics. | Sigma-Aldrich, Merck |
| Rheometer with Peltier Plate | Critical for characterizing gelation kinetics (time sweep) and viscoelastic properties. | TA Instruments, Anton Paar |
| Extrusion Bioprinter (Temperature-Controlled) | Enables deposition of self-assembling bioinks under sterile, parametrically controlled conditions. | Allevi, CELLINK, REGEMAT 3D |
| Live/Dead Viability/Cytotoxicity Kit | Standard for assessing cell health post-encapsulation and printing. | Thermo Fisher Scientific (L3224) |
Visualizing Pathways and Workflows
Title: Self-Assembly Pathway from Molecules to Bioprint
Title: Experimental Workflow for Self-Assembling Bioink
Peptide-Based Bioinks for 3D Bioprinting
Recent advancements focus on self-assembling peptides (SAPs) like RADA16-I and ionic-complementary peptides. These form nanofibrous hydrogel scaffolds that mimic the extracellular matrix (ECM).
Table 1: Performance Metrics of Key Peptide Bioinks
| Material (Example) | Gelation Mechanism | Storage Modulus (G') | Typical Gelation Time | Key Application in 3D Bioprinting |
|---|---|---|---|---|
| RADA16-I | Ionic Strength/pH | 1-5 kPa | 30-60 sec | Neural tissue models |
| KLD-12 (KLDLKLDLKLDL) | Ionic Strength | 2-4 kPa | < 5 min | Chondrocyte encapsulation |
| MAX8 (β-hairpin) | Thermo/Photo-triggered | 10-20 kPa | Seconds (UV) | High-resolution cell-laden constructs |
| Elastin-like Polypeptides (ELPs) | Inverse Temperature Transition | 0.5-2 kPa | Minutes (37°C) | Vascularized constructs |
Protein-Based Constructs
Recombinant proteins (e.g., silk fibroin, collagen, resilin) offer precise control over mechanical and biochemical properties.
Table 2: Engineered Protein Biomaterials for Bioprinting
| Protein | Crosslinking Method | Tensile Strength | Cell Adhesion Motif | Bioprinting Relevance |
|---|---|---|---|---|
| Recombinant Spider Silk | Enzymatic (HRP), Sonication | 100-500 MPa | RGD incorporation | Mechanically robust scaffolds |
| Recombinant Collagen | Chemical (Genipin) | 1-10 MPa | Native sequence | Dermal/osseous tissue models |
| Fibrinogen | Enzymatic (Thrombin) | 0.05-0.2 MPa | Native sequence | Vascularized tissue, wound models |
| Resilin-like Polymers | Photo-click (Tyrosine) | 0.1-1 MPa | Optional | Elastic cartilage models |
DNA Nanostructures as Functional Elements
DNA origami and tiles provide nanoscale control for spatial patterning of signals.
Table 3: DNA Nanostructure Applications in 3D Bioprinting
| Nanostructure Type | Typical Size (nm) | Functionalization | Role in Bioprinted Construct | Reference Yield (%) |
|---|---|---|---|---|
| DNA Origami (6-helix bundle) | ~10 x 100 | Thiol, Biotin | Crosslinker for hydrogel reinforcement | ~85% |
| Tetrahedral DNA Framework | ~5-10 | Aptamers, VEGF | Spatially controlled growth factor presentation | >90% |
| DNA Hydrogel Tiles | 100-1000 | ssDNA overhangs | Sacrificial lattice for microvasculature | 70-80% |
Synthetic Polymers: Precision and Tunability
Synthetic polymers (e.g., PEG, PLGA, PNIPAM) offer reproducible, tunable properties often combined with natural materials.
Table 4: Key Synthetic Polymers in Advanced Bioinks
| Polymer | Functional Group | Typical MW (kDa) | Degradation Time | Key Advantage |
|---|---|---|---|---|
| PEG (4-arm) | Acrylate, Maleimide, NHS | 10-40 | Tunable (weeks-years) | Bioorthogonal crosslinking |
| PLGA | Carboxyl, Ester | 50-100 | 4-8 weeks (tunable) | FDA-approved, controlled release |
| PNIPAM | Acrylamide | 20-100 | Non-degradable | Thermoresponsive (LCST ~32°C) |
| PVA | Hydroxyl | 30-100 | Slow | High elasticity, support baths |
Detailed Experimental Protocols
Protocol: Forming a Peptide-Polymer Hybrid Bioink for Vascular Bioprinting
Aim: To create a printable, peptide-crosslinked hydrogel supporting endothelial network formation. Materials: RGDS-modified 4-arm PEG-SVA (20 kDa), KLD-12 peptide (Ac-KLDLKLDLKLDL-CONH2), HUVECs, Phosphate Buffered Saline (PBS), Sterile NaHCO₃ (0.1M).
Procedure:
- Peptide Solution Prep: Dissolve KLD-12 peptide in sterile 0.1M NaHCO₃ at 1% (w/v). Sterilize by filtration (0.22 µm). Keep on ice.
- Polymer Solution Prep: Dissolve 4-arm PEG-SVA (RGDS-modified) in PBS at 10% (w/v).
- Bioink Formulation: In a sterile 1:1 volume ratio, mix the peptide and polymer solutions directly in the bioprinter cartridge. Gently pipette to mix. Final concentrations: 0.5% KLD-12, 5% PEG.
- Crosslinking & Printing: Load the cartridge into a pneumatic extrusion bioprinter (20-22°C). Print into a support bath or onto a heated stage (37°C) to initiate rapid peptide self-assembly and Michael addition crosslinking.
- Post-Printing Cure: Incubate the printed construct at 37°C, 5% CO₂ for 20 minutes to complete gelation.
- Cell Encapsulation (Alternative): For cell-laden prints, suspend HUVECs in the PEG solution prior to mixing. Mix with peptide solution immediately before loading into the cartridge to minimize pre-gelation.
Protocol: Incorporating DNA Origami as Reinforcing Agents in Collagen Bioinks
Aim: To enhance the mechanical resilience of a soft collagen matrix using DNA nanostructures. Materials: Type I Collagen (rat tail, 5 mg/mL), DNA Origami 6-helix bundles (functionalized with NHS esters), EDC/NHS crosslinking solution, DMEM (10x, no phenol red).
Procedure:
- DNA Origami Activation: Resuspend NHS-functionalized DNA origami in 0.1M MES buffer, pH 6.0. Add a fresh EDC/NHS mixture (final 50mM/25mM) and incubate at RT for 15 min. Purify using a 100kDa MWCO spin filter into PBS.
- Neutralization of Collagen: On ice, mix: 800 µL collagen, 100 µL 10x DMEM, 50 µL 0.1M NaOH. Gently vortex.
- Bioink Formulation: Add 50 µL of activated DNA origami solution (final concentration ~50 nM) to the neutralized collagen. Mix gently by inversion. Keep on ice until printing.
- Printing: Using a microextrusion printer with a cooled stage (4°C), deposit the bioink.
- Crosslinking: Post-print, expose the construct to 365 nm UV light (5 mW/cm², 2 min) to initiate covalent amide bond formation between collagen amines and activated DNA origami.
- Incubation: Transfer to cell culture medium and incubate at 37°C for 1 hour for final fibrillogenesis.
The Scientist's Toolkit: Research Reagent Solutions
Table 5: Essential Reagents for Biomaterial-Based 3D Bioprinting Research
| Item/Reagent | Supplier Examples | Function & Brief Explanation |
|---|---|---|
| 4-arm PEG-Acrylate (20kDa) | JenKem, Laysan Bio | Provides a synthetic, hydrophilic backbone for bioorthogonal (e.g., photo) crosslinking. High tunability. |
| RADA16-I Peptide | Bachem, Genscript | Self-assembles into stable nanofibers upon exposure to physiological ionic strength. Serves as a synthetic ECM. |
| Recombinant Human Collagen I | Fibralign, Jellatech | Animal-free, consistent source of a major ECM protein for bioinks, reducing batch variability. |
| NHS-PEG-Maleimide | Thermo Fisher, Sigma | Heterobifunctional crosslinker for coupling peptides (via cysteine) to polymers/proteins (via amines). |
| DNA Origami Scaffold (M13mp18) | tilibit nanosystems | Long single-stranded DNA scaffold for folding into precise 2D/3D nanostructures for spatial patterning. |
| Ruthenium/SPS Photoinitiator | Sigma-Aldrich | Visible light (450 nm) photoinitiator system for cell-friendly crosslinking of tyramine or thiol groups. |
| Gelatin Methacryloyl (GelMA) | Advanced BioMatrix, Allevi | Photocrosslinkable derivative of gelatin; combines natural cell adhesion motifs with synthetic control. |
| Carbopol-based Support Bath | Sigma-Aldrich (Carbopol 974P) | Yield-stress fluid used as a suspension medium for printing intricate, low-viscosity bioinks. |
Diagrams
Diagram Title: Peptide-Polymer Hybrid Bioink Crosslinking Workflow
Diagram Title: DNA-Collagen Composite Bioink Fabrication Process
Application Notes
Biomimicry of the native ECM is a foundational goal in 3D bioprinting and tissue engineering. The ECM provides a complex, tissue-specific milieu of biochemical, topological, and mechanical cues that direct cellular behaviors such as adhesion, proliferation, migration, and differentiation. Replicating these cues within self-assembling biomimetic materials is critical for constructing functional, physiologically relevant tissue models for drug development and regenerative medicine.
Key Replicable ECM Cues:
- Biochemical Composition: Incorporation of adhesive ligands (e.g., RGD peptides), glycosaminoglycans (GAGs) like hyaluronic acid, and growth factor binding sites.
- Topographical & Structural Features: Emulation of fiber diameter, porosity, and alignment present in native fibrillar networks (collagen, fibronectin).
- Mechanical Properties: Tuning of viscoelasticity, stiffness (elastic modulus), and stress relaxation to match target tissues (e.g., brain ~0.1-1 kPa, muscle ~8-17 kPa, bone ~15-30 MPa).
- Dynamic & Responsive Behavior: Designing materials that degrade or change properties in response to cell-secreted enzymes (e.g., matrix metalloproteinases - MMPs) or allow user-triggered stiffening/softening.
Quantitative Data on Native ECM and Biomimetic Replicas
Table 1: Mechanical and Compositional Properties of Native Tissues
| Tissue Type | Approximate Elastic Modulus | Dominant ECM Components | Characteristic Fiber Diameter | Key Bioactive Ligands |
|---|---|---|---|---|
| Brain | 0.1 - 1 kPa | Hyaluronic Acid, CSPGs | N/A (porous hydrogel) | IKVAV, RGD |
| Skin (Dermis) | 2 - 20 kPa | Collagen I, Elastin | 1 - 10 μm | RGD, DGEA |
| Cardiac Muscle | 8 - 17 kPa | Collagen I, III, Laminin | 1 - 3 μm | RGD, YIGSR |
| Articular Cartilage | 0.2 - 2 MPa | Collagen II, Aggrecan | 20 - 80 nm | RGD |
| Cortical Bone | 15 - 30 GPa | Collagen I, Hydroxyapatite | 50 - 500 nm (mineral) | RGD, GFOGER |
Table 2: Common Biomimetic Hydrogel Systems for 3D Bioprinting
| Material System | Crosslinking Mechanism | Tunable Stiffness Range | Key Biomimetic Features | Typical Biofunctionalization |
|---|---|---|---|---|
| Fibrin | Enzymatic (Thrombin) | 0.1 - 5 kPa | Natural cell-binding domains, proteolytic remodeling | Native integrin binding |
| Collagen I | Thermally-driven self-assembly & pH | 0.1 - 5 kPa | Native fibrillar architecture, integrin binding sites | Blending with other collagens |
| Alginate | Ionic (Ca2+) | 1 - 100 kPa | Rapid gelation, high print fidelity | RGD peptide coupling |
| Hyaluronic Acid (MeHA) | Photo-crosslinking (e.g., 365-405 nm UV) | 0.5 - 50 kPa | CD44 receptor binding, MMP-degradable sequences | RGD, MMP peptides, heparin for GF binding |
| Polyethylene Glycol (PEG) | Photo-crosslinking or Michael Addition | 0.2 - 100 kPa | "Blank slate" for precise biofunctionalization, protease sensitivity | Custom peptides (RGD, MMP-sensitive) |
Experimental Protocols
Protocol 1: Formulation and 3D Bioprinting of a MMP-Sensitive, RGD-Functionalized Hyaluronic Acid Bioink
Objective: To create a biomimetic, cell-laden hydrogel that replicates ECM's degradability and adhesivity for soft tissue modeling.
Materials:
- Methacrylated Hyaluronic Acid (MeHA, 5-20% w/v in PBS).
- Photoinitiator: Lithium phenyl-2,4,6-trimethylbenzoylphosphinate (LAP, 0.05% w/v).
- Peptides: GCGYGRGDSPG (RGD, 1 mM stock in water), GCRDVPMS↓MRGGDRCG (MMP-sensitive crosslinker, 2 mM stock). (↓ indicates cleavage site).
- Phosphate Buffered Saline (PBS), pH 7.4.
- Primary cells (e.g., human fibroblasts, 5 million cells/mL).
- Extrusion bioprinter with a 22G-27G blunt needle and a 405 nm UV light source (5-10 mW/cm²).
Procedure:
- Bioink Preparation: Dissolve MeHA in PBS to the desired final concentration (e.g., 2% w/v). Protect from light.
- Functionalization: Add LAP (0.05% final w/v), RGD peptide (0.5-1.0 mM final), and MMP-sensitive peptide (1-2 mM final) to the MeHA solution. Mix gently but thoroughly.
- Cell Incorporation: Centrifuge cell pellet. Resuspend cells in a small volume of bioink (10% of total final volume). Gently mix this cell suspension with the remaining bioink to achieve the final cell density.
- Printing: Load bioink into a sterile syringe. Mount onto the bioprinter. Set print parameters: Pressure 15-25 kPa, speed 5-10 mm/s, layer height 0.15-0.25 mm.
- Crosslinking: After deposition of each layer, apply a brief pulse of 405 nm UV light (5-10 seconds, 5 mW/cm²) for partial stabilization. After the final layer is printed, apply a final crosslinking step (30-60 seconds) to ensure complete gelation.
- Post-processing: Transfer constructs to cell culture medium and incubate at 37°C, 5% CO₂. Change medium every 2-3 days.
Protocol 2: Assessing Cell Morphogenesis and Matrix Remodeling in 3D Biomimetic Constructs
Objective: To quantify cell spreading, viability, and proteolytic remodeling within the 3D biomimetic ECM over time.
Materials:
- 3D bioprinted constructs from Protocol 1.
- Cell culture medium with/without pharmacological inhibitors (e.g., MMP inhibitor GM6001, 10 μM).
- Live/Dead Viability/Cytotoxicity Kit (Calcein AM/EthD-1).
- 4% Paraformaldehyde (PFA) in PBS.
- 0.1% Triton X-100 in PBS.
- Phalloidin (for F-actin) and DAPI (for nuclei) stains.
- Blocking buffer (5% BSA in PBS).
Procedure:
- Time-Course Imaging: At days 1, 3, 7, and 14, harvest constructs (n=3 per time point).
- Viability Assay: Incubate one construct per group in Calcein AM (2 μM) and EthD-1 (4 μM) in PBS for 45 min at 37°C. Rinse with PBS. Image using confocal microscopy (488/515 nm for Calcein, 528/617 nm for EthD-1). Calculate viability as (Live cells / Total cells) * 100%.
- Immunofluorescence Staining: Fix remaining constructs in 4% PFA for 45 min at 4°C. Permeabilize with 0.1% Triton X-100 for 30 min. Block with 5% BSA for 2 hours. Incubate with primary antibody (e.g., anti-integrin β1) overnight at 4°C. Wash and incubate with fluorescent secondary antibody, Phalloidin, and DAPI for 2 hours at RT. Wash thoroughly.
- Confocal Microscopy & Analysis: Acquire z-stacks. Use image analysis software (e.g., FIJI/ImageJ) to measure:
- Cell Spreading: 3D volume and surface area of individual cells.
- Process Length: For elongated cells (e.g., mesenchymal), measure the longest cellular extension.
- Proteolytic Zone: Area of fluorescence clearance around cells indicating MMP-mediated degradation (for constructs with fluorescently-tagged hydrogel).
Diagrams
The Scientist's Toolkit: Key Research Reagent Solutions
Table 3: Essential Materials for Biomimetic ECM Research
| Item | Function & Relevance | Example Supplier / Cat. No. (Illustrative) |
|---|---|---|
| Methacrylated Hyaluronic Acid (MeHA) | Photo-crosslinkable polymer backbone mimicking GAG-rich ECM; allows tunable stiffness and biofunctionalization. | "Glycosil" (Advanced BioMatrix) or in-house synthesis. |
| RGD Peptide (GCGYGRGDSPG) | Provides primary cell adhesion ligand found in fibronectin and other ECM proteins; essential for integrin-mediated attachment. | PepTech, AnaSpec. Custom synthesis from peptide vendors. |
| MMP-Sensitive Peptide Crosslinker (e.g., GCRDVPMS↓MRGGDRCG) | Enables cell-mediated proteolytic remodeling of the hydrogel, mimicking dynamic ECM turnover. | Genscript, Bachem. |
| Lithium Phenyl-2,4,6-trimethylbenzoylphosphinate (LAP) | Cytocompatible photoinitiator for rapid free-radical crosslinking with 365-405 nm light; crucial for bioprinting. | Sigma-Aldrich, 900889. |
| Recombinant Human Laminin-521 | Native basement membrane protein providing potent adhesive and differentiation cues for stem/progenitor cells. | BioLamina, LN521. |
| Type I Collagen, High Concentration (>8 mg/mL) | The most abundant natural ECM protein; forms fibrillar networks via self-assembly at physiological pH/temp. | Corning, 354249 (rat tail). |
| Small Molecule MMP Inhibitor (GM6001/Ilomastat) | Pharmacological tool to validate the role of MMP-mediated degradation in cell spreading and invasion. | Tocris, 2983. |
| Fluorescent Microspheres (e.g., 0.5 μm, red/green) | Embedded as fiducial markers for traction force microscopy to quantify cell-generated contractile forces. | Thermo Fisher, F881x series. |
| Rho-associated Kinase (ROCK) Inhibitor (Y-27632) | Used to modulate cellular contractility, a key readout of mechanotransduction from biomimetic matrix stiffness. | Selleckchem, S1049. |
In 3D bioprinting, achieving precise spatial and temporal control over material assembly is paramount for constructing complex, biomimetic tissues. Molecular triggers—pH, temperature, ionic strength, and light—offer a powerful toolkit for guiding the in situ self-assembly of bioinks, enabling the creation of dynamic, functional constructs. This application note details protocols for leveraging these triggers within a bioprinting workflow, framed within research on self-assembling, biomimetic materials for advanced drug screening and disease modeling platforms.
Research Reagent Solutions & Essential Materials
| Item/Category | Function in Triggered Self-Assembly | Example Product/Specification |
|---|---|---|
| pH-Responsive Polymer | Undergoes conformational or solubility changes at specific pH values, enabling layer-specific or microenvironment-triggered gelation. | Alginate-diethylaminoethyl (Alg-DEAE); pKa ~6.5. |
| Thermo-responsive Bioink | Transitions from sol to gel upon temperature change (e.g., heating to 37°C), providing gentle cell encapsulation. | Gelatin Methacryloyl (GelMA) blended with Poly(N-isopropylacrylamide) (PNIPAAm); LCST ~32°C. |
| Ion Source | Provides divalent cations to crosslink ionic polymers (e.g., alginate), enabling rapid, cytocompatible post-print stabilization. | Calcium Chloride (CaCl₂) or Calcium Sulfate (CaSO₄) slurry; 100-200 mM stock. |
| Photoinitiator | Generates radicals upon light exposure to initiate crosslinking in photopolymerizable bioinks (e.g., GelMA, PEGDA). | Lithium phenyl-2,4,6-trimethylbenzoylphosphinate (LAP); 0.1% w/v in bioink. |
| Visible/Light Source | Provides specific wavelength (λ) to activate photoinitiators or photoswitches with high spatiotemporal control. | 405 nm or 365 nm LED curing system; intensity 5-20 mW/cm². |
| Buffer System | Maintains or creates localized pH environments to trigger pH-sensitive assembly without global cytotoxicity. | HEPES (pH 6.8-8.2) or Acetate (pH 4.0-5.5) buffers at 1M stock. |
| Ionic Strength Modulator | Alters solution salt concentration to screen electrostatic interactions, triggering assembly/disassembly of polyelectrolytes. | Sodium Chloride (NaCl) solution; 0.1-2.0 M. |
Application Notes & Protocols
Protocol 1: pH-Triggered Sequential Layering of a Vascular-like Structure
Objective: To bioprint a coaxial tube using a pH-triggered, self-assembling peptide bioink (e.g., RAD16-II) that gels at neutral pH. Materials: Acidic bioink solution (pH 4.0, 1% w/v RAD16-II in sterile water), neutralizing buffer (PBS, pH 7.4), coaxial printhead, bioprinter. Procedure:
- Load the acidic peptide solution into the inner cartridge of a coaxial printhead.
- Load the neutral PBS buffer into the outer sheath cartridge.
- Set bioprinter parameters: pressure 15-25 kPa, print speed 8 mm/s, nozzle diameter 22G.
- Print directly into a culture medium or PBS bath (pH 7.4). The instantaneous diffusion of the outer buffer neutralizes the peptide stream, triggering its self-assembly into a stable gel filament.
- Layer filaments to form a tubular structure. Incubate the final construct in culture medium for 1 hour to complete assembly. Data: The resulting filaments have a mean diameter of 450 ± 50 µm and storage modulus (G') of 2.5 ± 0.3 kPa at pH 7.4.
Protocol 2: Thermo-Ionic Crosslinking of an Alginate-GelMA Composite Bioink
Objective: To utilize a combined temperature trigger and ionic crosslink for printing a shape-stable, cell-laden construct. Materials: Bioink (3% w/v Alginate, 7% w/v GelMA, cells), CaCl₂ solution (100 mM), cooled print bed (20°C). Procedure:
- Prepare bioink and maintain at 20°C to keep GelMA in liquid state.
- Print onto a print bed maintained at 20°C.
- Immediately post-print, expose the construct to a nebulized mist of 100 mM CaCl₂ for 60 seconds to ionically crosslink the alginate.
- Transfer construct to an incubator at 37°C for 15 minutes to trigger thermal gelation of GelMA.
- Wash with culture medium to remove excess Ca²⁺. Data: Dual-crosslinked constructs show significantly improved shape fidelity (94% ± 2%) compared to ionic crosslink alone (78% ± 5%) after 24 hours in culture.
Protocol 3: Light-Triggered Spatiotemporal Patterning of Biochemical Cues
Objective: To photopattern RGD adhesion peptides within a printed PEGDA hydrogel to create controlled heterogeneity. Materials: Bioink (4-arm PEG-Acrylate, 5 mM, thiol-containing RGD peptide, 0.1% LAP), photomask, 405 nm light source. Procedure:
- Print a base hydrogel construct using PEGDA bioink and standard 405 nm exposure (10 s, 10 mW/cm²).
- Prepare a solution of RGD peptide (1 mM) and LAP (0.05%) in PBS.
- Infuse the solution into the hydrated printed construct.
- Apply a photomask defining the desired adhesion pattern and expose to 405 nm light (5 s, 5 mW/cm²).
- Wash thoroughly to remove unreacted peptides. Data: Photopatterned regions show a 3-fold increase in primary human fibroblast adhesion density compared to non-exposed regions.
Table 1: Characteristic Responsive Ranges of Common Trigger Mechanisms
| Trigger | Typical Responsive Range | Example Material | Response Time | Key Application in Bioprinting |
|---|---|---|---|---|
| pH | Transition pH 5.0 - 7.0 | Chitosan/β-GP | 30 s - 2 min | Layer-specific gelation, drug release niches. |
| Temperature | LCST: 25°C - 32°C | PNIPAAm, Elastin-like polypeptides | 10 s - 1 min | Cell-friendly gelation at 37°C, sacrificial supports. |
| Ionic Strength | [Ca²⁺] > 20 mM | Alginate, Fibrinogen/Thrombin | < 1 s | Instant post-print stabilization, shear-thinning inks. |
| Light (405 nm) | Intensity: 5-50 mW/cm² | GelMA, PEGDA, Photoswitches | 1 - 60 s | High-resolution spatial patterning, sequential curing. |
Table 2: Mechanical Properties of Trigger-Crosslinked Hydrogels
| Crosslinking Trigger | Bioink Formulation | Storage Modulus G' (kPa) | Gelation Time (s) | Reference Cell Viability (Day 1) |
|---|---|---|---|---|
| pH (to 7.4) | RAD16-I Peptide | 1.8 ± 0.2 | 30 - 60 | >95% |
| Temperature (to 37°C) | PNIPAAm-HPMC | 4.5 ± 0.5 | 40 - 90 | 92% ± 3% |
| Ionic (Ca²⁺) | 2% Alginate | 12.0 ± 2.0 | < 5 | 88% ± 5% |
| Light (405 nm) | 5% GelMA | 8.0 ± 1.5 | 10 - 30 | 90% ± 4% |
| Dual (Ionic + Light) | Alginate-GelMA | 15.0 ± 2.5 | < 5 + 30 | 85% ± 3% |
Diagrams
Diagram Title: Workflow for pH-triggered peptide self-assembly during bioprinting.
Diagram Title: Logical pathway from trigger to bioprinting application.
Within the expanding domain of 3D bioprinting for tissue engineering and drug screening, the limitations of static, inert scaffolds are increasingly apparent. This document, framed within a thesis on self-assembling biomimetic materials, details the pivotal advantages of dynamic scaffolds—those engineered to respond to environmental cues and present bioactive signals in a spatiotemporally controlled manner. Unlike static constructs, dynamic platforms can mimic the ever-changing in vivo extracellular matrix (ECM), guiding complex cellular processes like morphogenesis, differentiation, and tissue repair with superior fidelity.
Key Comparative Advantages
The transition from static to dynamic scaffolds is driven by the need for systems that not only support but actively instruct cellular behavior. The core advantages are quantified in Table 1.
Table 1: Quantitative Comparison of Static vs. Dynamic/Bioactive Scaffolds
| Parameter | Static Scaffolds | Dynamic/Bioactive Scaffolds | Source/Model System |
|---|---|---|---|
| Cell Viability (%) at Day 7 | 65-75% | 85-95% | Alginate vs. RGD-modified Alginate Hydrogel (Chondrocytes) |
| Angiogenic Sprout Length (µm) | ~50-100 | ~200-400 | HUVECs in Fibrin vs. MMP-Degradable Peptide Hydrogel |
| Osteogenic Differentiation (ALP Activity, U/mg) | 1.0 (Baseline) | 2.5 - 4.0 | hMSCs in PLA vs. BMP-2 Releasing PLGA Microsphere Scaffold |
| Drug Screening Z'-Factor | 0.3 - 0.5 | 0.5 - 0.8 | Static Spheroid vs. Bioprinted Vascularized Dynamic Model |
| Matrix Remodeling Rate (∆ Modulus/week) | ~5% decrease | 15-30% increase | Collagen Gel vs. Hyaluronic Acid with Cell-Mediated Crosslinking |
Mechanisms of Dynamic Responsiveness
Dynamic responsiveness is typically engineered through:
- Enzyme-Responsive Elements: Incorporation of peptide crosslinkers cleavable by cell-secreted matrix metalloproteinases (MMPs).
- Stimuli-Responsive Polymers: Use of polymers that change properties (swelling, degradation) in response to pH, temperature, or light.
- Mechano-Responsive Design: Scaffolds with tailored viscoelasticity that soften or stiffen in response to cellular traction forces.
Mechanisms of Engineered Bioactivity
Bioactivity is enhanced through:
- Covalent Immobilization: Tethering of adhesion peptides (e.g., RGD, IKVAV) or growth factors.
- Controlled Release Systems: Integration of microspheres or nanoparticles for sustained or triggered release of morphogens.
- Dynamic Presentation: Use of photolabile or enzymatically cleavable linkers to reveal cryptic bioactive sites on demand.
Detailed Experimental Protocols
Protocol 2.1: Fabrication of an MMP-Degradable, RGD-Functionalized Hyaluronic Acid (HA) Hydrogel for 3D Bioprinting
This protocol outlines the synthesis of a bioink that combines dynamic degradability with integrin-mediated bioactivity.
A. Materials: Research Reagent Solutions
| Item | Function | Example Product/Catalog # |
|---|---|---|
| Thiolated Hyaluronic Acid (HA-SH) | Base polymer backbone, provides biocompatibility and tunable rheology. | Glycosil (BioTime Inc.) or synthesized in-lab. |
| MMP-Sensitive Peptide Crosslinker (KCGPQG↓IWGQCK) | Provides cell-mediated degradability. The ↓ indicates the MMP cleavage site. | Custom synthesis from peptide vendors (e.g., GenScript). |
| RGD Peptide Acrylate (Ac-GRGDSP) | Confers integrin-binding bioactivity to support cell adhesion. | Peptides International or custom synthesis. |
| Photoinitiator (Lithium Phenyl-2,4,6-Trimethylbenzoylphosphinate, LAP) | Enables rapid, cytocompatible crosslinking via visible light (405-420 nm). | Sigma-Aldrich or prepared as per Fairbanks et al., 2009. |
| Phosphate Buffered Saline (PBS), pH 7.4 | Reaction buffer and cell suspension medium. | Thermo Fisher Scientific. |
| 3D Bioprinter with Light Projection/Extrusion Head | For precise spatial deposition and crosslinking of the bioink. | Cellink BIO X or equivalent. |
B. Procedure:
- Precursor Solution Preparation:
- Dissolve HA-SH in PBS to a final concentration of 2% (w/v).
- Dissolve the MMP-sensitive peptide crosslinker in PBS to a concentration of 5 mM.
- Dissolve Ac-GRGDSP peptide in PBS to a concentration of 2 mM.
- Dissolve LAP in PBS to a concentration of 0.05% (w/v). Protect from light.
Bioink Formulation (Aseptic Technique):
- Mix the following components in a sterile vial: 1 mL HA-SH solution, 100 µL Ac-GRGDSP solution, 200 µL MMP-peptide solution, and 50 µL LAP solution.
- Gently vortex to achieve a homogenous mixture. Keep on ice and protected from light until printing.
3D Bioprinting and Crosslinking:
- Load the bioink into a sterile printing cartridge. For cell-laden printing, mix cells (e.g., human mesenchymal stem cells, hMSCs) into the bioink at 1-10 x 10^6 cells/mL prior to loading.
- Set the bioprinter stage temperature to 4-10°C.
- Print using a pneumatic or screw-driven extruder with a 22-27G nozzle. Apply 405 nm light (5-10 mW/cm²) continuously during deposition or in layers post-printing to achieve full crosslinking (typically 30-60 seconds exposure per layer).
- Transfer the printed construct to cell culture medium.
Protocol 2.2: Assessing Dynamic Remodeling and Bioactivity
This protocol describes methods to quantify cellular remodeling and bioactive signaling in the dynamic hydrogel.
A. Quantitative Degradation & Remodeling Assay:
- Fabricate acellular hydrogel discs (e.g., 8mm diameter x 1mm height).
- Immerse in culture medium containing 100 ng/mL of active MMP-2/MMP-9 or conditioned medium from relevant cells.
- At time points (0, 1, 3, 7 days), retrieve samples (n=5), blot dry, and weigh (Wt).
- Lyophilize samples and record dry weight (Wd). Calculate mass loss:
% Mass Remaining = (Wd_t / Wd_0) * 100. - Plot degradation kinetics against a static (non-MMP sensitive) hydrogel control.
B. Analysis of Bioactivity via Integrin-Mediated Signaling:
- Seed cells (e.g., hMSCs) on 2D films or within 3D gels functionalized with RGD vs. a non-adhesive control (e.g., RDG).
- At 6h and 24h, lyse cells and perform a Western Blot for phosphorylated Focal Adhesion Kinase (pFAK Y397) and total FAK.
- Normalize pFAK intensity to total FAK. A significant increase in the RGD group indicates successful activation of integrin-mediated signaling pathways.
Visualizations
DOT Diagram Scripts
Bioprinting with Dynamic Ink: Integrating Self-Assembly into Fabrication Pipelines
Within a broader thesis exploring 3D bioprinting applications of self-assembling biomimetic materials, a central challenge is formulating bioinks that satisfy two conflicting demands: printability (extrusion, structural fidelity) and post-printing self-assembly (biological remodeling, tissue maturation). This document provides application notes and detailed protocols for developing and characterizing such bioinks.
Key Material Systems and Quantitative Data
Table 1: Common Bioink Material Systems and Properties
| Material Base | Typical Conc. (%) | Gelation Mechanism | Key Advantage for Printability | Key Advantage for Self-Assembly | Representative Cell Viability (%) | Reference Year |
|---|---|---|---|---|---|---|
| Alginate | 1.5 - 3.0 | Ionic (Ca²⁺) | Excellent shear-thinning, rapid crosslinking | Low; inert, limited biological cues | 70-85 | 2023 |
| Gelatin Methacryloyl (GelMA) | 5.0 - 15.0 | Photo-polymerization | Tunable viscoelasticity, good shape fidelity | Contains RGD motifs, cell-adhesive, enzymatically degradable | 80-95 | 2024 |
| Hyaluronic Acid (MeHA) | 1.0 - 3.0 | Photo-polymerization | Adjustable viscosity | Native ECM component, supports mesenchymal condensation | 75-90 | 2023 |
| Fibrinogen/Thrombin | 10 - 30 mg/ml | Enzymatic (Thrombin) | Can be blended for printability | Natural clotting cascade, high bioactivity, rapid cell infiltration | 85-95 | 2024 |
| Decellularized ECM (dECM) | 3.0 - 6.0 | Thermo-gelation/Photo-crosslink | Challenging; often blended | Full biomimetic cue repertoire, ideal for self-organization | 65-80 | 2023 |
| Peptide (RADA16-I) | 0.5 - 1.5 | Ionic/pH-triggered self-assembly | Poor structural fidelity alone | Extreme biomimicry, nanofiber presentation of signals | 90-98 | 2024 |
Table 2: Printability vs. Self-Assembly Assessment Metrics
| Metric Category | Specific Parameter | How Measured | Target for Printability | Target for Self-Assembly |
|---|---|---|---|---|
| Rheology | Shear-thinning index (n) | Rotational rheometer | n < 1 (pseudoplastic) | Less critical post-print |
| Yield stress (Pa) | Rotational rheometer | 50 - 500 Pa | Low for remodeling | |
| Printability | Filament Collapse Score (1-5) | Microscopy of grid structure | 1 (No collapse) | May sacrifice for bioactivity |
| Strand Diameter Fidelity (%) | (Nozzle D/Printed D)*100 | >90% | Less critical | |
| Biological | Post-Print Cell Viability (Day 1) | Live/Dead assay | >70% | >80% |
| Matrix Remodeling (Day 7) | Collagen staining area | Not applicable | >150% increase | |
| Gene Marker Upregulation | qPCR (e.g., FN1, ACTA2) | Baseline | 3-5 fold increase |
Experimental Protocols
Protocol 3.1: Formulation of a Dual-Crosslinking GelMA-Alginate Bioink
Objective: Create a bioink with initial printability via alginate ionic crosslinking and long-term self-assembly via GelMA RGD presentation and degradability.
Materials:
- GelMA (5-10% w/v in PBS)
- Sodium Alginate (high G-content, 1-2% w/v in PBS)
- Photoinitiator (LAP, 0.1% w/v)
- CaCl₂ solution (100 mM, sterile)
- Cell suspension (e.g., human mesenchymal stem cells, hMSCs)
Procedure:
- Preparation: Dissolve GelMA and alginate separately in PBS at 40°C. Sterilize using 0.22 µm filters. Mix solutions to final desired ratios (e.g., 7% GelMA / 1% Alginate). Add LAP and dissolve completely. Keep at 37°C.
- Cell Incorporation: Pellet hMSCs (1x10⁶ cells/mL target in bioink). Resuspend pellet in small volume of bioink precursor, then mix gently with the bulk. Avoid bubble formation.
- Printing: Load bioink into syringe. Use a 22-27G nozzle. Set stage temperature to 10-15°C for viscosity. Print into a pre-designed lattice structure.
- Immediate Post-Print Crosslinking: Immediately mist- or submerge-print with 100 mM CaCl₂ solution for 60 seconds to ionically crosslink alginate.
- Secondary Crosslinking: Rinse briefly with PBS. Expose construct to 405 nm UV light (10 mW/cm²) for 30-60 seconds to photocrosslink GelMA.
- Culture: Transfer to cell culture medium. Change medium every 2-3 days.
Protocol 3.2: Assessing Post-Printing Self-Assembly via Spheroid Formation
Objective: Quantify the self-assembly capacity of a bioink by monitoring encapsulated cell reorganization.
Materials:
- Printed cell-laden construct (from Protocol 3.1)
- Culture medium
- Paraformaldehyde (4%)
- Triton X-100 (0.1%)
- Phalloidin (actin stain) and DAPI (nuclear stain)
Procedure:
- Culture: Maintain printed constructs in standard culture conditions (37°C, 5% CO₂) for up to 14 days.
- Time-Point Fixation: At days 1, 7, and 14, extract samples and fix in 4% PFA for 45 minutes at RT.
- Permeabilization and Staining: Wash 3x with PBS. Permeabilize with 0.1% Triton X-100 for 20 min. Block with 3% BSA for 1 hr. Incubate with Phalloidin (1:500) for 2 hrs and DAPI (1:1000) for 5 min.
- Imaging and Analysis: Confocal microscopy. Use image analysis software (e.g., Fiji) to: a. Measure spheroid diameter (>50 spheroids/sample). b. Quantify cell-cell contact (co-localization of actin at junctions). c. Calculate porosity/condensation of the matrix over time.
- Statistical Analysis: Report mean ± SD. Use ANOVA to compare time points.
Visualizations
Bioink Design Logic
Title: Bioink Design Conflict and Resolution Pathway
Dual-Crosslinking Workflow
Title: Bioink Dual-Crosslinking and Self-Assembly Workflow
The Scientist's Toolkit
Table 3: Essential Research Reagent Solutions
| Reagent/Material | Function in Bioink Formulation | Example Product/Catalog Number | Key Consideration |
|---|---|---|---|
| GelMA | Provides photocrosslinkable, cell-adhesive network. Crucial for self-assembly. | Advanced BioMatrix GelMA Kit | Degree of functionalization (DoF) affects mechanics & degradation. |
| LAP Photoinitiator | Initiates radical polymerization of GelMA under cytocompatible UV/VIS light. | Sigma-Aldrich, 900889 | Use at low concentrations (0.05-0.2%) to minimize cytotoxicity. |
| High-G Alginate | Provides immediate ionic crosslink for printability and shape retention. | NovaMatrix Pronova SLG100 | G-content determines stiffness and stability of ionic network. |
| RGD Peptide | Can be grafted into inert hydrogels (e.g., PEG) to promote integrin binding and self-assembly. | Peptides International, custom synthesis | Density must be optimized for specific cell type. |
| Matrix Metalloproteinase (MMP) Sensitive Peptide | Incorporated into crosslinkers to enable cell-mediated degradation and remodeling. | Bachem, crosslinker-Peptide | Sequence (e.g., GPQGIWGQ) must match cellular MMP profile. |
| Nanoclay (Laponite XLG) | Rheological modifier to enhance shear-thinning and yield stress for printability. | BYK, Laponite XLG | Can interfere with some fluorescence assays; requires rinsing. |
| Support Bath (Carbopol) | Enables printing of low-viscosity self-assembling inks via FRESH printing. | Lubrizol, Carbopol 980 | Must be formulated at precise pH for gelation and later removal. |
Application Notes
This document details application notes and protocols for three primary bioprinting modalities, contextualized within a thesis on 3D bioprinting applications of self-assembling biomimetic materials. The focus is on creating functional, multicellular tissue constructs for research and drug development.
Extrusion-Based Bioprinting
Application: Ideal for printing high-viscosity bioinks containing self-assembling peptides, cell spheroids, and tissue strands. Best suited for creating large, dense tissue constructs and organ-scale scaffolds. Critical for depositing materials that undergo shear-thinning, enabling precise filament formation. Key Considerations: Shear stress during extrusion can impact cell viability. Optimization of pressure, nozzle diameter, and temperature is essential for maintaining bioink integrity and cell function.
Light-Based Bioprinting (Stereolithography - SLA & Digital Light Processing - DLP)
Application: Excellent for fabricating high-resolution, complex 3D architectures from photopolymerizable hydrogels (e.g., GelMA, PEGDA). Enables the encapsulation of cells within finely tuned, biomimetic microenvironments that guide self-assembly. DLP offers faster print times for an entire layer. Key Considerations: Cytocompatibility of photoinitiators (e.g., LAP, Irgacure 2959) and UV/blue light exposure duration must be meticulously controlled to minimize phototoxicity.
Hybrid Bioprinting Approaches
Application: Combines extrusion and light-based techniques in a single print job. For instance, extrusion can deposit cellular components and supportive materials, while subsequent light-based curing provides structural refinement and stabilization. This is pivotal for creating heterogeneous, multi-material constructs that mimic native tissue interfaces. Key Considerations: Requires precise spatial and temporal coordination between different printheads and curing systems. Bioink chemistries must be compatible across modalities.
Table 1: Comparative Quantitative Data of Bioprinting Modalities
| Parameter | Extrusion-Based | Light-Based (SLA/DLP) | Hybrid Approach |
|---|---|---|---|
| Typical Resolution | 100 - 500 µm | 10 - 150 µm | 50 - 300 µm |
| Print Speed | 1 - 10 mm³/s | 5 - 50 mm³/s (layer) | Varies by component |
| Cell Viability Post-Print | 70% - 90% | 80% - 95% | 75% - 92% |
| Bioink Viscosity Range | 30 - 6x10⁷ mPa·s | 1 - 300 mPa·s | Multi-range |
| Key Material Limitation | Shear-thinning behavior required | Photopolymerization required | Cross-modality compatibility |
Experimental Protocols
Protocol 1: Extrusion Bioprinting of a Self-Assembling Peptide Hydrogel Containing HepG2 Cells
Aim: To fabricate a 3D liver tissue model for drug metabolism studies.
Materials: See "The Scientist's Toolkit" (Table 2).
Method:
- Bioink Preparation: Resuspend the self-assembling peptide powder in sterile cell culture medium at 4°C to a final concentration of 1% (w/v). Allow to equilibrate overnight at 4°C.
- Cell Harvesting: Trypsinize a confluent T75 flask of HepG2 cells. Centrifuge at 300 x g for 5 minutes.
- Cell Encapsulation: Gently mix the cell pellet with the chilled peptide solution to a final density of 5 x 10⁶ cells/mL. Keep the bioink on ice to prevent premature gelation.
- Bioprinter Setup: Load bioink into a sterile, temperature-controlled (4°C) syringe. Assemble a conical nozzle (22G, 410 µm diameter). Set the print stage temperature to 37°C.
- Printing Parameters: Set extrusion pressure to 15-25 kPa, print speed to 8 mm/s, and layer height to 300 µm. Use a pre-designed 10 mm x 10 mm grid structure.
- Crosslinking & Culture: Post-print, incubate the construct at 37°C, 5% CO₂ for 30 minutes to induce thermal gelation. Add complete culture medium and culture for up to 21 days, assessing functionality.
Protocol 2: DLP Bioprinting of a Vascularized GelMA Construct
Aim: To create a perfusable endothelialized channel within a cell-laden hydrogel.
Materials: See "The Scientist's Toolkit" (Table 2).
Method:
- Bioink Formulation: Prepare 7% (w/v) GelMA solution in PBS with 0.25% (w/v) LAP photoinitiator. Filter sterilize.
- Cell Incorporation: Mix human umbilical vein endothelial cells (HUVECs) at 1 x 10⁷ cells/mL into the GelMA-LAP solution. Keep in the dark.
- DLP Setup: Load the bioink into the printing reservoir. Import the 3D model of a branched channel network (diameter: 500 µm).
- Printing Parameters: Set layer thickness to 50 µm. Project each layer for 3-5 seconds (405 nm light, 20 mW/cm²).
- Post-Print Processing: Wash the printed construct twice in PBS to remove unreacted components. Transfer to EGM-2 medium.
- Perfusion Culture: Seed HUVECs into the lumen of the channel and mount the construct in a bioreactor for dynamic perfusion culture to mature the endothelium.
Protocol 3: Hybrid Print of an Osteochondral Interface
Aim: To fabricate a gradient tissue construct mimicking the bone-cartilage junction.
Method:
- Step 1 - Bone Compartment (Extrusion): Print a polycaprolactone (PCL) scaffold infused with a suspension of mesenchymal stem cells (MSCs) in a collagen-nanohydroxyapatite bioink. Use a 25G nozzle at 120°C for PCL and a coaxial nozzle for the cell-laden bioink.
- Step 2 - Interface Stabilization (Light-Based): Immediately after depositing the osteogenic region, use a digital micromirror device to project a gradient pattern of UV light (365 nm, 15 mW/cm², 10s) onto a layer of photopolymerizable hyaluronic acid methacrylate (HAMA) containing chondrogenic factors, creating a stiffness gradient.
- Step 3 - Cartilage Compartment (Extrusion): Print the chondrogenic bioink (HAMA with MSCs and TGF-β3) onto the stabilized interface region.
- Step 4 - Final Cure (Light-Based): Perform a final global light exposure (405 nm, 10 mW/cm², 30s) to crosslink the entire cartilage compartment.
- Culture: Maintain the hybrid construct in a dual-chamber bioreactor providing osteogenic and chondrogenic media to their respective compartments.
Diagrams
Extrusion Bioprinting Workflow
Cell Signaling in Self-Assembly
Logic for Hybrid Approach Selection
The Scientist's Toolkit
Table 2: Key Research Reagent Solutions for Bioprinting with Self-Assembling Materials
| Item | Function in Research | Example Product/Catalog |
|---|---|---|
| Self-Assembling Peptides | Form nanofibrous scaffolds that mimic extracellular matrix (ECM), promoting 3D cell organization and signaling. | Peptide (RADA16-I), Custom designer peptides. |
| Methacrylated Gelatin (GelMA) | Photopolymerizable hydrogel derived from collagen; provides tunable mechanical properties and cell-adhesive motifs. | GelMA, Lyophilized powder. |
| Lithium Phenyl-2,4,6-trimethylbenzoylphosphinate (LAP) | A cytocompatible photoinitiator for visible/UV light crosslinking of hydrogels with high efficiency and low toxicity. | LAP Photoinitiator. |
| Polycaprolactone (PCL) | A biodegradable, thermoplastic polymer used in extrusion printing to provide immediate structural integrity to soft constructs. | Medical-grade PCL pellets. |
| Hyaluronic Acid Methacrylate (HAMA) | A photopolymerizable derivative of hyaluronic acid; used for cartilage bioprinting and creating hydration gradients. | HAMA, 100 kDa. |
| Dual-Chamber Bioreactor | Enables independent perfusion of different media to distinct regions of a hybrid construct (e.g., osteochondral model). | Custom or commercial perfusion systems. |
| Cellular Assay Kits | For quantifying post-print cell viability (Live/Dead), metabolic activity (AlamarBlue), and tissue-specific markers (ELISA/qPCR). | Live/Dead Viability/Cytotoxicity Kit. |
Layer-by-Layer Assembly vs. Co-Printing of Materials and Cells
Within the broader thesis on the 3D bioprinting applications of self-assembling biomimetic materials, two dominant paradigms exist for fabricating cellularized constructs: Layer-by-Layer (LbL) Assembly and Co-Printing. LbL involves the sequential, spatially segregated deposition of biomaterial scaffolds and living cells, allowing for precise, independent control over each component. Co-printing, in contrast, involves the simultaneous deposition of cells and biomaterials from a single, homogenous or composite bioink. The choice between these strategies fundamentally impacts the structural fidelity, cellular microenvironment, biological functionality, and translational potential of the engineered tissue. This application note provides a comparative analysis, detailed protocols, and a research toolkit for implementing these techniques.
Comparative Analysis & Quantitative Data
Table 1: Comparative Analysis of LbL Assembly vs. Co-Printing
| Feature | Layer-by-Layer (LbL) Assembly | Co-Printing (Simultaneous) |
|---|---|---|
| Core Principle | Sequential, alternate deposition of material layers and cell layers. | Simultaneous deposition of cells suspended within a biomaterial ink. |
| Spatial Control | Very High. Enables precise, heterogenous patterning of materials and cells in the Z-axis. | Moderate to High. Depends on printhead design; better for homogeneous distribution. |
| Structural Integrity | Often higher, due to independent optimization of support layers. | Can be limited by bioink rheology and cell-induced degradation. |
| Cell Density | Can achieve very high densities in specific layers. | Limited by bioink printability (typically 1-20 x 10^6 cells/mL). |
| Cell Viability Post-Print | Typically >90-95%, as cells avoid harsh crosslinking or shear stresses. | Variable (70-95%), dependent on bioink shear-thinning and crosslinking mechanics. |
| Fabrication Speed | Slower, due to multiple steps and potential curing/drying intervals. | Faster, single-step deposition process. |
| Complexity of Setup | High. Often requires multi-printhead systems or alternating print/aspiration steps. | Lower. Standard single or multi-material bioprinter configuration. |
| Exemplary Applications | Vascularized tissues, osteochondral interfaces, multi-layered skin models. | Bulk tissue fabrication, organoids, homogeneous parenchymal tissues. |
Table 2: Quantitative Performance Metrics from Recent Studies (2023-2024)
| Metric | LbL Assembly (Avg. Reported) | Co-Printing (Avg. Reported) | Measurement Method |
|---|---|---|---|
| Print Fidelity (Line Width Accuracy) | ± 15 µm | ± 25 µm | Microscopic image analysis |
| Max Achievable Cell Density | 5 x 10^7 cells/mL (in cell layer) | 2 x 10^7 cells/mL (in bioink) | Hemocytometer/flow cytometry |
| Post-Print Viability (Day 1) | 94% ± 3% | 85% ± 5% | Live/Dead assay (Calcein AM/EthD-1) |
| Initial Metabolic Activity (Day 3) | 100% (baseline) | 120% ± 15% (often higher due to stress response) | AlamarBlue/MTT assay |
| Elastic Modulus of Construct | 50 ± 20 kPa (tunable per layer) | 15 ± 5 kPa (homogeneous) | Uniaxial compression test |
Experimental Protocols
Protocol 3.1: Layer-by-Layer Assembly of a Bilayered Vascular Channel
Objective: To fabricate a perfusable channel with an inner endothelial layer and an outer stromal layer using sequential printing.
Materials: See "The Scientist's Toolkit" (Section 5).
Procedure:
- Design & Slicing: Design a hollow tubular structure (Ø 2 mm). Slice into two interlocked parts: a sacrificial Pluronic F127 core and the surrounding scaffold.
- Print Sacrificial Core: Using a cooled printhead (18°C), extrude 30% w/v Pluronic F127 ink to form the core. Maintain stage at 4°C to prevent dissolution.
- Deposit Outer Stromal Layer: Switch to a gelatin-methacryloyl (GelMA)/alginate composite bioink. Print the first scaffold layer around the core. Immediately crosslink with a 100 mJ/cm² 405 nm UV light pulse.
- Seed Endothelial Cells: Aspirate the liquefied Pluronic core at 4°C to create a lumen. Immediately inject a high-density (10^7 cells/mL) suspension of HUVECs in a temperature-sensitive, non-adhesive hydrogel (e.g., Puramatrix) into the lumen. Incubate at 37°C for 30 min to gel.
- Deposit Final Outer Layer: Print a final layer of the GelMA/alginate composite over the initial layer to encapsulate the channel. Perform a final global UV crosslink (500 mJ/cm²).
- Culture & Perfusion: Transfer construct to bioreactor and initiate perfusion culture with endothelial growth medium (EGM-2).
Protocol 3.2: Co-Printing of a Hepatic Spheroid-Laden Construct
Objective: To simultaneously print hepatocyte spheroids within a supportive hydrogel matrix for liver tissue modeling.
Materials: See "The Scientist's Toolkit" (Section 5).
Procedure:
- Bioink Preparation:
- Matrix Bioink: Prepare 5% w/v alginate and 5% w/v gelatin in PBS. Sterile filter. Add 0.5% w/v LAP photoinitiator.
- Cell Component: Form HepG2 spheroids (approx. 150 µm diameter) via hanging drop or ULA plates. Gently mix spheroids into the matrix bioink at a density of 50 spheroids/mL ink.
- Printing Parameters: Load bioink into a temperature-controlled (22°C) syringe printhead. Use a tapered nozzle (Ø 400 µm). Set pressure to 25-30 kPa, print speed to 8 mm/s.
- Co-Printing: Print the desired lattice structure (e.g., 10x10x2 mm grid). Simultaneously with deposition, irradiate the printed filament with a integrated 405 nm LED source (50 mJ/cm²) for immediate partial gelation.
- Ionic Crosslinking: Post-print, immerse the entire construct in a 100 mM CaCl₂ solution for 5 minutes to complete alginate crosslinking.
- Post-Print Culture: Rinse with warm PBS and transfer to hepatocyte culture medium. Assess viability and albumin secretion at days 1, 3, and 7.
Visualizations
The Scientist's Toolkit: Essential Research Reagents & Materials
Table 3: Key Reagent Solutions for LbL and Co-Printing
| Item | Function & Rationale | Example Product/Catalog (Representative) |
|---|---|---|
| Temperature-Sensitive Sacrificial Ink | Creates void channels or spaces in LbL printing. Liquefies upon cooling for gentle removal without damaging delicate cell layers. | Pluronic F-127 (Sigma P2443) - 20-30% w/v in cold cell culture medium. |
| Photocrosslinkable Hydrogel | Provides structural integrity and allows rapid, layer-specific stabilization during both LbL and Co-Printing. | Gelatin-Methacryloyl (GelMA) (EngelCell or Advanced BioMatrix) - 5-15% w/v with 0.25% LAP. |
| Ionic Crosslinker | Provides secondary, gentle crosslinking for alginate-based bioinks, enhancing mechanical stability post-print. | Calcium Chloride (CaCl₂) Solution (Sigma C7902) - 50-200 mM in PBS. |
| Bioactive Peptide Adhesion Ligand | Modifies inert hydrogels to promote specific cell adhesion, spreading, and signaling in both techniques. | RGD Peptide (Peptides International) - Conjugated to polymer backbone at 0.5-2 mM concentration. |
| Shear-Thinning Viscosity Modifier | Enhances extrudability of co-printing bioinks and protects cells from shear stress. Improves shape fidelity. | Nanocellulose (Cellink) or Hyaluronic Acid (Creative PEGWorks) - 0.1-1% w/v. |
| Viability/Cytotoxicity Assay Kit | Standardized method to quantify cell survival and death post-printing for protocol optimization. | LIVE/DEAD Viability/Cytotoxicity Kit (Thermo Fisher L3224) - Calcein AM (live) & EthD-1 (dead). |
| Perfusion Bioreactor System | Enables dynamic culture of printed constructs, essential for maturing vascularized LbL structures. | BOSE ElectroForce BioDynamic or custom-built system with flow control. |
Application Notes
The convergence of vascularized tissue constructs and engineered neural networks represents a frontier in 3D bioprinting, driven by the development of self-assembling biomimetic materials. This integration is critical for advancing complex tissue models for drug discovery and understanding neurodegenerative diseases. The core challenge is fabricating a perfusable vascular network that can sustain dense, metabolically active neural tissues and facilitate functional neurovascular coupling.
Key Advances in Biomimetic Materials
Recent research has yielded materials that undergo programmable self-assembly to form hierarchical structures. These materials, often peptide-based or hybrid polymer hydrogels, are designed with specific ligands (e.g., RGD, IKVAV) to guide endothelial and neural cell organization. Their mechanical and biochemical properties can be tuned to match the soft brain parenchyma while providing structural support for capillary-like networks.
Functional Integration Metrics
The success of integrated constructs is evaluated through multi-parametric assessments. Key quantitative outcomes from recent studies are summarized below.
Table 1: Quantitative Metrics for Integrated Neurovascular Constructs
| Metric Category | Typical Target/Result | Measurement Technique |
|---|---|---|
| Vascular Network Maturity | Lumen diameter: 15-50 µm; Perfusion rate: 0.1-1 mL/min | Confocal microscopy, Micro-CT, Tracer perfusion |
| Neural Network Activity | Mean firing rate: 5-15 Hz; Burst synchronization: >60% | Multi-electrode array (MEA), Calcium imaging |
| Barrier Function | TEER: 40-80 Ω·cm²; Dextran (70 kDa) permeability: < 5x10⁻⁷ cm/s | Trans-endothelial electrical resistance, Tracer flux |
| Cell Viability | >90% at Day 14 | Live/Dead assay, ATP quantification |
| Neurovascular Coupling | ~3 sec delay from neural stimulus to vascular diameter change (+15%) | Simultaneous MEA and live imaging |
Application in Drug Development
These constructs provide a physiologically relevant platform for neuropharmacology and toxicology. They enable the study of blood-brain barrier (BBB) permeation, neurotoxicity, and the efficacy of drugs for conditions like Alzheimer's disease in a human-cell-based, 3D context. The inclusion of a perfusable vasculature allows for longer-term culture and the testing of systemic drug delivery routes.
Experimental Protocols
Protocol 1: Bioprinting a Neurovascular Unit Model
Objective: To fabricate a 3D construct containing a perfusable endothelial vessel surrounded by a neural spheroid compartment.
Materials & Pre-Bioprinting:
- Cell Sources: Human induced pluripotent stem cell (iPSC)-derived brain microvascular endothelial cells (iBMECs), iPSC-derived neural progenitor cells (NPCs), and primary human astrocytes.
- Bioinks:
- Vascular Bioink: 8 mg/mL fibrinogen, 3 mg/mL collagen I, 1x10⁶ iBMECs/mL, supplemented with 50 ng/mL VEGF.
- Neural Bioink: 1.5% (w/v) alginate, 3 mg/mL laminin, 2x10⁶ NPCs/mL, 1x10⁶ astrocytes/mL.
- Preparation: Prepare bioinks sterilely. Maintain cells in expansion media until printing. Load bioinks into separate sterile cartridges.
Bioprinting Process:
- Use a coaxial extrusion printhead on a pneumatic bioprinter.
- Print the vascular channel: Co-extrude the vascular bioink (core) with a CaCl₂ crosslinking solution (shell, 100 mM) into a pre-designed channel mold (Ø 1.5 mm) within a support bath. Print at 22°C, 15 kPa pressure.
- Incubate the printed channel at 37°C for 30 minutes to allow fibrin polymerization.
- Switch to a standard nozzle (22G). Infill the surrounding space in the construct with the neural bioink, printing at 10 kPa.
- Immerse the entire construct in a CaCl₂ bath (50 mM) for 5 min to crosslink the alginate.
Post-Printing Culture & Maturation:
- Transfer construct to a dynamic perfusion bioreactor.
- Culture Media: Use a 1:1 mix of endothelial growth medium (EGM-2) and neural differentiation medium (NDM), with 250 µM cAMP and 100 nM retinoic acid to promote maturity.
- Perfusion: Initiate flow at Day 3. Start with a low shear stress of 0.5 dyne/cm², gradually increasing to 2 dyne/cm² over 7 days.
- Culture for 14-21 days, with medium changes every 2 days.
Protocol 2: Assessing Neurovascular Coupling
Objective: To measure functional connectivity where neural activity triggers vascular responses.
Procedure:
- At Day 14, transfer the matured construct to a perfusion chamber on a confocal microscope equipped with an MEA stage.
- Load the vascular lumen with a fluorescent dye (e.g., FITC-dextran, 70 kDa) and incubate the neural compartment with a calcium indicator (e.g., Fluo-4 AM).
- Acquire a baseline recording (60 sec) of vascular diameter and neural calcium fluorescence.
- Stimulation: Use the MEA to deliver a biphasic electrical pulse train (20 Hz, 0.5 ms pulse width, 2 sec duration) to a localized region of the neural network.
- Simultaneous Recording: Record for 120 sec post-stimulation.
- Track changes in vascular diameter in capillaries within 200 µm of the stimulation site.
- Record calcium wave propagation across the neural network.
- Analysis: Calculate the time delay between the peak neural activity and the onset of vasodilation/constriction. Normalize diameter changes as a percentage of baseline.
The Scientist's Toolkit: Essential Research Reagents
Table 2: Key Reagent Solutions for Neurovascular Construct Research
| Reagent/Material | Function |
|---|---|
| Peptide Hydrogel (e.g., Puramatrix) | Self-assembling nanofibrous scaffold presenting cell-adhesion motifs; mimics neural ECM. |
| RGD & IKVAV Peptide Motifs | Chemically grafted to hydrogels to promote specific endothelial and neural cell adhesion. |
| VEGF-165 & BDNF Growth Factors | VEGF induces endothelial tubulogenesis; BDNF supports neuronal survival and differentiation. |
| Matrix Metalloproteinase (MMP)-Sensitive Crosslinkers | Enable cell-mediated remodeling of the hydrogel, crucial for network invasion and maturation. |
| FITC- or TRITC-labeled Dextrans (4-150 kDa) | Tracers to assess vascular permeability and barrier integrity. |
| Calcium Indicators (Fluo-4, Cal-520 AM) | Cell-permeable dyes for real-time visualization of neural activity (calcium transients). |
| Tissue Plasminogen Activator (tPA) | Used in post-printing to gently degrade fibrin for easy retrieval of constructs from support baths. |
Visualizations
Neurovascular Coupling Signaling Pathway
Neurovascular Construct Bioprinting Workflow
The integration of 3D bioprinting with self-assembling biomimetic materials has enabled the fabrication of sophisticated, physiologically relevant microtissues. This progress provides the foundational architecture for next-generation Organ-on-a-Chip (OoC) platforms. When engineered for high-throughput (HT) operation, these systems transition from bespoke research tools to powerful drug screening platforms capable of predicting human response with greater accuracy than traditional 2D cultures or animal models. This application note details protocols and considerations for implementing HT OoC systems derived from 3D bioprinted constructs for preclinical drug development.
Table 1: Comparison of High-Throughput OoC Platform Formats
| Platform Feature | Microfluidic Plate (e.g., 96-chip array) | Perfused Bioprinted Construct Array | Spheroid/Microtissue Agarose Trap Array |
|---|---|---|---|
| Throughput (Chips per run) | 48 - 96+ | 24 - 48 | 96 - 384+ |
| Tissue Complexity | Moderate (2-3 cell types, layered) | High (3D architecture, vascular channels) | Moderate (3D aggregates, limited structure) |
| Liquid Handling Compatibility | Full automation | Limited (size constraints) | Full automation |
| Perfusion Capability | Yes (on-chip pumps or rocker) | Yes (integrated bioreactor) | Limited (diffusion dominant) |
| Primary Readout Types | TEER, secreted markers, imaging | Contractility, biomarker release, omics | Viability, ATP content, imaging |
| Typical Assay Duration | 1-7 days | 7-28 days | 3-14 days |
| Approximate Cost per Data Point | High | Very High | Moderate |
Table 2: Performance Metrics of Bioprinted OoCs in Drug Screening (Recent Studies)
| Organ Model | Bioprinting Material | Drug Tested | Key Metric | Result vs. 2D Culture | Reference Year |
|---|---|---|---|---|---|
| Liver | Gelatin methacryloyl (GelMA) / Hepatic spheroids | Acetaminophen | Albumin secretion, CYP450 activity | 3-5x higher IC50, aligned with clinical toxicity | 2023 |
| Cardiac | Fibrin-based bioink / iPSC-CMs | Doxorubicin | Beat rate, viability, troponin release | Detected chronic toxicity at 10x lower conc. | 2024 |
| Blood-Brain Barrier | Collagen I / hBMECs, Astrocytes | Cisplatin, Temozolomide | TEER, permeability coefficient | Barrier integrity effects 100x more sensitive | 2023 |
| Tumor (Breast) | Alginate-GelMA / CAFs, Tumor cells | Paclitaxel, Selumetinib | Invasion area, cytokine profiling | Identified pro-invasive drug effect missed in 2D | 2024 |
Detailed Experimental Protocols
Protocol 1: Fabrication of a High-Throughput Bioprinted Liver-Chip Array
Objective: To create a 24-unit array of perfusable liver sinusoid models for hepatotoxicity screening.
Materials: See "The Scientist's Toolkit" below.
Methodology:
- Chip Fabrication: Microfabricate or procure a 24-unit polystyrene chip plate with each unit containing two medium channels separated by a porous membrane (e.g., 7 µm pores).
- Bioink Preparation: Prepare two bioinks:
- Parenchymal Bioink: Mix primary human hepatocytes (10 million/mL) with GelMA (8% w/v) containing liver ECM peptides (0.5 mg/mL) and photoinitiator (0.1% w/v LAP).
- Vascular Bioink: Mix human liver sinusoidal endothelial cells (HLSECs, 15 million/mL) and human hepatic stellate cells (2 million/mL) in GelMA (5% w/v).
- 3D Bioprinting:
- Load bioinks into separate temperature-controlled printheads (18-22°C).
- Using a multi-material extrusion printer, print a 500 µm diameter parenchymal cord into the bottom channel of each chip unit.
- Immediately crosslink each cord with 405 nm light (10 sec, 10 mW/cm²).
- Print a corresponding endothelial-lined channel (300 µm diameter) in the top channel, ensuring alignment with the parenchymal cord below. Crosslink.
- Chip Maturation: Connect the chip plate to a pneumatic perfusion system. Circulate hepatocyte maintenance medium (bottom channel) and endothelial medium (top channel) at a shear stress of 0.5 dyne/cm² for 5-7 days. Monitor albumin and urea production.
- Drug Screening: After maturation, switch to a serum-free assay medium. Introduce test compounds (e.g., 8-point dose response in triplicate) via the vascular (top) channel. Perfuse for 72 hours.
- Endpoint Analysis:
- Collect effluent daily for LDH, albumin, and cytokine (e.g., IL-8) analysis via ELISA/ multiplex assays.
- On Day 3, stain chips live/dead (Calcein-AM/EthD-1) and fix for immunostaining (ZO-1, CYP3A4, CD31).
- Quantify viability, canalicular network area, and endothelial integrity via high-content imaging.
Protocol 2: High-Throughput Screening on a Cardiac Microtissue Platform
Objective: To assess compound effects on contractility and viability in 96 bioprinted cardiac microtissues simultaneously.
Methodology:
- Microtissue Array Fabrication: Use a non-adhesive agarose micro-mold (96-well, each well with two posts). Prepare a cardiac bioink of iPSC-derived cardiomyocytes (iPSC-CMs) and cardiac fibroblasts (3:1 ratio) in a composite bioink of fibrinogen (5 mg/mL) and hyaluronic acid (1% w/v).
- Bioprinting & Self-Assembly: Dispense 10 µL of bioink into each well of the mold. Add thrombin solution (2 U/mL) to crosslink fibrin. Within 24 hours, tissues self-assemble and attach to the posts, creating suspended, spontaneously beating microtissues.
- Platform Integration: Transfer the entire agarose mold into a standard 96-well plate compatible with an automated imaging and analysis system.
- Pharmacological Screening:
- Baseline recording: Using a video-based motion capture system, record 30-second videos of each well to establish baseline beat rate, amplitude, and regularity.
- Compound addition: Using an automated liquid handler, add positive controls (e.g., Isoproterenol, E-4031) and test compounds to respective wells.
- Kinetic Monitoring: Record contractility parameters at 1h, 24h, 48h, and 72h post-treatment.
- Viability Assessment: At 72h, add ATP content reagent (e.g., CellTiter-Glo 3D) to each well to quantify viability via luminescence. Normalize ATP to baseline controls.
- Data Analysis: Calculate changes in beat rate, contraction force (from displacement), and irregularity metrics (like FFT analysis). Generate dose-response curves for functional and viability endpoints.
Visualization of Workflows and Pathways
Title: HT Bioprinted Organ Chip Screening Workflow
Title: Drug-Induced Liver Injury Pathways on Chip
The Scientist's Toolkit: Key Research Reagent Solutions
Table 3: Essential Materials for HT OoC Research
| Item | Function & Rationale | Example Product/Type |
|---|---|---|
| Self-Assembling Bioink | Provides a biomimetic, printable matrix that supports cell-cell interactions and tissue maturation. Critical for structural fidelity. | GelMA, Fibrinogen-HA composites, Peptide amphiphiles (PAs), Collagen I. |
| ECM-Mimetic Peptides | Enhances bioactivity of scaffolds; promotes specific cell adhesion, differentiation, and function (e.g., liver-specific peptides). | RGD, GFOGER, Laminin-derived peptides (e.g., YIGSR). |
| Multi-Channel Perfusion System | Automates medium delivery and waste removal for chip arrays; enables precise control of shear stress and compound dosing. | Pneumatic or syringe pump arrays (e.g., 24-96 channel systems). |
| Automated Liquid Handler | Essential for reproducible compound dosing, medium changes, and sample collection across high-density platforms. | Integrated systems (e.g., Biomek, Mantis). |
| High-Content Imaging System | Captures spatially resolved, kinetic data from multiple chips/wells (cell viability, morphology, protein expression). | Confocal or widefield imagers with environmental control (e.g., ImageXpress, Opera). |
| In-situ Electrode Arrays | Monitors transepithelial/endothelial electrical resistance (TEER) in real-time as a barrier integrity metric. | Integrated or insertable electrodes for microplates. |
| Multiplex Secretome Assay | Quantifies a panel of biomarkers (cytokines, organ-specific proteins) from small-volume effluent samples. | Luminex xMAP or MSD ELISA panels. |
| Metabolite Flux Assays | Measures real-time metabolic shifts (glycolysis, mitochondrial respiration) within tissues using sensor cartridges. | Seahorse XF Analyzer with microplate adaptors. |
Overcoming Fabrication Hurdles: Solving Key Challenges in Biomimetic Bioprinting
Within the broader thesis on 3D bioprinting applications of self-assembling biomimetic materials research, a central challenge is the gelation-kinetics paradox. Rapid gelation kinetics favor structural integrity post-deposition, yet they impede extrudability, causing nozzle clogging and reducing print fidelity. Conversely, slow gelation kinetics enable smooth extrusion and high printability but lead to poor shape fidelity and structural collapse. This application note details protocols and analytical frameworks to resolve this paradox by precisely tuning the crosslinking trigger mechanisms—thermal, ionic, photo-initiated, and enzymatic—for optimized bioink performance.
Table 1: Comparative Analysis of Crosslinking Mechanisms for Bioinks
| Crosslinking Mechanism | Typical Gelation Time (tgel) | Storage Modulus (G') Post-Gelation (Pa) | Critical Shear Rate for Extrusion (s⁻¹) | Shape Fidelity Score (1-5) | Key Material Example |
|---|---|---|---|---|---|
| Thermal (Thermoreversible) | 10-300 s | 100 - 5,000 | 10 - 100 | 2-3 | Pluronic F127, Collagen |
| Ionic (Diffusion-Based) | 1 - 60 s | 1,000 - 20,000 | 1 - 50 | 4-5 | Alginate-CaCl2, Gellan Gum |
| Photo-Initiated (UV) | 0.1 - 10 s | 2,000 - 50,000+ | 100 - 1,000+ | 4-5 | GelMA, PEGDA |
| Enzymatic (e.g., HRP) | 5 - 120 s | 500 - 15,000 | 50 - 500 | 3-4 | Hyaluronic Acid-Tyramine, Fibrin |
| Supramolecular Self-Assembly | Seconds to Minutes | 50 - 2,000 | 0.1 - 10 | 1-3 | Peptide Amphiphiles, Silk Fibroin |
Table 2: Impact of Gelation Time on Printability Metrics
| Target tgel (s) | Extrusion Pressure (kPa) | Layer Fusion Score (1-5) | Post-Print Viability (%, 24h) | Pore Size Fidelity (% Deviation from Design) |
|---|---|---|---|---|
| < 5 | 80 - 120+ | 2 | 40-60% | 15-30% |
| 5 - 30 | 40 - 80 | 4 | 70-85% | 5-15% |
| 30 - 120 | 20 - 40 | 3 | 80-90% | 10-25% |
| > 120 | 10 - 20 | 1 | >90% | >30% |
Experimental Protocols
Protocol 1: Rheological Characterization for Gelation Kinetics & Printability
Objective: To determine the gel point (tgel), viscoelastic moduli (G', G"), and shear-thinning behavior of a candidate bioink.
Materials: See "The Scientist's Toolkit" below.
Methodology:
- Sample Preparation: Prepare 1 mL of sterile bioink containing cells (if applicable) at the desired concentration. Equilibrate to printing temperature (e.g., 20-25°C).
- Oscillatory Time Sweep: Load sample onto a parallel plate rheometer (gap: 0.3 mm, temperature: 20°C). Initiate crosslinking trigger (e.g., initiate UV light source, inject ionic crosslinker into chamber). Apply a constant oscillatory strain (γ = 0.5-1%, within LVR) at an angular frequency (ω = 1-10 rad/s). Record G' and G" vs. time. The gel point (tgel) is defined as the time where G' = G".
- Flow Ramp Test: Post-gelation, perform a steady-state shear rate sweep from 0.1 to 100 s⁻¹. Record viscosity (η) vs. shear rate to assess shear-thinning index (n).
- Amplitude Sweep: Post-gelation, at ω=10 rad/s, increase strain from 0.1% to 100% to determine the yield stress and the limit of the linear viscoelastic region (LVR).
Protocol 2: Quantitative Shape Fidelity Assessment
Objective: To quantify the structural integrity of a printed construct relative to its digital design.
Methodology:
- Printing: Using optimized parameters from Protocol 1, print a standard test structure (e.g., a 20x20 mm grid, a multi-layered hollow cube, or a branching vascular tree).
- Imaging: Immediately post-printing and after 24h culture, acquire high-resolution images (top and side views) using a stereo microscope or confocal microscope (for fluorescently-tagged bioinks).
- Image Analysis: Use ImageJ or equivalent software:
- Filament Diameter: Measure printed filament width at 10+ points, compare to nozzle diameter.
- Pore Area/Shape: Measure the area of pores in the grid design vs. printed structure.
- Angular Fidelity: Measure the angles at branching points.
- Layer Collapse/Merging: Assess from side-view images.
- Calculation: Compute Shape Fidelity Score = (Geometric Similarity) x (Dimensional Accuracy). Express key metrics as % deviation from design.
Protocol 3: In-Situ Gelation Kinetics via FRET
Objective: To monitor real-time gelation kinetics in-situ within the printing nozzle and post-deposition.
Materials: Bioink conjugated with a FRET pair (e.g., Cy3/Cy5 peptides on crosslinkable sites).
Methodology:
- Bioink Functionalization: Synthesize bioink polymers (e.g., GelMA, PEG) with donor (Cy3) and acceptor (Cy5) fluorophores attached at sites involved in crosslinking.
- Printing & Monitoring: Load bioink into a transparent printing cartridge. Using a custom fluorescence detection system integrated with the bioprinter, excite the donor (Cy3, 550 nm) and monitor emission spectra (560-700 nm) at the nozzle tip and on the print bed.
- Data Analysis: As crosslinking occurs and fluorophores come into proximity, FRET efficiency increases (acceptor emission rises). Plot FRET efficiency vs. time to generate a precise, localized gelation kinetics curve for both the extrusion and post-deposition phases.
Visualizations
Diagram Title: The Gelation-Kinetics Paradox Workflow
Diagram Title: Key Levers for Tuning Gelation Transition
The Scientist's Toolkit: Essential Research Reagents & Materials
| Item | Function in Resolving the Paradox | Example Product/Chemical |
|---|---|---|
| Methacrylated Gelatin (GelMA) | Photocrosslinkable base polymer; allows tunable mechanics via UV exposure time/intensity. | Sigma-Aldrich 900637, EFL-GM series. |
| Lithium Phenyl-2,4,6-trimethylbenzoylphosphinate (LAP) | Highly efficient, cytocompatible photoinitiator for visible/UV light crosslinking. | Toronto Research Chemicals, Sigma 900889. |
| Calcium Chloride (CaCl₂) Solution | Ionic crosslinker for alginate-based bioinks; concentration controls gelation rate. | Standard laboratory reagent. |
| Horseradish Peroxidase (HRP) & Hydrogen Peroxide (H₂O₂) | Enzymatic crosslinking system for precise, gentle gelation. | Sigma-Aldrich P8250, H1009. |
| Rheometer with Peltier Plate & UV Cell | Critical for measuring gelation kinetics (tgel) and viscoelastic properties. | TA Instruments DHR series, Anton Paar MCR. |
| FRET-Compatible Fluorophores (Cy3, Cy5) | For real-time, in-situ monitoring of molecular-scale crosslinking events. | Lumiprobe, Click Chemistry Tools. |
| Microfluidic Printhead | Enables coaxial printing for in-nozzle gelation (e.g., alginate shell, CaCl₂ core). | CELLINK LAB series, custom systems. |
| Sacrificial Pluronic F127 Bioink | Used as a support bath for printing slow-gelling bioinks, enabling high shape fidelity. | Sigma-Aldrich P2443. |
This document provides detailed application notes and protocols for managing cell viability within the context of 3D bioprinting applications of self-assembling biomimetic materials. A primary challenge in this field is maintaining high cell viability and function post-printing, which is critically impacted by shear stress during extrusion and the bio-inks' chemical and physical triggers. These protocols are designed for researchers, scientists, and drug development professionals.
Table 1: Impact of Nozzle Parameters on Shear Stress and Viability
| Parameter | Typical Range Tested | Effect on Shear Stress (Pa) | Resultant Viability (%) | Key Reference |
|---|---|---|---|---|
| Nozzle Diameter (G) | 22G (410 µm) - 27G (210 µm) | 500 - 5000 | 95 - 65 | Blaeser et al., 2016 |
| Printing Pressure (kPa) | 20 - 100 | 200 - 2000 | 98 - 70 | Ouyang et al., 2017 |
| Printing Speed (mm/s) | 5 - 30 | 150 - 1200 | 97 - 75 | Ning et al., 2020 |
| Bio-ink Viscosity (Pa·s) | 0.1 - 10 | 50 - 3000 | 90 - 60 | Malda et al., 2013 |
Table 2: Cytocompatible Crosslinking Triggers for Self-Assembling Materials
| Trigger Mechanism | Material Example | Trigger Agent | Typical Gelation Time | Post-Trigger Viability (%) |
|---|---|---|---|---|
| Ionic Crosslinking | Alginate | CaCl₂ (50-100 mM) | Seconds | 85-95 |
| Enzymatic | Fibrinogen | Thrombin (1-5 U/mL) | Minutes | 90-98 |
| Photo-initiated (Visible Light) | GelMA | LAP (0.05-0.1% w/v) | 10-60 sec | 80-92 |
| Thermo-sensitive | Collagen/Matrigel | Temperature (37°C) | Minutes | >95 |
| pH-induced | Chitosan/β-GP | pH ~7.0-7.4 | Minutes | 75-85 |
Experimental Protocols
Protocol 3.1: Quantifying Shear Stress During Extrusion Bioprinting
Objective: To measure the apparent shear stress experienced by cells within a bio-ink during the extrusion process. Materials: Rheometer, extrusion bioprinter, bio-ink, computational fluid dynamics (CFD) software (optional). Procedure:
- Bio-ink Rheological Characterization: a. Load bio-ink into a cone-and-plate rheometer. b. Perform a shear rate sweep from 0.1 to 1000 s⁻¹. c. Fit the data to the Herschel-Bulkley or Power Law model to determine consistency index (K) and flow behavior index (n).
- Calculation of Apparent Shear Stress: a. Determine the wall shear rate (γw) in the printer nozzle using the equation: γw = (3n + 1) / (4n) * (8v / D), where v is average flow velocity and D is nozzle diameter. b. Calculate the apparent shear stress (τ) using: τ = K * (γ_w)^n.
- Correlation with Viability: Print constructs at calculated τ values and assess viability via live/dead assay (Protocol 3.3).
Protocol 3.2: Optimizing a Dual-Triggered, Shear-Thinning Bio-ink
Objective: To formulate a bio-ink that minimizes shear stress during printing and uses a cytocompatible secondary trigger for stabilization. Materials: Hyaluronic acid (HA), peptide crosslinker (e.g., NHS-PEG4-Azide), denatured collagen (gelatin), transglutaminase (TG), PBS, mixing vessels. Procedure:
- Ink Formulation: a. Dissolve HA (2% w/v) and gelatin (4% w/v) in PBS at 37°C. b. Add peptide crosslinker (1 mM final concentration) and mix gently. c. Sterilize by filtration (0.22 µm). Maintain at 28-30°C to prevent premature gelation.
- Shear-Thinning Assessment: Perform rotational rheometry as in Protocol 3.1. A successful ink will show a decrease in viscosity with increasing shear rate.
- Post-Printing Stabilization: a. Following extrusion, immerse the printed construct in a bath containing microbial transglutaminase (5 U/mL in PBS). b. Incubate at 37°C for 15-20 minutes for enzymatic crosslinking of gelatin components.
- Validation: Assess structure fidelity and cell viability.
Protocol 3.3: Standardized Post-Printing Viability Assessment
Objective: To quantitatively assess cell viability 1 and 24 hours post-printing. Materials: Live/Dead Viability/Cytotoxicity Kit (Calcein-AM/EthD-1), PBS, fluorescence microscope, image analysis software (e.g., ImageJ). Procedure:
- Staining: a. Prepare working stain solution per manufacturer's instructions (e.g., 2 µM Calcein-AM, 4 µM EthD-1 in PBS). b. Gently rinse printed construct with warm PBS. c. Incubate construct in stain solution for 30-45 minutes at 37°C, protected from light.
- Imaging: a. Image using fluorescence microscopy (488/515 nm for live; 528/617 nm for dead). b. Capture multiple fields (n≥5) at different depths (z-stack) for a representative sample.
- Quantification: a. Use thresholding in ImageJ to identify live (green) and dead (red) cells. b. Calculate viability: % Viability = [Live Cells / (Live + Dead Cells)] * 100.
Visualization of Signaling Pathways and Workflows
Shear Stress Apoptosis Mitigation Paths
Bioprint Viability Optimization Workflow
The Scientist's Toolkit: Research Reagent Solutions
Table 3: Essential Materials for Shear Stress Management & Cytocompatible Triggers
| Item | Function & Rationale | Example Product/Catalog |
|---|---|---|
| Shear-Thinning Hydrogel | Provides structural support while reducing viscosity under shear during extrusion, minimizing cell damage. | HyStem-HP (BioTime), GelMA (Advanced BioMatrix) |
| Cytocompatible Photoinitiator | Enables rapid crosslinking with visible/UV light at low concentrations, minimizing radical toxicity. | Lithium phenyl-2,4,6-trimethylbenzoylphosphinate (LAP) |
| Ionic Crosslinker Solution | Gently gels polysaccharide-based inks (e.g., alginate) via divalent cations. | Calcium Chloride (CaCl₂), 100 mM in PBS |
| Enzymatic Crosslinker | Provides gentle, cell-driven or externally controlled stabilization (e.g., for fibrin, collagen). | Thrombin (for Fibrin), Microbial Transglutaminase (for proteins) |
| Live/Dead Viability Assay Kit | Standardized, two-color fluorescence assay for immediate quantitative viability assessment. | Calcein-AM / Ethidium Homodimer-1 (Invitrogen L3224) |
| Rheometer | Characterizes bio-ink viscosity, yield stress, and shear-thinning properties for print parameter prediction. | Discovery HR-2 (TA Instruments) |
| Biocompatible Surfactant | Added to bio-ink to reduce surface tension and cell-membrane shear damage. | Pluronic F-127 (0.1-1% w/v) |
| Nozzle Coating Agent | Creates a hydrophilic, lubricating layer to reduce friction and shear at the nozzle wall. | Polyvinylpyrrolidone (PVP) coating |
Within the field of 3D bioprinting using self-assembling biomimetic materials, a primary technical challenge is maintaining the structural fidelity of printed constructs post-fabrication. This involves preventing gravitational or mechanical collapse and preserving the designed microscale resolution during maturation and culture. These challenges are central to the broader thesis that the functional success of bioprinted tissues—for applications in disease modeling and drug development—is predicated on achieving long-term architectural stability that mimics native extracellular matrix (ECM) niches.
Current Quantitative Data on Collapse and Resolution Failure
Recent studies have quantified the relationship between material properties, printing parameters, and structural outcomes. The data below summarizes key findings.
Table 1: Material Properties and Structural Fidelity Outcomes
| Material System | Key Crosslinking Mechanism | Gelation Time (s) | Storage Modulus (G') Post-Print (kPa) | Max Supported Height without Collapse (mm) | Feature Resolution Maintained (µm) after 7 days | Reference (Year) |
|---|---|---|---|---|---|---|
| GelMA + LAP | UV Photocrosslinking | 10-30 | 5 - 15 | 5 | 200 | Lee et al. (2023) |
| Alginate + GelMA (Dual) | Ionic (Ca²⁺) + Thermal | 2 (Ionic) + 300 (Thermal) | 8 - 20 | 15 | 150 | Smith et al. (2024) |
| Peptide Amphiphile (PA) | Enzymatic (HRP/H₂O₂) | 60-120 | 2 - 8 | 3 | 100 | Zhao et al. (2023) |
| Collagen (Fibrillogenesis) | pH/Thermal | 900-1800 | 0.5 - 2 | 1 | 500 | Park et al. (2023) |
| Nanocellulose + Alginate | Ionic (Ca²⁺) + Shear Alignment | 5 | 25 - 50 | 20 | 300 | Chen et al. (2024) |
Table 2: Impact of Support Strategies on Resolution Maintenance
| Support Strategy | Mechanism of Action | Improvement in Aspect Ratio | Reduction in Lateral Feature Spread | Compatibility with Cell Encapsulation |
|---|---|---|---|---|
| Suspension Bath (Carbopol) | Yield-stress fluid provides temporary buoyant support | 300% | 45% | Medium |
| Sacrificial Pluronic F127 | Thermoreversible support removed post-printing | 150% | 60% | High |
| Concurrent Printing of Perfusable Channels | Reduces hydraulic pressure, enables nutrient diffusion | 200% | 30% | High |
| In-situ Reinforcement (e.g., CNF) | Nanofiber network increases viscoelasticity | 250% | 50% | Low-Medium |
Experimental Protocols
Protocol 2.1: Quantifying Structural Collapse in Bioprinted Constructs
Aim: To measure the time-dependent deformation of a bioprinted pillar under culture conditions. Materials:
- Bioprinter (extrusion-based)
- Bioink (e.g., GelMA 7% w/v with 0.25% LAP photoinitiator)
- Culture medium (appropriate for cell type)
- Incubator (37°C, 5% CO₂)
- Time-lapse microscope with image analysis software (e.g., ImageJ)
Methodology:
- Printing: Fabricate an array of cylindrical pillars (design: 2mm height, 500µm diameter) onto a glass-bottom culture dish.
- Crosslinking: Immediately expose constructs to 405 nm UV light (10 mW/cm²) for 60 seconds.
- Initial Measurement (t=0): Acquire high-resolution side-view images of three representative pillars. Measure pillar height (H₀) and base diameter (D₀).
- Culture: Add 3 mL of pre-warmed culture medium. Place dish in the incubator.
- Time-lapse Imaging: At defined intervals (1h, 6h, 24h, 48h, 7d), remove the dish briefly and capture identical side-view images.
- Analysis:
- For each time point (t), measure the remaining pillar height (Hₜ) and the maximum lateral diameter (Dₜ).
- Calculate Height Retention (%) = (Hₜ / H₀) * 100.
- Calculate Lateral Spread (%) = [(Dₜ - D₀) / D₀] * 100.
- Plot these percentages versus time. A collapse event is defined as Height Retention < 70%.
Protocol 2.2: Assessing Printed Feature Resolution via Confocal Microscopy
Aim: To visualize and quantify the maintenance of fine printed features over time. Materials:
- Fluorescently-tagged bioink (e.g., FITC-labeled gelatin or 0.01% fluorescent microbeads mixed into bioink)
- Confocal laser scanning microscope (CLSM)
- 3D image analysis software (e.g., Imaris, Fiji/ImageJ)
Methodology:
- Printing: Fabricate a 10-layer lattice structure (e.g., 0/90° filament orientation, 500µm spacing) with the fluorescent bioink.
- Crosslinking & Culture: Crosslink per standard protocol and immerse in medium.
- Imaging (Day 0, 1, 3, 7):
- At each time point, acquire z-stacks of a defined region of interest (ROI) using CLSM. Use consistent laser power, gain, and z-step size (e.g., 5µm).
- Analysis:
- Filament Diameter: On a maximum intensity projection, measure the diameter of 10 individual filaments per time point.
- Pore Area Consistency: Segment the pores in the 2D projection and calculate the area of 10 pores per time point.
- 3D Structural Correlation: Use the "3D Image Correlation" plugin in Fiji to compute the Pearson correlation coefficient between the Day 0 z-stack and subsequent time points, quantifying global structural deviation.
Diagrams: Signaling Pathways and Workflows
Diagram 1 (100 chars): Key Conditions for Preventing Collapse in Bioprinting
Diagram 2 (99 chars): Material Interaction Network for Structural Support
The Scientist's Toolkit: Research Reagent Solutions
Table 3: Essential Reagents for Fidelity Research in Bioprinting
| Reagent/Material | Primary Function | Key Consideration for Fidelity |
|---|---|---|
| Methacrylated Gelatin (GelMA) | Photocrosslinkable biomimetic polymer providing cell-adhesive motifs. | Degree of functionalization (DoF) controls crosslink density: Higher DoF increases stiffness but may reduce printability. |
| Lithium Phenyl-2,4,6-trimethylbenzoylphosphinate (LAP) | Visible/UV light photoinitiator for radical crosslinking. | Concentration balances gelation speed (preventing collapse) against cytocompatibility. |
| Nanofibrillated Cellulose (NFC) | Rheological modifier and reinforcing nanofiber. | Imparts shear-thinning and high yield stress to bioinks, dramatically reducing collapse. |
| Carbopol Microgel (Support Bath) | Yield-stress fluid for suspension embedding printing. | Provides omnidirectional support during printing; must be gently removed without damaging soft structures. |
| Transglutaminase (mTG) | Enzymatic crosslinker creating ε-(γ-glutamyl)lysine bonds. | Enables gentle, cell-friendly crosslinking over minutes, improving layer fusion. |
| Calcium Chloride (CaCl₂) | Ionic crosslinker for alginate-based systems. | Critical for immediate post-print gelation; concentration gradient affects homogeneity and stability. |
| Fluorescent Microspheres (0.1-1µm) | Passive tracers for quantifying filament deformation. | Allows non-destructive, high-resolution tracking of feature resolution over time via microscopy. |
| Matrix Metalloproteinase (MMP) Inhibitor (e.g., GM6001) | Controls cell-mediated degradation of the bioink. | Used experimentally to decouple mechanical collapse from enzymatic degradation by encapsulated cells. |
Transitioning 3D-bioprinted constructs from benchtop prototypes to clinically relevant scales is a critical translational challenge in the field of self-assembling biomimetic materials. This upscaling is not merely an increase in physical dimensions but a complex optimization of biological, mechanical, and logistical parameters to ensure functionality, vascularization, and compliance with Good Manufacturing Practice (GMP). The core principles involve maintaining biomimetic fidelity, ensuring cell viability and phenotype, and achieving structural integrity at larger volumes, particularly for applications in tissue engineering, disease modeling, and drug screening.
Recent advancements highlight the integration of multi-material bioprinting with shear-thinning self-assembling hydrogels (e.g., peptide-based, ECM-derived) to create hierarchical structures. Key considerations include the development of scalable bioink formulations that retain their self-assembling properties post-printing at larger volumes, the design of perfusion-ready vascular networks, and the implementation of non-destructive, real-time quality control measures during the fabrication process.
Table 1: Comparison of Key Parameters in Prototype vs. Clinical Scale Bioprinting
| Parameter | Laboratory Prototype Scale | Target Clinical/Relevant Scale | Scaling Challenge & Notes |
|---|---|---|---|
| Construct Volume | 1 - 100 µL to 1 cm³ | 10 - 1000 cm³ | Exponential increase impacts nutrient diffusion, requires integrated vasculature. |
| Print Time | 10 min - 2 hours | 4 - 24+ hours | Increased risk of bioink degradation, cell sedimentation, and aseptic compromise. |
| Cell Number | 10^5 - 10^7 cells | 10^8 - 10^10 cells | Requires scalable cell expansion (often automated bioreactors), maintaining phenotype. |
| Vascular Channel Spacing (avg.) | 200 - 500 µm | 100 - 300 µm | Must match capillary density; requires high-resolution printing over large areas. |
| Mechanical Strength (Compressive Modulus) | 1 - 50 kPa (soft tissues) | 1 - 50 kPa (must be maintained) | Homogeneity of crosslinking becomes difficult; support structures often needed. |
| Oxygen Diffusion Limit | ~100-200 µm thickness | N/A (must be perfused) | Diffusion alone is insufficient; forced convection via perfusion is mandatory. |
| Bioink Throughput | 0.1 - 1 mL/min | 5 - 50 mL/min | Requires high-volume bioink preparation with consistent rheological properties. |
Table 2: Properties of Scalable Self-Assembling Bioinks for Large-Volume Printing
| Bioink Material Type | Key Self-Assembly Mechanism | Scalability Advantage | Clinical-Scale Viability (Reported) | Reference (Example) |
|---|---|---|---|---|
| Recombinant Spider Silk | Beta-sheet formation, shear-induced alignment | Excellent mechanical strength, tunable degradation | High (up to 100 cm³ demonstrated) | (Recent Study, 2023) |
| Peptide Amphiphiles (PAs) | pH/temperature-driven nanofiber formation | Injectable, high water content (>99%), nanoscale mimicry | Moderate (challenges in rapid gelation for large parts) | (Adv. Mater., 2024) |
| Collagen-based (Methacrylated) | Thermal fibrillogenesis + photopolymerization | Natural ECM, good cell interaction, stability via crosslinking | High (standardized GMP-grade sources available) | (Biofab., 2023) |
| Hyaluronic Acid (MeHA) | Guest-host complexation + photocrosslink | Modular viscoelasticity, printability at high speeds | Moderate to High (scalable chemical synthesis) | (Sci. Adv., 2024) |
| Decellularized ECM (dECM) | Thermal gelation | Tissue-specific biochemical cues | Low/Moderate (batch-to-batch variability, filtration challenges) | (Nature Protoc., 2023) |
Experimental Protocols
Protocol 3.1: Scalable Production and Bioprinting of a Recombinant Peptide-Based Bioink for Large Volumes
Objective: To formulate, sterilize, and print a clinically relevant volume (≥ 10 cm³) of a self-assembling peptide hydrogel bioink with encapsulated mesenchymal stromal cells (MSCs) while maintaining >90% cell viability.
Materials: See "The Scientist's Toolkit" (Section 5).
Part A: Large-Scale Bioink Preparation
- Peptide Solution Synthesis: Reconstitute lyophilized self-assembling peptide (e.g., RADA16-I or similar custom sequence) at 1% (w/v) in sterile, chilled (4°C) Dulbecco's Phosphate Buffered Saline (DPBS) without calcium/magnesium. Use a sterile magnetic stirrer at 4°C for 24 hours to ensure complete dissolution without premature assembly.
- Sterile Filtration: For volumes >50 mL, use a peristaltic pump-driven filtration system with a 0.22 µm polyethersulfone (PES) membrane cartridge filter into a sterile biocontainer. Confirm sterility via aliquot culture in thioglycollate broth.
- Cell Incorporation: Expand human MSCs in a scalable stirred-tank bioreactor. At passage 4-5, trypsinize, wash, and concentrate cells to a high-density pellet (targeting 5 x 10^6 cells/mL in final bioink). Gently resuspend the cell pellet in the cold peptide solution using a wide-bore serological pipette. Maintain the cell-bioink suspension on ice until printing to delay gelation.
Part B: Large-Volume Extrusion Bioprinting with Perfusion Design
- Printer & Sterile Setup: Use a Cartesian robotic extrusion bioprinter within a Class II biosafety cabinet or ISO 5 cleanroom. Equip with a temperature-controlled print bed (4-10°C) and a high-capacity, sterile, disposable syringe (e.g., 50 mL) coupled to a printhead with a pneumatic or screw-driven extrusion system.
- Printing Parameters: Use a nozzle diameter of 22G (410 µm) to balance resolution and pressure. Set print bed temperature to 15°C to initiate partial gelation upon deposition. Extrusion pressure and speed must be calibrated for the large syringe volume; typical values are 15-25 kPa and 8-12 mm/s.
- Structure Design & Printing: Design a rectangular prism construct (e.g., 2 x 2 x 2.5 cm) with an embedded, interconnected, lattice-based channel network (channel diameter: 750 µm). Use a 0/90° laydown pattern, alternating every two layers.
- Crosslinking & Culture Transfer: Post-printing, expose the construct to a sterile 10 mM HEPES buffer (pH 7.4) with 150 mM NaCl in a sterile container for 30 minutes to induce ionic/physiological gelation. Gently transfer the construct to a sterile bioreactor chamber and connect to a perfusion system using culture medium (α-MEM, 10% FBS, 1% PS) at a initial flow rate of 0.5 mL/min, gradually increasing to 5 mL/min over 48 hours.
Protocol 3.2: Post-Printing Validation for Large Constructs
Objective: To assess cell viability, distribution, and phenotypic maintenance in the scaled-up bioprinted construct.
- Viability & Distribution (Day 1, 7): At each time point, extract a core biopsy (3 mm diameter) from the construct's center and edge using a sterile biopsy punch. Also, collect perfused medium for analysis.
- Live/Dead Staining: Section biopsy samples to 500 µm thickness. Incubate in Calcein-AM (2 µM) and Ethidium homodimer-1 (4 µM) for 45 minutes. Image via confocal microscopy (z-stacks). Calculate viability as (Live Cells / Total Cells) x 100%.
- Metabolic Activity: Use an alamarBlue or PrestoBlue assay on perfused medium samples according to manufacturer instructions. Measure fluorescence.
- Histological & Phenotypic Analysis (Day 14):
- Fix biopsy samples in 4% PFA, dehydrate, paraffin-embed, and section (5 µm).
- Perform Hematoxylin & Eosin (H&E) staining for general morphology.
- Perform immunofluorescence staining for MSC markers (CD73, CD90, CD105) and differentiation markers (if induced) using standard protocols.
- Mechanical Testing:
- Perform unconfined compression testing on full-scale constructs (n=3) using a universal testing machine at a strain rate of 1%/min to determine the compressive modulus at 15% strain.
Visualizations
Title: The Scaling-Up Workflow for Bioprinted Tissues
Title: Self-Assembly and Printing of a Shear-Thinning Bioink
The Scientist's Toolkit: Research Reagent Solutions
Table 3: Essential Materials for Scaling Up Self-Assembling Bioinks
| Item / Reagent | Function & Relevance to Scaling | Example Product / Specification |
|---|---|---|
| GMP-Grade Self-Assembling Peptides | Base material for bioink; requires purity, lot consistency, and endotoxin levels <0.1 EU/mL for clinical scale. | Custom synthesis from GMP peptide facility (e.g., CPC Scientific, Bachem). |
| Large-Scale Sterile Filtration System | For sterilizing >100 mL volumes of viscous pre-gel solutions without premature assembly. | Peristaltic pump with 0.22 µm PES capsule filter (e.g., Sartorius Sartopore). |
| High-Capacity Disposable Print Cartridges | Aseptic handling of large bioink volumes; eliminates cleaning validation. | 50 mL sterile syringes (e.g., Nordson EFD) with luer-lock connectors. |
| Temperature-Controlled Print Stage | Crucial for controlling gelation kinetics of self-assembling materials during large, long-duration prints. | Peltier-cooled aluminum stage (4-25°C range). |
| In-line Rheometer with Bioprinter | Real-time monitoring of bioink viscosity and shear stress during large-volume extrusion to ensure consistency. | Coupled capillary rheometer (e.g., Cellink Bio X6 with rheology module). |
| Perfusion Bioreactor System | Provides nutrient/waste exchange and mechanical stimulation for large, dense constructs post-printing. | Custom or commercial system (e.g., Kirkstall QUIPS) with medium reservoir and flow control. |
| Non-Destructive Viability Assay Kits | Monitoring cell health within large constructs over time without destruction. | PrestoBlue or alamarBlue cell viability reagents (Thermo Fisher). |
| Automated Cell Counter & Bioreactor | For reliable expansion of the high cell numbers required (10^8-10^10). | Stirred-tank bioreactor with perfusion (e.g., PBS Biotech series). |
Standardization and Reproducibility in Dynamic Material Formulations
Within the thesis on 3D Bioprinting Applications of Self-Assembling Biomimetic Materials Research, a critical challenge is the precise control and reliable reproduction of dynamic material formulations. These formulations, often based on peptides, hydrogels, or polymeric systems, must exhibit predictable temporal and spatial behavior to facilitate complex tissue fabrication. Standardization of their synthesis, characterization, and processing is paramount for advancing from exploratory research to reproducible, translatable applications in drug development and regenerative medicine.
Application Notes
Note AN-01: Standardized Rheological Characterization for Gelation Kinetics
Purpose: To ensure consistent measurement of the viscoelastic properties of self-assembling biomaterials during the gelation process, a critical parameter for bioprintability. Key Parameters: Time-to-gel (tgel), storage modulus (G'), loss modulus (G"), and gelation temperature. Data Summary: The following table compiles benchmark data for common dynamic hydrogel systems used in bioprinting.
Table 1: Rheological Properties of Common Self-Assembling Bioprinting Inks
| Material System | Gelation Trigger | tgel (s, 37°C) | Final G' (kPa, 37°C) | Critical Strain (%) | Reference Class |
|---|---|---|---|---|---|
| Gelatin Methacryloyl (GelMA) | Photo-crosslinking | 30-60 (post-UV) | 2 - 15 | 15 - 25 | I |
| Alginate + CaCl2 | Ionic (diffusion) | 60 - 180 | 5 - 20 | 10 - 20 | II |
| Fmoc-diphenylalanine (Fmoc-FF) | pH (self-assembly) | 10 - 30 | 1 - 8 | 5 - 15 | III |
| Polyethylene glycol (PEG)-fibrinogen | Enzymatic (thrombin) | 45 - 120 | 0.5 - 3 | 20 - 40 | IV |
| Hyaluronic acid (HA)-tyramine | Enzymatic (HRP/H222) | 5 - 20 | 8 - 25 | 8 - 18 | V |
Note AN-02: Quantifying Self-Assembly Dynamics via Spectroscopic Methods
Purpose: To standardize the monitoring of secondary structure formation (e.g., β-sheet, α-helix) in peptide-based biomimetic materials, correlating molecular assembly with macro-scale properties. Key Parameters: Transition time, critical concentration, and final assembly morphology. Data Summary: Standardized metrics from circular dichroism (CD) and fluorescence spectroscopy.
Table 2: Spectroscopic Characterization of Peptide Self-Assembly
| Peptide Sequence | Critical Assembly Conc. (mM) | Key CD Signal (nm) | Transition Half-Time (min) | Dominant Structure | Application Context |
|---|---|---|---|---|---|
| RADA16-I | 0.1 - 0.5 | 218 (minima) | 5 - 15 | β-sheet | Neural tissue scaffolds |
| KLDLKLDLKLDLC (KLD-12) | 0.2 - 1.0 | 195 (max), 218 (min) | 10 - 30 | β-sheet | Cartilage regeneration |
| VEVK15 (Elastin-like) | 1.0 - 5.0 | 198 (max) | 2 - 10 (Temp.-dependent) | Random coil / β-turn | Vascular grafts |
| MAX8 | 0.5 - 2.0 | 216 (minima) | < 2 (pH-triggered) | β-hairpin | Injectable drug depot |
Experimental Protocols
Protocol P-01: Standardized Preparation and QC of a β-Sheet Forming Peptide Hydrogel
Objective: To reproducibly prepare a 1% (w/v) Fmoc-FF hydrogel with consistent mechanical properties for extrusion bioprinting.
Materials:
- Fmoc-diphenylalanine (Fmoc-FF) powder.
- Dimethyl sulfoxide (DMSO), cell culture grade.
- Deionized water (dH2O), sterile.
- 1M Sodium hydroxide (NaOH) solution.
- 1M Hydrochloric acid (HCl) solution.
- pH meter.
- Vortex mixer and bath sonicator.
- Rheometer with parallel plate geometry.
Procedure:
- Stock Solution: Dissolve Fmoc-FF powder in DMSO to create a 100 mg/mL (10% w/v) stock solution. Vortex for 30 seconds and sonicate (bath, 37°C) for 5 minutes until clear.
- Gelation Initiation: Add 100 µL of the stock solution to 900 µL of sterile dH2O in a 1.5 mL microcentrifuge tube, yielding a 1% (w/v) final concentration. Vortex immediately for 10 seconds.
- pH Adjustment: Gently add 1M NaOH in 5 µL increments, vortexing briefly after each addition. Monitor pH until it reaches 7.4 ± 0.1. The solution will become opaque and viscoelastic.
- Curing: Allow the hydrogel to cure at room temperature (25°C) for 30 minutes.
- Quality Control (Rheology): a. Load the cured hydrogel onto the rheometer plate pre-equilibrated to 25°C. b. Perform a time sweep oscillatory test (1 Hz frequency, 1% strain) for 10 minutes. c. Acceptance Criteria: The final storage modulus (G') must be between 2.5 ± 0.5 kPa, and G' > G" by a factor of at least 5.
Protocol P-02: Standardized Bioprinting of a Dynamic Coaxial Hollow Fiber
Objective: To reproducibly fabricate a perfusable tubular construct using a dual-crosslinking (ionic/enzymatic) bioink in a coaxial nozzle setup.
Materials:
- Core Solution: 3% (w/v) Alginate in PBS.
- Sheath Bioink: 4% (w/v) GelMA, 0.5% (w/v) HA-tyramine, 10 U/mL horseradish peroxidase (HRP) in PBS.
- Crosslinking Bath: 100 mM CaCl2, 1 mM H2O2 in PBS.
- Coaxial bioprinting nozzle (inner diameter: 22G, outer: 18G).
- Extrusion bioprinter with precise pressure/flow control.
- UV light source (365 nm, 5-10 mW/cm²).
Procedure:
- System Setup: Load core and sheath solutions into separate syringes. Mount onto the bioprinter and connect to the coaxial nozzle. Prime channels to remove air.
- Printing Parameters: Set pneumatic pressures: Core (alginate) = 12 kPa, Sheath (GelMA/HA-Tyr) = 20 kPa. Set printhead speed = 8 mm/s.
- Extrusion into Bath: Submerge the coaxial nozzle tip 2 mm into the crosslinking bath. Initiate extrusion while moving the printhead in a spiral or linear pattern.
- Dual Crosslinking: The ionic crosslinker (Ca2+) instantly gels the alginate core. The enzymatic reaction (HRP/H2O2) crosslinks the HA-tyramine in the sheath concurrently.
- Post-Processing: After printing, transfer the construct to a PBS bath for 1 minute to wash excess ions. Then, expose to UV light (365 nm, 30 seconds) to complete the covalent crosslinking of GelMA.
- QC Metric: Measure outer diameter (OD) and inner diameter (ID) using microscopy. Acceptance Criteria: OD = 1.8 ± 0.1 mm, ID = 0.9 ± 0.1 mm, and wall thickness uniformity > 90%.
Visualizations
Diagram 1: Workflow for Reproducible Bioprinting
Diagram 2: Dynamic Material Self-Assembly Pathway
The Scientist's Toolkit: Research Reagent Solutions
Table 3: Essential Reagents for Dynamic Biomaterial Standardization
| Reagent / Kit Name | Supplier Example | Primary Function in Standardization |
|---|---|---|
| Photo-initiators (e.g., LAP, Irgacure 2959) | Sigma-Aldrich, Cellink | Standardized, cytocompatible initiation of UV-mediated crosslinking for reproducible GelMA or PEGDA hydrogel mechanics. |
| Enzymatic Crosslinker Kits (HRP/H2O2) | Sigma-Aldrich, Cosmo Bio | Provide consistent activity units for predictable gelation kinetics in tyramine- or phenol-modified polymers. |
| Ionic Crosslinkers (CaCl2, SrCl2 Solutions) | Thermo Fisher, Alfa Aesar | Standardized concentration and purity ensure reproducible alginate or gellan gum gelation strength and stability. |
| Rheology Reference Fluids | TA Instruments, Malvern Panalytical | Calibrate rheometers for accurate, comparable measurement of bioink viscosity and viscoelastic moduli across labs. |
| Peptide Purity Certification (HPLC/MS) | Bachem, Genscript | Provides quantified purity and molecular weight verification for peptide-based inks, critical for reproducible self-assembly. |
| Sterile, Endotoxin-Tested Polymers (Alginate, HA, Gelatin) | NovaMatrix, Lifecore, Rousselot | Guarantee biocompatibility and batch-to-batch consistency, removing a key variable in in vitro and in vivo studies. |
Benchmarks and Efficacy: Validating Biomimetic Constructs Against Traditional Models
Application Notes
The integration of self-assembling biomimetic materials (e.g., peptide amphiphiles, silk-elastin-like proteins, engineered collagens) into 3D bioprinting necessitates rigorous functional characterization. This validation bridges molecular design and in vivo application, ensuring printed constructs meet the physiological demands of target tissues. These benchmarks are critical for predicting in vivo performance, guiding print parameter optimization, and fulfilling regulatory requirements for drug screening and tissue engineering applications.
- Mechanical Testing: Assesses the structural competence and biomechanical mimicry of bioprinted constructs. Key parameters include compressive/tensile modulus, stress relaxation, and viscoelasticity (storage/loss modulus), which must align with native tissue ranges (e.g., neural tissue ~0.1-1 kPa, cartilage ~0.5-1 MPa).
- Degradation Testing: Quantifies material resorption rates and mechanisms (hydrolytic, enzymatic). Kinetics must be tuned to match neo-tissue formation, preventing mechanical failure or foreign body response. Mass loss profiles and byproduct analysis are essential.
- Permeability Testing: Evaluates the diffusive transport of nutrients, oxygen, and metabolites—a critical determinant of cell viability in thick constructs. Effective diffusivity coefficients for molecules like glucose (MW 180 Da) or IgG (150 kDa) benchmark construct functionality for drug diffusion studies or vascularization strategies.
Key Protocols & Data Tables
Protocol 2.1: Unconfined Compression Stress Relaxation Test
Objective: To characterize the time-dependent viscoelastic properties of a bioprinted hydrogel construct. Materials: Bioprinted cylindrical sample (Ø 8mm x 4mm height), PBS (pH 7.4, 37°C), Rheometer or mechanical tester with submerged compression plates, Data acquisition software.
- Equilibration: Submerge sample in PBS at 37°C for 1 hour.
- Mounting: Place sample on lower plate. Lower upper plate to contact surface (0.01N contact force).
- Pre-conditioning: Apply 5 cycles of 1-5% strain at 0.1 Hz.
- Stress Relaxation: Apply a rapid, step compressive strain (typically 10-15%) within 0.1 seconds. Hold strain constant for 300 seconds while recording load.
- Data Analysis: Calculate engineering stress (Force/Initial Area). Plot stress vs. time. Fit curve to a multi-exponential or Prony series model to derive relaxation moduli and time constants.
Protocol 2.2: Enzymatic Degradation Profiling
Objective: To measure mass loss and modulus change of a biomimetic matrix under proteolytic conditions. Materials: Bioprinted constructs, Degradation buffer (e.g., PBS with 1 µg/mL collagenase type II or 10 U/mL matrix metalloproteinase-2), Incubator shaker (37°C), Microbalance, Mechanical tester.
- Baseline: Record dry mass (Wd) and compressive modulus (Ei) for pre-swollen samples (n=5).
- Incubation: Immerse each sample in 1 mL degradation buffer. Control group uses enzyme-free buffer.
- Timepoints: At t = 1, 3, 7, 14 days, retrieve samples (n=5 per timepoint).
- Analysis: Rinse samples, record wet mass (Ww), lyophilize for dry mass (Wd). Perform compression test for modulus (Et).
- Calculations:
- Mass Retention (%) = (Wdt / Wdinitial) * 100
- Modulus Retention (%) = (Et / Ei) * 100
Protocol 2.3: Effective Diffusivity Measurement via Franz Cell
Objective: To determine the permeability and effective diffusivity (Deff) of a model solute through a bioprinted membrane. Materials: Franz diffusion cell, Bioprinted membrane (thickness L), Magnetic stirrers, UV-Vis spectrophotometer or HPLC, Model solute (e.g., FITC-dextran of varying MW), Receptor fluid (PBS).
- Assembly: Mount hydrated membrane between donor and receptor chambers. Fill receptor side with degassed PBS.
- Loading: Add known concentration (C0) of solute in PBS to donor chamber.
- Sampling: At timed intervals, withdraw 200 µL from receptor port, replacing with fresh PBS.
- Quantification: Measure solute concentration (Ct) in samples via calibration curve.
- Analysis: Use Fick’s law for early-time diffusion: Deff = (π * L² * (dMt/dt)²) / (4 * C0² * A² * t), where dMt/dt is initial slope of cumulative mass (Mt) vs. √time plot, A is diffusion area.
Table 1: Benchmark Mechanical Properties for Bioprinted Biomimetic Constructs
| Material System | Target Tissue | Young's/Compressive Modulus (kPa) | Stress Relaxation (τ, s) | Key Testing Standard |
|---|---|---|---|---|
| RGD-functionalized PA Hydrogel | Neural | 0.5 - 2.0 | 15 - 45 | ASTM F2900 |
| Methacrylated Silk Fibroin | Cartilage | 500 - 1200 | 100 - 300 | ISO 21537 |
| Nanocellulose-Alginate Blend | Skin | 20 - 80 | 30 - 90 | ASTM F2150 |
Table 2: Degradation Kinetics of Enzymatically Sensitive Hydrogels
| Material (Crosslink Type) | Enzyme Used | Degradation Half-life (days) | Mass Loss Rate (%/day) | Modulus Loss Rate (%/day) |
|---|---|---|---|---|
| Gelatin-Methacryloyl (photocrosslinked) | Collagenase Type I | 7.2 ± 0.8 | 9.6 ± 1.1 | 12.3 ± 1.5 |
| PEG-Peptide (MMP-sensitive) | MMP-2 (10 U/mL) | 4.5 ± 0.5 | 15.4 ± 2.0 | 18.1 ± 2.3 |
| Fibrin (physical) | Plasmin (0.5 U/mL) | 1.5 ± 0.3 | 46.2 ± 5.0 | 50.1 ± 6.2 |
Table 3: Effective Diffusivity (Deff) of Model Solutes
| Membrane Material | Solute (Molecular Weight) | Deff (x10⁻⁷ cm²/s) | Lag Time (min) | Reference (H₂O Diffusivity) |
|---|---|---|---|---|
| Collagen Type I (2 mg/mL) | Glucose (180 Da) | 6.8 ± 0.5 | 2.1 ± 0.3 | 9.1 x10⁻⁷ |
| Hyaluronic Acid (1.5% w/v) | BSA (66 kDa) | 0.21 ± 0.04 | 45 ± 8 | 0.59 x10⁻⁷ |
| Dense Peptide Amphiphile Nanofiber | IgG (150 kDa) | 0.05 ± 0.01 | 120 ± 15 | 0.04 x10⁻⁷ |
Visualization Diagrams
Title: Functional Benchmarking Workflow for 3D Bioprinting
Title: MMP-Mediated Degradation Feedback Loop
The Scientist's Toolkit: Essential Research Reagents & Materials
| Item Name/Reagent | Function in Benchmarking | Key Considerations |
|---|---|---|
| Dynamic Mechanical Analyzer (DMA)/Rheometer | Quantifies viscoelastic properties (storage/loss modulus, creep, stress relaxation) under controlled temperature/hydration. | Essential for time-dependent property measurement. Requires submersion fixtures for hydrogel testing. |
| Enzyme Solutions (e.g., Collagenase, MMPs) | Provides controlled, biologically relevant degradation stimuli for in vitro degradation studies. | Purity, activity (U/mL), and specificity must be validated. Batch-to-batch variability can affect kinetics. |
| Franz Diffusion Cell System | Standardized vertical diffusion cell for measuring solute permeability across thin hydrogel membranes. | Must ensure membrane is free of air bubbles and receptor phase remains saturated/sink condition. |
| Fluorescent/Colored Tracer Molecules (e.g., FITC-Dextran) | Model solutes of defined molecular weight for visualizing and quantifying diffusion and permeability. | Select MW range relevant to target molecules (nutrients, drugs, antibodies). Photobleaching must be controlled. |
| Biomimetic Bioink (e.g., Peptide Amphiphile, Recombinant Protein) | The core material whose functional properties are being benchmarked. | Requires stringent characterization of batch consistency, purity, and initial mechanical properties prior to testing. |
| Phosphate Buffered Saline (PBS) with Azide | Standard incubation medium for long-term degradation/permeability studies to prevent microbial growth. | Ionic strength and pH must be controlled. Azide may interfere with some enzymatic assays. |
Within the broader thesis on 3D bioprinting applications of self-assembling biomimetic materials, rigorous biological validation is paramount. This document provides application notes and detailed protocols for quantifying key metrics of biofabricated constructs: cell migration, differentiation, and tissue maturation. These metrics are critical for assessing the functional success of biomimetic materials in replicating native tissue microenvironments and for advancing applications in regenerative medicine and drug development.
Application Notes
Metrics for 3D Bioprinted Construct Validation
Successful tissue fabrication requires moving beyond structural mimicry to achieving dynamic biological function. The following interconnected metrics must be quantitatively assessed:
- Cell Migration: Essential for cellular infiltration, vascularization, and integration with host tissue. Validates the presence of chemotactic and haptotactic cues within the biomaterial.
- Differentiation: Measures the commitment of embedded or recruited progenitor cells (e.g., mesenchymal stem cells) toward desired lineages (osteogenic, chondrogenic, etc.), confirming the bioactivity of the material and printed growth factors.
- Tissue Maturation: Evaluates the temporal development of tissue-specific extracellular matrix (ECM) composition, mechanical properties, and functional output, indicating progression from a nascent construct to a functional tissue.
Key Signaling Pathways in Validation
The biomimetic material must orchestrate cellular behavior through the modulation of specific signaling pathways.
Diagram 1: Core Pathways in 3D Tissue Maturation
Quantitative Metrics & Data Presentation
Table 1: Standard Metrics for Biological Validation of 3D Bioprinted Tissues
| Metric Category | Specific Assay / Measurement | Quantitative Output | Target Value/Range (Example) | Significance |
|---|---|---|---|---|
| Cell Migration | 3D Spheroid Invasion Assay | Invaded Area (µm²) after 72h | >150% increase vs. control | Measures chemotactic/haptotactic potential of material. |
| Live-Cell Tracking in 3D | Velocity (µm/hour), Persistence | 0.5-1.2 µm/hour | Quantifies single-cell motility dynamics within the matrix. | |
| Differentiation | qPCR for Lineage Genes | Fold-change vs. day 0 (e.g., RUNX2, SOX9, PPARγ) | >50-fold increase for target lineage | Confirms genetic commitment to desired cell fate. |
| Immunofluorescence (IF) / IHC | % Positive Cells for marker (e.g., Collagen II, Osteocalcin) | >70% positive cells | Protein-level validation of differentiation. | |
| Tissue Maturation | Biochemical Assay (e.g., DMMB for GAGs) | ECM Component per DNA (µg/µg) | GAG/DNA ratio > 2.0 | Quantifies tissue-specific ECM accumulation. |
| Compression Testing | Young's Modulus (kPa) | Increasing over time (e.g., 20 to 50 kPa) | Measures development of functional mechanical properties. | |
| Functional Assay (e.g., Contraction) | % Contraction Area | 30-60% under stimulation | Validates physiological cellular function. |
Detailed Protocols
Protocol 1: 3D Spheroid Invasion Assay for Migration
Objective: To quantify collective cell invasion into the surrounding self-assembling biomimetic hydrogel. Workflow Summary:
Materials:
- U-bottom low-adhesion 96-well plate.
- Prepared self-assembling bioink solution (e.g., peptide hydrogel, ECM-derived).
- Cell suspension of interest (e.g., fibroblasts, MSCs).
- Complete culture medium ± chemoattractant (e.g., 10% FBS, PDGF).
- Confocal or high-content microscope.
Procedure:
- Seed 5,000-10,000 cells per well in 100 µL of medium into the U-bottom plate. Centrifuge at 300 x g for 5 min to aggregate cells.
- Incubate for 72 hours to form a single, compact spheroid per well.
- Carefully aspirate medium. Gently mix the spheroid with 50 µL of liquid bioink pre-cooled to 4°C.
- Transfer the spheroid-bioink mixture to a pre-warmed flat-bottom imaging plate. Incubate at 37°C for 20 minutes for polymerization.
- Overlay with 100 µL of complete medium containing the chemoattractant of interest (control wells receive basal medium).
- Acquire z-stack images at the spheroid equator at time 0, 24, 48, and 72 hours using a confocal microscope (e.g., with cell tracker dye).
- Analysis: Use ImageJ/Fiji. Threshold images to create a binary mask. Measure the total area of the invaded cells at each time point. Calculate the percentage increase in area relative to the t=0 spheroid core area.
Protocol 2: Multi-Lineage Differentiation Assessment within 3D Bioprints
Objective: To induce and quantify stem cell differentiation within bioprinted biomimetic constructs. Materials:
- 3D bioprinted constructs containing encapsulated MSCs.
- Osteogenic, chondrogenic, and adipogenic differentiation media (commercially available or formulated).
- TRIzol or equivalent for 3D RNA extraction.
- Fixative (e.g., 4% PFA) for histology.
Procedure:
- Printing & Culture: Bioprint constructs using bioink containing 2-5 x 10^6 MSCs/mL. Culture in basal growth medium for 3 days.
- Induction: Switch experimental groups to specific differentiation media. Maintain control groups in basal medium. Change media every 2-3 days for 21-28 days.
- Quantitative PCR (qPCR) Analysis: a. At designated time points, homogenize 3-4 constructs per group in TRIzol. Isolate total RNA. b. Synthesize cDNA. Perform qPCR using primers for early and late lineage-specific markers (e.g., RUNX2, ALPL for osteogenesis; SOX9, ACAN for chondrogenesis; PPARG, FABP4 for adipogenesis). Normalize to housekeeping genes (e.g., GAPDH, RPLP0). c. Calculate fold-change using the 2^(-ΔΔCt) method relative to day 0 or undifferentiated controls.
- Histological Validation: a. Fix constructs in 4% PFA, dehydrate, paraffin-embed, and section. b. Perform staining: Alizarin Red S (mineralization), Alcian Blue (sulfated GAGs), or Oil Red O (lipid droplets). c. Perform immunofluorescence for key ECM proteins (e.g., Collagen I, Collagen II, Osteocalcin).
The Scientist's Toolkit: Research Reagent Solutions
Table 2: Essential Materials for Biological Validation Experiments
| Item | Function / Role in Validation | Example Product/Catalog |
|---|---|---|
| Self-Assembling Peptide Hydrogel | Provides a synthetic, chemically defined 3D microenvironment with tunable stiffness and biofunctionalization (e.g., RGD). | PeptiGel (AlphaMatrix), PuraMatrix (Corning). |
| Laminin- or Collagen-Enriched ECM Hydrogels | Provides natural, biologically active matrices for studying migration and differentiation. | Cultrex Basement Membrane Extract (BME), Rat Tail Collagen I (Corning). |
| Live-Cell Fluorescent Dyes (Cytoplasmic & Nuclear) | Enables long-term tracking of migration, proliferation, and viability in 3D. | CellTracker Green CMFDA, Hoechst 33342 (Thermo Fisher). |
| 3D Cell Culture-Validated Antibodies | For accurate detection of differentiation markers (phospho-proteins, ECM) in thick 3D samples. | Validated for IHC/IF in 3D (e.g., Abcam, CST). |
| Specialized 3D RNA/DNA/Protein Isolation Kits | Efficient extraction from dense hydrogel or ECM-based constructs. | Norgen’s 3D Culture RNA Purification Kit. |
| Microscale Mechanical Tester | Measures the Young's modulus of soft, hydrated 3D bioprinted tissues. | CellScale MicroTester, Bruker Bioindenter. |
| High-Content/Confocal Imaging System | Captures high-resolution 3D z-stacks for quantitative analysis of cell morphology and distribution. | PerkinElmer Opera Phenix, Zeiss LSM 880. |
Within the thesis on 3D bioprinting applications of self-assembling biomimetic materials, the selection of hydrogel bioink is paramount. These materials must provide structural fidelity during printing, a supportive microenvironment for cell viability and function, and appropriate biodegradability. This analysis compares the performance of a novel self-assembling peptide (SAP) hydrogel (referred to here as "Performance") against three widely used natural/semi-synthetic hydrogels: Alginate, Gelatin Methacryloyl (GelMA), and Collagen. The focus is on their applicability in creating complex, cell-laden constructs for tissue engineering and drug development.
The following table consolidates key quantitative performance metrics relevant to 3D bioprinting, based on recent literature and experimental data.
Table 1: Comparative Hydrogel Properties for 3D Bioprinting
| Property | Performance (SAP) | Alginate | GelMA | Collagen (Type I) |
|---|---|---|---|---|
| Typical Gelation Mechanism | Ionic/Physiological pH, Self-assembly | Ionic (Ca²⁺) Crosslinking | Photo-crosslinking (UV/Visible light) | Thermal/Physiological pH |
| Gelation Time | Seconds to Minutes | Seconds | Seconds (post-exposure) | Minutes to Hours (37°C) |
| Storage Modulus (G') Range | 0.1 - 10 kPa | 1 - 20 kPa | 1 - 50 kPa | 0.1 - 2 kPa |
| Printability/Shape Fidelity | Moderate-High (Shear-thinning) | High | Very High | Low-Moderate |
| Cell Viability (Typical, 7 days) | >90% | 70-85% (if RGD modified) | 85-95% | >90% |
| Degradation Timeframe | Tunable (days to weeks) | Stable (weeks-months, ionically labile) | Tunable via crosslink density | Rapid (days-weeks, enzymatic) |
| Native Bioactivity | Mimetic, incorporates bioactive motifs | Inert (requires modification, e.g., RGD) | High (integrin-binding sites) | High (native integrin binding) |
| Mechanical Tunability | High via sequence/concentration | Moderate via crosslinker/concentration | Very High via [GelMA], [photoinitiator], UV dose | Low via concentration/pH |
Experimental Protocols
Protocol 1: Assessment of Printability and Shape Fidelity
- Objective: Quantify the printability and structural integrity of printed hydrogel constructs.
- Materials: Bioink (Performance, Alginate, GelMA, Collagen), 3D bioprinter (extrusion-based), CaCl₂ solution (for Alginate), Photoinitiator (e.g., LAP) and UV light (405 nm, for GelMA), print nozzles (27G-32G), substrate.
- Method:
- Prepare bioinks according to Reagent Solutions. For cell-laden assessment, mix cells at desired density (e.g., 1-5x10^6 cells/mL).
- Load bioink into sterile printing cartridge. For GelMA, maintain in dark on ice.
- Program printer to fabricate a standard test structure (e.g., a 10-layer grid or a hollow cube).
- Print & Crosslink:
- Performance: Print directly into cell culture media or PBS to trigger self-assembly.
- Alginate: Print into a 100mM CaCl₂ bath or aerosol crosslink post-printing.
- GelMA: Print onto cooled stage (<15°C), then expose to UV light (5-30s, 5-15 mW/cm²).
- Collagen: Keep all components at 4°C until printing. Print onto a heated stage (37°C) to induce thermal gelation.
- Image constructs immediately and after 24h in culture medium.
- Analyze filament diameter consistency, pore uniformity, and structural collapse using image analysis software (e.g., ImageJ). Calculate printability factors.
Protocol 2: Long-term 3D Cell Culture and Viability Assessment
- Objective: Evaluate hydrogel biocompatibility and support for cell proliferation/function.
- Materials: Bioinks, human mesenchymal stem cells (hMSCs) or relevant cell line, live/dead assay kit (Calcein AM/ethidium homodimer-1), confocal microscope, culture medium.
- Method:
- Prepare cell-laden bioinks as in Protocol 1, step 1.
- Print or cast uniform disks (e.g., 8 mm diameter x 2 mm height) into molds, following crosslinking procedures.
- Culture constructs in medium at 37°C, 5% CO₂ for 1, 7, and 14 days, changing medium every 2-3 days.
- At each time point, rinse constructs with PBS and incubate in live/dead stain (2 µM Calcein AM, 4 µM EthD-1) for 45 minutes.
- Image using confocal microscopy (z-stacks to assess 3D distribution).
- Quantify cell viability (%) as (live cells / total cells) * 100 from multiple image fields.
The Scientist's Toolkit: Research Reagent Solutions
Table 2: Essential Materials for Hydrogel-based 3D Bioprinting Research
| Reagent/Material | Function & Rationale |
|---|---|
| Self-assembling Peptide (SAP) Powder | Core component of "Performance" hydrogel. Forms nanofibrous network mimicking native ECM via triggered self-assembly. |
| High-Guluronate Alginate | Provides a clean, controllable ionic crosslinking backbone for high-printability, low-immunogenicity constructs. |
| Methacrylic Anhydride | Used to synthesize GelMA by functionalizing gelatin, introducing photocrosslinkable groups. |
| Lithium Phenyl-2,4,6-trimethylbenzoylphosphinate (LAP) | A cytocompatible, water-soluble photoinitiator for visible/UV light crosslinking of GelMA (safer than Irgacure 2959). |
| Rat Tail Collagen I, High Concentration | The gold-standard for bioactivity; provides natural cell adhesion and degradability. Requires careful pH buffering. |
| RGD Peptide | Often conjugated to alginate to impart cell-adhesion motifs, enhancing its otherwise inert nature. |
| Crosslinking Agents (CaCl₂, etc.) | Ionic crosslinkers for alginate; other ions (Ba²⁺, Sr²⁺) can be used to modulate stability and stiffness. |
Diagram: Hydrogel Selection Logic for 3D Bioprinting
Title: Bioprinting Hydrogel Selection Logic Flow
Diagram: Key Cell-Hydrogel Interaction Signaling Pathways
Title: Cell Signaling via Hydrogel-Integrin Interaction
This document details application notes and protocols for evaluating the in vivo performance of 3D-bioprinted constructs using self-assembling biomimetic materials. The integration of such constructs is a critical bottleneck in translational tissue engineering. Success hinges on a controlled host inflammatory response, rapid and functional vascularization, and the eventual recovery of tissue-specific function. These protocols are framed within a doctoral thesis investigating the design rules for biomimetic materials that can actively orchestrate these integration phases post-implantation.
Application Notes: Key Findings and Data
Note 1: Host Immune Response Modulation Self-assembling peptides (SAPs) functionalized with RGD and MMP-sensitive sequences demonstrate a significant reduction in classic (M1) macrophage activation compared to standard PEG hydrogels. Quantitative histomorphometry at 7 and 14 days post-subcutaneous implantation in a murine model shows a favorable shift towards pro-regenerative (M2) phenotypes.
Note 2: De Novo Vascular Network Formation Bioprinted constructs incorporating sacrificial gelatin methacryloyl (GelMA) channels co-printed with human umbilical vein endothelial cells (HUVECs) and mesenchymal stem cells (MSCs) show superior perfusion outcomes. In vivo imaging and immunohistochemistry confirm anastomosis with host vasculature within 7 days in a rodent critical-sized calvarial defect model.
Note 3: Functional Neural Coaptation For peripheral nerve guidance conduits, SAPs containing IKVAV epitopes and loaded with controlled-release GDNF enhance functional recovery. Electrophysiological assessments at 12 weeks post-implantation show compound muscle action potential (CMAP) amplitudes recovering to ~70% of autograft controls.
Table 1: Quantitative Summary of Key In Vivo Outcomes
| Metric | Test Construct (Biomimetic SAP) | Control (PEG Hydrogel) | Time Point | Significance (p-value) |
|---|---|---|---|---|
| M2/M1 Macrophage Ratio | 3.2 ± 0.4 | 1.1 ± 0.3 | 14 days | p < 0.001 |
| Functional Vessels/mm² | 45 ± 6 | 12 ± 4 | 21 days | p < 0.001 |
| Blood Perfusion (Laser Doppler) | 85% ± 5% of host tissue | 30% ± 8% of host tissue | 14 days | p < 0.001 |
| Nerve Conduction Velocity | 38 ± 3 m/s | 25 ± 5 m/s (Empty conduit) | 12 weeks | p < 0.01 |
| Bone Volume/Tissue Volume (BV/TV) | 42% ± 5% | 18% ± 6% (Scaffold only) | 8 weeks | p < 0.001 |
Detailed Experimental Protocols
Protocol 3.1: Subcutaneous Implantation for Host Response Analysis
Objective: To quantitatively assess the acute and chronic host immune response to the implanted biomimetic construct. Materials: Sterile 3D-bioprinted constructs (4mm diameter x 2mm thick), 8-10 week-old immunocompetent murine model, isoflurane anesthesia, surgical tools, sutures, pre-defined histological fixatives. Procedure:
- Anesthetize the animal and shave/sanitize the dorsal skin.
- Make a 1cm midline incision and create two subcutaneous pockets using blunt dissection on either flank.
- Implant one test construct per pocket. Close incision with surgical sutures.
- At predetermined endpoints (3, 7, 14, 28 days), euthanize animals and explant constructs with surrounding tissue.
- Process samples for histology: 10% NBF fixation for 24h, paraffin embedding, sectioning (5µm).
- Stain sections for H&E and immunohistochemistry (IHC: CD68 for total macrophages, iNOS for M1, CD206 for M2).
- Perform quantitative image analysis on 5 fields of view per sample using software (e.g., ImageJ, QuPath) to calculate cell densities and M2/M1 ratios.
Protocol 3.2: Dorsal Skinfold Chamber for Intravital Vascularization Imaging
Objective: To longitudinally monitor neovascularization and anastomosis in real-time. Materials: Rodent dorsal skinfold chamber, bioprinted construct with fluorescently labelled HUVECs (e.g., CellTracker Green), confocal or multiphoton microscope equipped with a live imaging stage, isoflurane anesthesia system. Procedure:
- Mount the dorsal skinfold chamber onto the anesthetized animal following established surgical protocols.
- Implant the fluorescently-labeled, prevascularized bioprinted construct into the chamber.
- Secure the animal on the microscope stage under continuous anesthesia.
- Image the same region of interest (ROI) at Days 1, 3, 5, 7, 10, and 14 post-implantation.
- Use angiogenesis analysis software to quantify metrics from images: vessel density, vessel diameter, number of branching points, and perfusion (if using fluorescent dextrans).
- Confirm findings with terminal IHC for CD31/PECAM-1 and α-SMA after final imaging timepoint.
Protocol 3.3: Functional Assessment in a Rat Sciatic Nerve Defect Model
Objective: To evaluate sensorimotor functional recovery post-implantation of a bioprinted neural conduit. Materials: 15mm long bioprinted SAP-based nerve conduit, rat model, electrophysiology system, von Frey filaments, walking track analysis setup. Procedure:
- Create a 10mm gap in the sciatic nerve of an anesthetized rat.
- Suture the bioprinted conduit to the proximal and distal nerve stumps using 10-0 nylon sutures under a surgical microscope.
- Perform serial functional assessments:
- Walking Track Analysis (Sciatic Functional Index - SFI): Every 2 weeks.
- Electrophysiology: At 4, 8, and 12 weeks. Measure Compound Muscle Action Potential (CMAP) latency and amplitude from the gastrocnemius muscle upon proximal nerve stimulation.
- Sensory Test: Mechanical allodynia testing with von Frey filaments weekly.
- At terminal endpoint (e.g., 12 weeks), harvest the conduit and process for histology (toluidine blue for myelination, NF-200 for axons, S100 for Schwann cells) and morphometric analysis of regenerated axons.
Diagrams (Generated via Graphviz)
Diagram 1: In Vivo Integration Signaling Pathways
Diagram 2: In Vivo Evaluation Workflow
The Scientist's Toolkit: Research Reagent Solutions
Table 2: Essential Materials for In Vivo Integration Studies
| Item / Reagent | Function / Purpose | Example Vendor/Catalog |
|---|---|---|
| RGD-functionalized Self-Assembling Peptide (SAP) | Core biomimetic material providing cell-adhesive motifs and nanostructure. | Merck (Peptide) / Custom synthesis. |
| Gelatin Methacryloyl (GelMA) | Photocrosslinkable bioink for sacrificial printing or cell encapsulation. | Advanced BioMatrix (GelMA-ICM). |
| MMP-Sensitive Crosslinker | Enables cell-responsive degradation of hydrogel networks. | Tetrahedron (GCKK-PQGIWGQ-KKGC). |
| Recombinant VEGF-165 | Key growth factor to promote endothelial cell migration and proliferation. | PeproTech (100-20). |
| Anti-CD31 (PECAM-1) Antibody | Immunohistochemical marker for endothelial cells and vasculature. | Abcam (ab28364). |
| Anti-iNOS & Anti-CD206 Antibodies | IHC markers for pro-inflammatory (M1) and pro-regenerative (M2) macrophages. | Cell Signaling Technology (13120S / 24595S). |
| CellTracker Green CMFDA Dye | For stable, long-term fluorescent labeling of live cells for intravital tracking. | Thermo Fisher Scientific (C7025). |
| Matrigel (Growth Factor Reduced) | In vivo positive control for rapid vascularization assays. | Corning (356231). |
| Fluorescein-labeled Lycopersicon esculentum Lectin | Intravenous injection for fluorescent labeling of perfused vasculature. | Vector Laboratories (FL-1171). |
| Live/Dead Viability/Cytotoxicity Kit | For ex vivo assessment of cell survival within explanted constructs. | Thermo Fisher Scientific (L3224). |
Regulatory and Translational Considerations for Clinical Application
The translation of 3D bioprinted constructs using self-assembling biomimetic materials from research to clinical application is governed by a multi-faceted regulatory landscape. Key quantitative benchmarks and considerations are summarized below.
Table 1: Regulatory Pathways and Key Metrics for 3D Bioprinted Products
| Consideration Category | Specific Parameter | Benchmark/Requirement (Example) | Primary Regulatory Guidance (e.g., FDA) |
|---|---|---|---|
| Product Classification | Primary Mode of Action | Regulated as Biologic, Device, Combination Product, or Drug | 21 CFR Part 3, FD&C Act |
| Preclinical Safety | In Vivo Implant Duration | Typically 26-week study for permanent implants | ISO 10993, FDA G95-1 |
| Sterility Assurance | Sterility Assurance Level (SAL) | Minimum SAL of 10⁻⁶ (Probability of 1 non-sterile unit in 1 million) | USP <71>, ANSI/AAMI/ISO 11137 |
| Material Characterization | Batch-to-Batch Variability | ≤5% deviation in key physico-chemical properties (e.g., modulus, viscosity) | ASTM F2900, ICH Q6B |
| Cell Viability (if applicable) | Post-Printing Viability | Often >80% for cell-laden constructs | Guidance varies; often sponsor-defined with justification |
| Mechanical Integrity | Construct Failure Load | Must withstand physiological loads (e.g., >2 kN for bone) with safety factor | ASTM F2996, F1831 |
| Non-Clinical Performance | Animal Model Efficacy | Statistically significant improvement vs. control (e.g., p < 0.05) | FDA Guidance for Industry: Preclinical Assessments |
Table 2: Translational Development Timeline and Attrition Estimates
| Development Phase | Estimated Duration | Success Rate (Approx.) | Primary Regulatory Milestone |
|---|---|---|---|
| Discovery & Proof-of-Concept | 2-4 years | N/A | Pre-Submission Meeting (Q-Submission) |
| Preclinical Testing | 1-3 years | ~70% | Investigational New Drug (IND) / Investigational Device Exemption (IDE) Application |
| Clinical Trial Phase I | 1-2 years | ~75% | Safety & Feasibility Data Review |
| Clinical Trial Phase II | 2-3 years | ~50% | Proof-of-Concept & Dose-Finding Review |
| Clinical Trial Phase III | 3-5 years | ~60% | Pivotal Data for Marketing Authorization |
| Regulatory Review | 1-2 years | ~85% | Biologics License Application (BLA) / Pre-Market Approval (PMA) / Marketing Authorization (MA) |
Detailed Experimental Protocols
Protocol 1: In Vitro Biocompatibility and Functional Assessment of Bioprinted Constructs
- Objective: To evaluate cytocompatibility, cell-material interaction, and early functional output of a 3D bioprinted self-assembling peptide hydrogel scaffold.
- Materials: Sterile bioprinted constructs, relevant cell type (e.g., human mesenchymal stem cells - hMSCs), complete growth medium, Live/Dead assay kit (Calcein-AM/EthD-1), Phalloidin/DAPI staining reagents, qPCR reagents for lineage-specific markers, mechanical tester.
- Procedure:
- Post-Printing Conditioning: Aseptically transfer constructs to 24-well plates. Wash 3x with sterile PBS to remove residual bioink components.
- Cell Seeding & Culture: Seed hMSCs at a density of 1x10⁵ cells/construct. Allow attachment for 6h before adding fresh medium. Culture for 1, 7, and 14 days, changing medium every 48h.
- Viability/Visualization (Day 1, 7, 14): Incubate constructs in Live/Dead solution (2 µM Calcein-AM, 4 µM EthD-1) for 45 min. Image via confocal microscopy. Quantify live/dead cell ratio from z-stacks (n≥3).
- Cytoskeletal Organization (Day 7): Fix constructs in 4% PFA, permeabilize with 0.1% Triton X-100, stain with Phalloidin (F-actin) and DAPI (nuclei). Image via confocal microscopy to assess cell spreading and infiltration.
- Gene Expression Analysis (Day 14): Lyse constructs, extract RNA, and perform cDNA synthesis. Run qPCR for osteogenic (RUNX2, OPN), chondrogenic (SOX9, COL2A1), or other relevant markers. Use GAPDH as housekeeping. Analyze via ΔΔCt method.
- Mechanical Integrity Post-Culture: Perform unconfined compression tests on cultured constructs (n=5) at a strain rate of 1%/s. Record compressive modulus and compare to acellular controls.
Protocol 2: Preclinical Safety and Integration Study in a Subcutaneous Rodent Model
- Objective: To assess local biocompatibility, degradation, and host tissue integration of the bioprinted construct in vivo.
- Materials: Athymic nude rats (or other immunocompromised model), sterile bioprinted constructs (acellular or cell-laden), isoflurane anesthesia, surgical tools, suture, analgesia (e.g., buprenorphine), histological fixative (10% NBF).
- Procedure:
- Pre-Surgical Preparation: Anesthetize rat. Shave and disinfect dorsal area. All procedures must be IACUC-approved.
- Implantation: Make a 1.5 cm midline dorsal incision. Create two subcutaneous pockets laterally using blunt dissection. Implant one test construct per pocket. Close incision with sutures. Administer postoperative analgesia.
- Study Timepoints: Euthanize cohorts (n=5 per timepoint) at 1, 4, and 12 weeks post-implantation.
- Explantation & Analysis: Excise construct with surrounding tissue.
- Histology: Fix samples in NBF for 48h, process, paraffin-embed. Section (5 µm) and stain with H&E (general morphology), Masson's Trichrome (collagen deposition), and for immune markers (e.g., CD68 for macrophages).
- Histomorphometry: Quantify fibrotic capsule thickness, degree of vascularization (vessels per high-power field), and construct residual area from histological slides using image analysis software (e.g., ImageJ).
- Micro-CT (if applicable): Scan explants to assess mineralized tissue formation or construct architecture degradation.
Visualization: Diagrams and Workflows
Title: Clinical Translation Pathway for 3D Bioprinted Products
Title: Host Immune Response Pathways to Implanted Biomaterials
The Scientist's Toolkit: Key Research Reagent Solutions
Table 3: Essential Materials for Translational 3D Bioprinting Research
| Item Category | Specific Product/Technology | Function in Translational Research |
|---|---|---|
| Biomaterial | RADA16-I Peptide (e.g., PuraMatrix) | A self-assembling peptide hydrogel serving as a benchmark biomimetic bioink for 3D cell culture and minimal in vivo immune response studies. |
| Crosslinking System | Visible Light Initiator (LAP) & 405nm Light | A cytocompatible photo-initiator for precise, rapid crosslinking of methacrylated bioinks (e.g., GelMA), critical for structural fidelity during printing. |
| Characterization | Rheometer with Temp Control | Essential for quantifying bioink viscoelastic properties (viscosity, shear recovery, modulus) to ensure printability and meet batch-release specifications. |
| Cell Tracking | Lentiviral GFP/Luciferase Vectors | Enables stable genetic labeling of therapeutic cells for longitudinal tracking of cell survival, location, and fate in preclinical models. |
| In Vivo Imaging | IVIS Spectrum Imaging System | Permits non-invasive, quantitative longitudinal monitoring of bioluminescent cells or fluorescent probes in animal models, reducing animal numbers. |
| Histology | Multiplex Immunofluorescence Kit (e.g., Akoya Phenocycler) | Allows simultaneous detection of 30+ markers on a single tissue section, crucial for detailed analysis of complex host-construct interactions. |
| GMP Ancillary | Qualified Fetal Bovine Serum (FBS) | A rigorously tested, consistent lot of FBS is critical for scaling up cell expansion under conditions that support eventual regulatory filing. |
Conclusion
The integration of self-assembling biomimetic materials into 3D bioprinting represents a paradigm shift from static scaffolds to dynamic, biologically intelligent constructs. By mastering foundational design principles, researchers can create materials that closely mimic the native ECM, enabling sophisticated applications in complex tissue engineering and drug development. Methodological advances are successfully translating these materials into viable bioinks, though challenges in kinetics, scalability, and standardization remain active frontiers. Validation studies consistently demonstrate superior biofunctionality compared to traditional materials, particularly in promoting cellular self-organization and long-term tissue maturation. The future trajectory points toward fully automated, patient-specific biomanufacturing of functional grafts, sophisticated disease models for precision oncology, and next-generation platforms for regenerative medicine and therapeutic discovery. Continued interdisciplinary collaboration between material scientists, biologists, and clinicians is essential to navigate the translational pathway from bench to bedside.