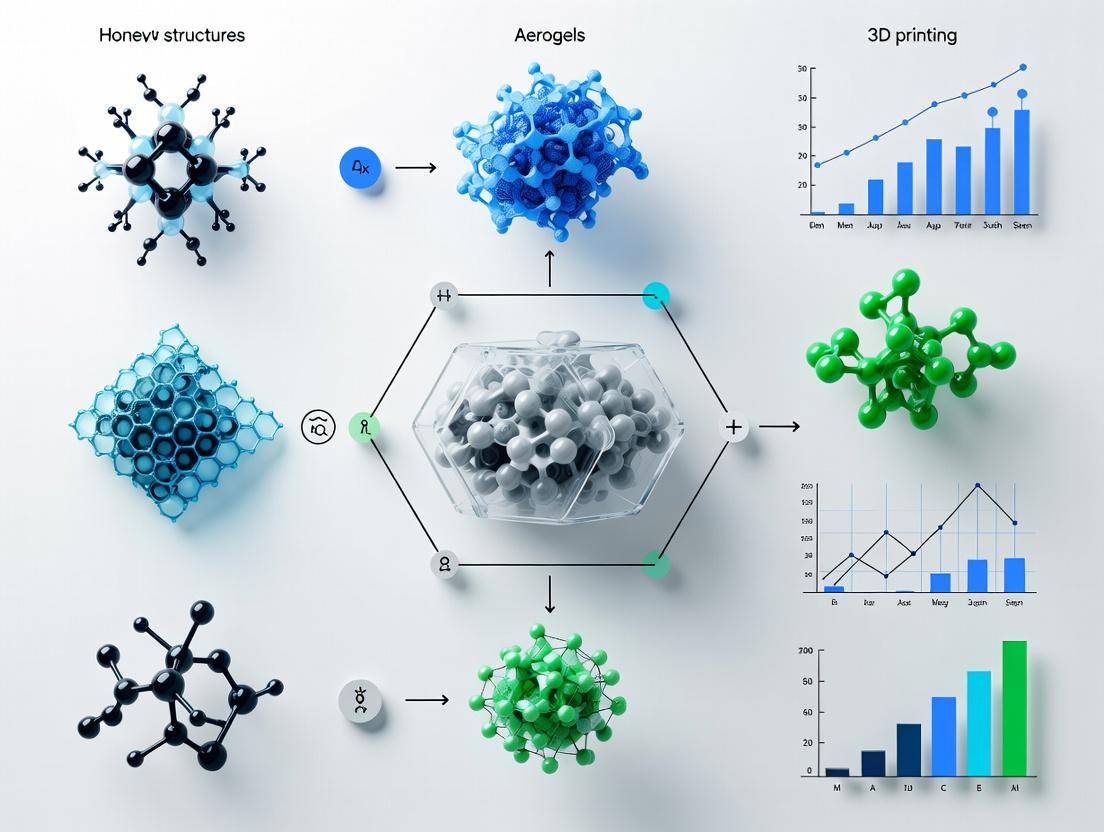
Revolutionizing Drug Delivery: A Deep Dive into 3D-Printed Hierarchical Honeycomb Aerogels for Biomedical Applications
This article provides a comprehensive analysis of 3D-printed hierarchical honeycomb structure aerogels, a cutting-edge platform in biomaterials science.
Revolutionizing Drug Delivery: A Deep Dive into 3D-Printed Hierarchical Honeycomb Aerogels for Biomedical Applications
Abstract
This article provides a comprehensive analysis of 3D-printed hierarchical honeycomb structure aerogels, a cutting-edge platform in biomaterials science. Tailored for researchers, scientists, and drug development professionals, we explore the foundational principles of their unique mechanics and mass transport, detail advanced fabrication methodologies like Direct Ink Writing (DIW) and digital light processing (DLP), and outline their specific applications in controlled drug release and tissue engineering scaffolds. We address critical troubleshooting for structural integrity and reproducibility, present rigorous validation protocols against traditional foams and hydrogels, and conclude with future clinical translation pathways. This resource synthesizes the latest research to guide the development of next-generation, programmable biomedical devices.
The Blueprint of Innovation: Understanding Hierarchical Honeycomb Aerogels
Within the context of advanced 3D printing for multifunctional aerogels, a "Hierarchical Honeycomb" architecture is defined by the integration of structural features across multiple distinct length scales, all organized in a repeating, cell-like (honeycomb) pattern. This multi-scale ordering is critical for achieving unprecedented combinations of properties—such as high specific surface area, ultra-low density, mechanical resilience, and tailored transport pathways—essential for applications in catalysis, energy storage, and targeted drug delivery.
Defining Architectural Characteristics & Quantitative Metrics
The hierarchical honeycomb is characterized by specific, measurable features at each scale, summarized in Table 1.
Table 1: Multi-Scale Quantitative Metrics Defining Hierarchical Honeycomb Aerogels
| Hierarchical Level | Key Feature | Typical Scale Range | Primary Function | Measurable Parameters |
|---|---|---|---|---|
| Macro-Architecture | Printed Honeycomb Lattice | 100 µm - 10 mm | Bulk Mechanical Integrity, Mass Transport | Strut Diameter (200-500 µm), Pore Size (1-5 mm), Porosity (> 95%) |
| Micro-Architecture | Cell Wall Microstructure | 1 µm - 100 µm | Stress Distribution, Fluidic Channels | Micro-pore Size (10-50 µm), Wall Thickness (5-50 µm) |
| Nano-Architecture | Nanofibrillar Network / Surface | 10 nm - 1 µm | Surface Area, Adsorption, Diffusion | Nanofiber Diameter (10-100 nm), Meso-pore Size (2-50 nm), BET Surface Area (200-800 m²/g) |
| Molecular Architecture | Chemical Functionalization | < 10 nm | Specific Binding, Catalytic Activity, Drug Loading | Functional Group Density (1-5 mmol/g), Drug Payload (10-40% w/w) |
Core Experimental Protocols
Protocol: Direct Ink Writing (DIW) of Hierarchical Honeycomb Aerogel
Objective: To fabricate a macroscopic 3D honeycomb lattice from a shear-thinning nanocomposite ink. Materials: See "Scientist's Toolkit" below. Procedure:
- Ink Preparation: Disperse surface-modified cellulose nanofibrils (CNFs, 2.0 wt%) and a graphene oxide (GO, 0.5 wt%) in deionized water. Homogenize via high-shear mixing (10,000 rpm, 30 min) followed by degassing under vacuum.
- Rheological Tuning: Adjust pH to ~6.5 to promote hydrogen-bonding network formation. Confirm ink exhibits shear-thinning behavior (viscosity drop > 1000x over shear rate 0.1 to 100 s⁻¹) and a storage modulus (G') > 500 Pa.
- Printing: Load ink into a syringe barrel fitted with a conical nozzle (inner diameter: 250 µm). Use a 3D bioprinter or customized DIW stage. Set printing parameters: Pressure = 25-35 psi, Print speed = 8-12 mm/s, Layer height = 200 µm. Print a 0/90° filament laydown pattern to create a grid structure with 1.5 mm spacing.
- Post-Printing Stabilization: Immediately freeze the printed lattice at -80°C for 4 hours. Lyophilize for 48 hours to obtain the aerogel.
- Cross-linking (Optional): For enhanced stability, subject the aerogel to vapor-phase cross-linking (e.g., glutaraldehyde vapor at 60°C for 6h).
Protocol: Characterization of Hierarchical Porosity
Objective: To quantify pore size distribution across nano- to macro-scales. Procedure:
- Macro/Micro-pore Analysis (Micro-CT): Mount aerogel sample on stage. Scan with a micro-computed tomography system at 5 µm resolution (60 kV, 133 µA). Reconstruct 3D volume and use image analysis software (e.g., ImageJ, Dragonfly) to calculate strut dimensions, macro-pore size distribution, and connectivity.
- Meso/Nano-pore Analysis (Gas Sorption): Degas 50-100 mg of aerogel sample at 120°C under vacuum for 12 hours. Perform N₂ adsorption-desorption isotherm at 77 K. Analyze data using Brunauer-Emmett-Teller (BET) theory for surface area (P/P₀ range 0.05-0.25) and Barrett-Joyner-Halenda (BJH) model for mesopore (2-50 nm) distribution.
Visualizing the Design-to-Function Workflow
Title: Fabrication Workflow for Hierarchical Aerogel
The Scientist's Toolkit: Key Research Reagent Solutions
| Item / Reagent | Function in Hierarchical Honeycomb Research |
|---|---|
| Cellulose Nanofibrils (CNFs) | Bio-derived nano-building block; forms entangled network for ink rheology and nanoscale fibrillar matrix. |
| Graphene Oxide (GO) Sheets | Provides electrical/thermal conductivity, enhances mechanical strength, and adds surface functional groups. |
| Cross-linker (e.g., Glutaraldehyde) | Induces covalent bonds between polymer chains, stabilizing the microstructure against aqueous dissolution. |
| Cryogenic Fluid (N₂(l)) | Used for rapid freezing to control ice crystal growth, dictating micro- and nano-porosity. |
| Lyophilizer | Removes solvent via sublimation, preserving the delicate nano-porous structure formed during freezing. |
| Direct Ink Write (DIW) 3D Printer | Precisely deposits shear-thinning ink to build the designed macro-scale honeycomb lattice. |
| Rheometer | Characterizes ink viscoelastic properties (yield stress, G', G'') to ensure printability and shape fidelity. |
Within the context of advanced 3D printing of hierarchical honeycomb aerogels for biomedical applications, the selection of core biopolymer materials is paramount. Silk fibroin (SF), gelatin (Gel), and chitosan (CS) are prominent due to their biocompatibility, tunable biodegradation, and functionalizability. These materials can be formulated into bio-inks and processed via cryogenic 3D printing or freeze-casting to create aerogels with highly ordered, hierarchical porosity. This structure mimics the extracellular matrix, enhancing applications in drug delivery, wound healing, and tissue engineering.
Material Properties and Performance Data
The following table summarizes key quantitative properties of aerogels derived from these biopolymers, relevant for hierarchical honeycomb structure design.
Table 1: Comparative Properties of Key Biopolymer Aerogels
| Material | Typical Porosity (%) | Compressive Modulus (kPa) | Degradation Time (in vivo) | Key Functional Groups for Crosslinking |
|---|---|---|---|---|
| Silk Fibroin (SF) | 90 - 99.5 | 50 - 500 (tunable via β-sheet content) | 3 months - 2+ years | -COOH, -NH₂ (Tyrosine residues for enzymatical crosslinking) |
| Gelatin (Gel) | 85 - 98 | 10 - 200 (highly dependent on concentration) | 1 - 8 weeks | -COOH, -NH₂ (Lysine for genipin/glutaraldehyde) |
| Chitosan (CS) | 80 - 96 | 20 - 300 (dependent on degree of deacetylation) | 2 - 6 months | -NH₂ (for ionic/ covalent crosslinking) |
| SF/Gel Blend | 92 - 99 | 80 - 400 | 1 month - 1 year | Combination of above |
| CS/Gel Blend | 87 - 97 | 30 - 250 | 2 weeks - 4 months | Combination of above |
Application Notes & Protocols
Protocol 1: Preparation of a 3D-Printable Silk Fibroin-Gelatin Composite Bio-ink for Honeycomb Aerogels
Objective: To formulate a homogeneous, shear-thinning bio-ink suitable for direct ink writing (DIW) of hierarchical honeycomb structures, followed by supercritical CO₂ drying to form an aerogel.
Materials:
- Bombyx mori silk cocoons
- Sodium carbonate (Na₂CO₃)
- Lithium bromide (LiBr) or Ajisawa's reagent
- Gelatin Type A (from porcine skin)
- Phosphate Buffered Saline (PBS)
- Glycerol (plasticizer)
- Genipin (crosslinker)
Methodology:
- Silk Fibroin Extraction: Degum 5g of silk cocoons in 2L of 0.02M Na₂CO₃ at 100°C for 30 min. Rinse thoroughly with deionized water (DIW) and dissolve the resulting fibroin in 9.3M LiBr at 60°C for 4 hours. Dialyze against DIW for 72 hours. Concentrate the aqueous SF solution to ~8-12% (w/v) using polyethylene glycol.
- Bio-ink Formulation: Mix the SF solution with gelatin powder to achieve a final composite ratio of 7:3 (SF:Gel) at a total polymer concentration of 6% (w/v) in PBS. Add 0.5% (v/v) glycerol. Stir at 37°C until homogeneous.
- Crosslinking & Rheology Tuning: Pre-crosslink the bio-ink by adding 0.1% (w/v) genipin and incubating at 4°C for 2 hours. This step induces mild beta-sheet formation in SF and increases viscosity for shape fidelity.
- 3D Printing: Load the ink into a syringe fitted with a conical nozzle (22-27G). Print using a DIW 3D printer with a cooled stage (4-10°C). Use a G-code designed for a hexagonal honeycomb lattice (e.g., 1 mm strut spacing, 0.8 mm layer height).
- Post-Printing Crosslinking & Drying: Immerse the printed structure in 90% ethanol for 30 min to complete SF β-sheet crystallization. Rinse. Perform solvent exchange with ethanol (gradient series: 30%, 50%, 70%, 90%, 100%). Dry using supercritical CO₂ (critical point dryer: 40°C, 1200 psi).
- Characterization: Analyze pore morphology (SEM), mechanical properties (compression testing), and porosity (mercury intrusion porosimetry).
Protocol 2: Fabrication of Chitosan-Gelatin Honeycomb Aerogel via Freeze-Casting for Drug Elution Studies
Objective: To create a directional, honeycomb-pored aerogel via unidirectional freeze-casting for controlled release of model therapeutics (e.g., vancomycin).
Materials:
- Chitosan (medium molecular weight, >75% deacetylation)
- Gelatin Type B
- Acetic acid (1% v/v)
- Glutaraldehyde (25% solution for vapor crosslinking)
- Model drug (e.g., Vancomycin hydrochloride)
Methodology:
- Solution Preparation: Dissolve chitosan (2% w/v) and gelatin (1% w/v) in 1% acetic acid under vigorous stirring at 50°C. Add the model drug at 5 mg/mL of solution. Filter the solution to remove bubbles.
- Freeze-Casting: Pour the solution into a cylindrical polytetrafluoroethylene (PTFE) mold. Place the mold on a copper cold finger pre-cooled to -40°C, ensuring unidirectional heat transfer. Freeze at -40°C for 4 hours.
- Lyophilization & Crosslinking: Transfer the frozen sample to a freeze-dryer. Primary drying: -40°C for 48 hours at 0.05 mBar. For crosslinking, place the lyophilized scaffold in a desiccator with a beaker containing 2 mL of 25% glutaraldehyde solution. Seal and expose to vapor at room temperature for 24 hours.
- Post-Treatment: Place the crosslinked aerogel in a fume hood for 2 hours to remove residual aldehyde, then rinse with 0.1M glycine solution and ethanol.
- Drug Release Protocol: Immerse individual aerogel samples (pre-weighed) in 10 mL of PBS (pH 7.4) at 37°C under gentle shaking (50 rpm). At predetermined intervals (0.5, 1, 2, 4, 8, 24, 48, 72h), withdraw 1 mL of release medium and replace with fresh PBS. Analyze drug concentration via UV-Vis spectrophotometry (λ=280 nm for vancomycin).
Experimental Workflow and Pathway Visualization
DIW Workflow for SF-Gel Honeycomb Aerogel
Freeze-Cast Aerogel Drug Release Protocol
The Scientist's Toolkit: Essential Research Reagent Solutions
Table 2: Key Reagents for Biopolymer Aerogel Research
| Reagent/Solution | Primary Function in Protocol | Critical Parameters & Notes |
|---|---|---|
| Ajisawa's Reagent (CaCl₂:EtOH:H₂O) | Alternative to LiBr for dissolving silk fibroin; less harsh, preserves molecular weight. | Molar ratio 1:2:8. Dissolution at 70-80°C. Requires careful dialysis. |
| Genipin Solution (0.1-0.5% w/v) | Natural, low-toxicity crosslinker for SF and gelatin; forms blue pigments. | Crosslinking rate is pH and temp-dependent. Prepare fresh in DMSO or ethanol. |
| Glutaraldehyde Vapor | Efficient crosslinker for chitosan and gelatin via Schiff base formation with -NH₂ groups. | Caution: Toxic. Use in sealed desiccator. Post-rinse with glycine is essential to block unreacted groups. |
| Supercritical CO₂ | Enables drying of gels without collapse of nanostructure, preserving high porosity. | Critical parameters: 40°C, 1200 psi. Requires prior solvent exchange with ethanol. |
| Ethanol Solvent Exchange Series | Gradually replaces water in hydrogel with a solvent miscible with scCO₂ to prevent pore collapse. | Typical gradient: 30%, 50%, 70%, 90%, 100% ethanol. 2-4 hours per step. |
| Simulated Body Fluid (SBF) | Assesses bioactivity and hydroxyapatite formation on aerogel surfaces for bone applications. | Ion concentration similar to human blood plasma. Incubate at 36.5°C; change weekly. |
This application note details the exploitation of synergistically combined properties—ultra-lightweight, high porosity, and exceptional surface area—within 3D-printed hierarchical honeycomb aerogels. Developed as part of a broader thesis on advanced material fabrication, these structures offer transformative potential for drug delivery systems, tissue engineering scaffolds, and catalytic supports. We present standardized protocols for synthesis, characterization, and functionalization, alongside critical reagent toolkits and quantitative performance data.
The convergence of additive manufacturing and aerogel chemistry enables the creation of architectures with programmable macro-scale geometry and nano-scale porous networks. The synergistic interplay of key properties is quantified below:
Table 1: Quantitative Property Summary of 3D-Printed Hierarchical Honeycomb Aerogels
| Property | Typical Range | Measurement Technique | Key Implication for Drug Development |
|---|---|---|---|
| Density | 5 – 50 mg/cm³ | Gravimetric analysis | Ultra-lightweight enables minimal implant mass and buoyant carriers. |
| Porosity | 98.5 – 99.8% | Mercury Porosimetry / N₂ Adsorption | Maximizes space for drug loading and cell infiltration. |
| Specific Surface Area (BET) | 450 – 850 m²/g | Nitrogen Adsorption (BET theory) | High capacity for drug adsorption, protein conjugation, and catalytic activity. |
| Pore Size Distribution | Macropores: 200-500 µm (printed) Mesopores: 5-50 nm (internal) | Multi-modal porosimetry | Hierarchical transport: macropores for bulk fluid/cell flow, mesopores for molecular loading. |
| Compressive Modulus | 0.5 – 5 MPa (at 80% strain) | Uniaxial compression test | Tunable mechanical compliance for specific tissue sites. |
Research Reagent Solutions Toolkit
Table 2: Essential Materials for 3D Printing Hierarchical Aerogels
| Item | Function & Rationale |
|---|---|
| Graphene Oxide (GO) or Cellulose Nanofibril (CNF) Ink | Primary rheological modifier for shear-thinning printability and backbone for the 3D network. |
| Crosslinker (e.g., Ca²⁺ ions, Genipin) | Induces gelation post-printing to stabilize the wet structure (green body) before drying. |
| Freeze-Dryer (Lyophilizer) | Removes solvent via sublimation to preserve nanoscale porosity and prevent pore collapse. |
| Supercritical CO₂ Dryer | Alternative to freeze-drying; uses supercritical fluid for solvent removal with minimal shrinkage. |
| Silane Coupling Agent (e.g., APTES) | Provides surface amine groups for subsequent covalent drug/biomolecule immobilization. |
| Model Drug (e.g., Doxorubicin, Vancomycin) | For loading and release kinetics studies. Fluorescently tagged versions allow for visualization. |
Application Notes & Protocols
Protocol: Direct Ink Writing (DIW) of Hierarchical Honeycomb Aerogel
Objective: To fabricate a stable 3D honeycomb lattice with dual-scale porosity.
- Ink Formulation: Disperse 2.5 wt% cellulose nanofibrils (CNF) and 1.0 wt% graphene oxide (GO) in deionized water. Mix homogenously using a high-shear mixer for 60 minutes.
- Rheology Check: Confirm ink exhibits shear-thinning behavior (viscosity drops >10x from low to high shear rate) and a storage modulus (G') > 500 Pa for shape fidelity.
- Printing: Load ink into a syringe barrel fitted with a tapered nozzle (diameter: 200-400 µm). Use a 3-axis bioprinter. Print parameters: Pressure = 25-35 kPa, Speed = 8-12 mm/s, Layer height = 80% nozzle diameter. Pattern: 0/90° alternating layers to create a rectilinear honeycomb grid.
- In-situ Gelation: Immerse printed wet structure in a 2% w/v CaCl₂ (for CNF) or 5 mM genipin (for GO/chitosan) bath for 60 minutes to crosslink.
- Solvent Exchange: Gradually transfer gel to increasing concentrations of ethanol/water baths (30%, 50%, 70%, 95%, 100%) over 12 hours.
- Drying: Perform critical point drying using supercritical CO₂ or freeze-dry for 48 hours.
Protocol: Drug Loading and Release Kinetics Assay
Objective: To quantify the loading capacity and controlled release profile from the aerogel.
- Surface Functionalization: Place dried aerogel in a 2% v/v (3-Aminopropyl)triethoxysilane (APTES) in anhydrous toluene solution for 24h. Wash with toluene and ethanol, then cure at 110°C for 1h.
- Drug Loading: Immerse functionalized aerogel in a 1 mg/mL doxorubicin (in PBS, pH 7.4) solution. Agitate gently at 4°C for 48h. Measure solution absorbance at 480 nm before and after to calculate loaded mass.
- Release Study: Transfer loaded aerogel to 50 mL of phosphate-buffered saline (PBS, pH 7.4) at 37°C under gentle agitation. At predetermined intervals (0.5, 1, 2, 4, 8, 24, 48, 72h), withdraw 1 mL of release medium and replace with fresh PBS. Quantify drug concentration via UV-Vis spectrometry.
- Data Analysis: Fit release data to Korsmeyer-Peppas model to elucidate release mechanism (Fickian diffusion vs. swelling-controlled).
Visualizations
Aerogel Fabrication & Functionalization Workflow
Property Synergy Driving Applications
Table 1: Comparative Mechanical Properties of Printed Honeycomb Aerogels
| Material Base | Young's Modulus (MPa) | Compressive Strength (kPa) | Density (mg/cm³) | Porosity (%) | Reference Year |
|---|---|---|---|---|---|
| Graphene Oxide | 10.2 - 45.7 | 5.1 - 16.3 | 4.8 - 12.1 | 99.2 - 99.8 | 2023 |
| Cellulose Nanofibril | 3.8 - 15.6 | 2.8 - 9.4 | 8.5 - 20.3 | 98.5 - 99.5 | 2024 |
| Silk Fibroin | 1.5 - 8.9 | 1.2 - 5.6 | 15.2 - 30.5 | 97.0 - 99.0 | 2023 |
| Polyimide | 25.1 - 110.5 | 12.5 - 45.8 | 6.2 - 15.8 | 98.8 - 99.7 | 2024 |
Table 2: Fluid Transport Parameters in Hierarchical Honeycombs
| Pore Scale (μm) | Permeability (m²) | Darcy Velocity (m/s) | Diffusivity Coefficient (m²/s) | Application Context |
|---|---|---|---|---|
| 10 - 50 (Macro) | 1.2e-12 - 5.5e-11 | 1e-4 - 5e-3 | 2.1e-9 - 8.7e-9 | Cell Seeding |
| 1 - 10 (Meso) | 5.5e-14 - 1.2e-12 | 1e-5 - 1e-4 | 8.7e-10 - 2.1e-9 | Nutrient Diffusion |
| 0.1 - 1 (Micro) | 1.0e-15 - 5.5e-14 | 1e-7 - 1e-5 | 1.0e-10 - 8.7e-10 | Drug Release |
Experimental Protocols
Protocol 2.1: Direct Ink Writing (DIW) of Hierarchical Honeycomb Aerogels
Purpose: To fabricate mechanically robust, porous aerogels with controlled multi-scale architecture for drug carrier applications. Materials: See "Research Reagent Solutions" Table. Procedure:
- Ink Preparation: Disperse 2.5% w/v cellulose nanofibrils in deionized water. Mix with 0.8% w/v gelatin methacrylate (GeIMA) crosslinker. Adjust pH to 7.4. Centrifuge at 5000 rpm for 10 min to remove air bubbles.
- Printing: Load ink into a 22-gauge nozzle syringe. Use a 3D bioprinter (e.g., BIO X). Set print parameters: Pressure = 180 kPa, Speed = 8 mm/s, Nozzle Height = 0.3 mm. Print in a hexagonal pattern with layer-by-layer rotation of 60°.
- Crosslinking: Expose printed structure to blue light (405 nm, 20 mW/cm²) for 90 seconds per layer.
- Freeze-Drying: Rapidly freeze the gel in liquid nitrogen for 5 minutes. Transfer to a freeze-dryer. Lyophilize at -55°C and 0.05 mBar for 48 hours.
- Post-Processing: Perform thermal annealing at 120°C for 2 hours under nitrogen atmosphere to enhance mechanical stability.
Protocol 2.2: Microfluidic Assessment of Diffusive Transport
Purpose: To quantify molecular diffusion coefficients within the honeycomb network for drug release modeling. Materials: Fluorescein isothiocyanate (FITC)-dextran (10 kDa), PBS buffer, confocal microscope, custom diffusion chamber. Procedure:
- Sample Mounting: Cut a 5mm x 5mm x 2mm aerogel sample. Secure it in the diffusion chamber, creating two compartments (Donor & Receiver).
- Loading: Fill the donor compartment with 100 µM FITC-dextran in PBS. Fill the receiver with PBS only.
- Imaging: Use confocal microscopy (z-stack, 10 µm intervals) to capture fluorescence intensity every 30 seconds for 60 minutes.
- Analysis: Apply Fick's second law using the concentration profile over time. Calculate effective diffusivity (D_eff) via curve fitting to the error function solution.
Visualizations
Diagram Title: DIW Fabrication Workflow
Diagram Title: Drug Release Pathway
The Scientist's Toolkit: Research Reagent Solutions
Table 3: Essential Materials for 3D Printed Honeycomb Aerogel Research
| Item | Function in Research | Example Product/Specification |
|---|---|---|
| Cellulose Nanofibrils (CNF) | Primary structural polymer for ink; provides shear-thinning behavior and green strength. | 2.5% w/v aqueous gel, diameter 5-50 nm. |
| Gelatin Methacrylate (GeIMA) | Photocrosslinkable biopolymer; enables shape fidelity and cytocompatibility. | Degree of substitution >70%, 5-15% w/v in PBS. |
| Photoinitiator (LAP) | Initiates crosslinking upon blue light exposure for solidification. | Lithium phenyl-2,4,6-trimethylbenzoylphosphinate, 0.25% w/v. |
| FITC-Dextran Conjugates | Fluorescent tracer molecules for quantifying diffusion and release profiles. | Molecular weights: 4, 10, 40, 70 kDa. |
| Cryogenic Freeze-Dryer | Removes solvent via sublimation to preserve nano-porous honeycomb structure. | Shelf temperature: -55°C, pressure: <0.1 mBar. |
| 3D Bioprinter (DIW) | Extrusion-based printer for precise deposition of viscous inks into 3D lattices. | Nozzle sizes: 18G-27G, pressure range: 10-250 kPa. |
| Mechanical Tester | Quantifies compressive/tensile modulus and strength of printed aerogels. | Load cell: 10N, resolution: 0.001N. |
The development of advanced porous materials for biomedical and industrial applications has undergone a paradigm shift. Initially, passive foams and aerogels, characterized by stochastic porosity and limited mechanical control, were the standard. The advent of additive manufacturing, particularly direct ink writing (DIW) 3D printing, has enabled the transition to programmable hierarchical structures. This evolution is critical for thesis research on 3D-printed hierarchical honeycomb aerogels, where geometry dictates function—from drug release kinetics to structural support.
Comparative Evolution: Key Data
The quantitative progression in key material properties is summarized below.
Table 1: Evolution of Porous Material Properties & Fabrication
| Era / Material Type | Typical Porosity (%) | Pore Size Control | Compressive Modulus (kPa) | Key Fabrication Method | Programmability |
|---|---|---|---|---|---|
| Traditional Passive Foams (e.g., Polyurethane) | 85-97 | Stochastic, Micron-scale | 10 - 100 | Gas Foaming, Freeze Casting | None |
| Classical Aerogels (e.g., Silica) | 95-99.8 | Stochastic, Nano to Micron | 1 - 100 | Sol-Gel, Supercritical Drying | None |
| Early Engineered Scaffolds | 70-90 | Semi-Ordered, 100-500 µm | 50 - 500 | Porogen Leaching, Electrospinning | Low (Bulk Shape) |
| 3D-Printed Hierarchical Aerogels (Current Research) | 60-95 | Precisely Ordered, 10 µm - 2 mm | 1 - 10,000+ | Direct Ink Writing (DIW), SLA | High (Architecture, Density, Pathway) |
Table 2: Performance in Drug Delivery Applications
| Structure Type | Drug Loading Capacity (wt%) | Release Profile Control | Diffusion Pathway | Stimuli-Responsive Capability |
|---|---|---|---|---|
| Passive Foam | 5-15 | First-order burst release | Random, Tortuous | Low (Material-Dependent) |
| Conventional Aerogel | 10-30 | Diffusion-controlled, sustained | Nano/Micro Pores | Moderate (if functionalized) |
| 3D-Printed Honeycomb Aerogel | 20-50+ | Tunable (zero-order, pulsatile) | Designed Macro-Channels & Micro-Pores | High (Geometry + Material) |
Application Notes & Protocols
Application Note AN-1: Design of a Drug-Eluting Hierarchical Honeycomb Aerogel
- Objective: To create a dexamethasone-loaded alginate-silk fibroin honeycomb aerogel for sustained anti-inflammatory release.
- Rationale: The honeycomb geometry provides high surface-area-to-volume ratio for loading, while the wall porosity and filament spacing dictate release kinetics and mechanical resilience.
- Key Parameters: Filament diameter (200 µm), pore size (1 mm hexagonal), wall porosity (70%), infill pattern (hexagonal).
Protocol P-1: Synthesis of a Printable Bio-Aerogel Ink (Alginate-Silk Fibroin Composite)
- Materials: See "The Scientist's Toolkit" below.
- Procedure:
- Silk Fibroin Solution Prep: Dissolve 10 g of Bombyx mori cocoons in 2M LiBr (100 mL) at 60°C for 4 hr. Dialyze against DI water (MWCO 3.5 kDa) for 72 hr. Concentrate to 8% (w/v) using PEG.
- Ink Formulation: Mix 3% (w/v) sodium alginate (4 mL) with 8% (w/v) silk fibroin solution (6 mL) under magnetic stirring (30 min, room temp). Add 0.5 g of nanocrystalline cellulose (NCC) as a rheological modifier. Stir for 2 hr.
- Drug Loading: Add 100 mg of dexamethasone (or model drug) to the ink. Homogenize via sonication (10 min, pulse mode).
- Ink Assessment: Measure viscosity via rheometer. Target: shear-thinning behavior with yield stress > 200 Pa for shape fidelity.
Protocol P-2: 3D Printing & Post-Processing to Form Aerogel
- Equipment: Direct Ink Writing (DIW) 3D printer (e.g., 3D-Bioplotter, or custom), 410 µm nozzle, cooling stage (4°C).
- Printing:
- Load ink into syringe barrel, attach nozzle.
- Set stage temperature to 4°C.
- Print honeycomb pattern (G-code designed for 1 mm pores, 5-layer height). Pressure: 25-35 psi, speed: 8 mm/s.
- Crosslink printed structure by immersing in 2% (w/v) CaCl₂ solution for 10 min.
- Post-Processing (Supercritical Drying - SC-CO₂):
- Dehydrate gel in graded ethanol baths (30%, 50%, 70%, 90%, 100%, 1 hr each).
- Transfer to SC-CO₂ dryer. Set conditions: 40°C, 120 bar, 2 hr for static drying, 1 hr for dynamic flow.
- Depressurize slowly (< 5 bar/min) to obtain dry, monolithic aerogel.
Protocol P-3: Drug Release Kinetics Assay
- Method:
- Weigh aerogel sample (W0).
- Immerse in 20 mL PBS (pH 7.4, 37°C) under gentle agitation (50 rpm).
- At predetermined intervals, withdraw 1 mL of release medium and replace with fresh PBS.
- Analyze drug concentration via HPLC/UV-Vis. Calculate cumulative release.
- Fit data to models (Korsmeyer-Peppas, Higuchi) to elucidate release mechanism.
Diagrams
Diagram 1: Evolution Pathway of Porous Materials
Diagram 2: 3D-Printed Aerogel Workflow for Drug Delivery
The Scientist's Toolkit: Key Research Reagent Solutions
Table 3: Essential Materials for 3D Printing Hierarchical Aerogels
| Item | Function & Rationale | Example (Supplier) |
|---|---|---|
| Ionic Crosslinker (CaCl₂) | Induces rapid gelation of alginate-based inks post-extrusion, providing immediate shape fidelity. | Calcium chloride, 96% (Sigma-Aldrich) |
| Rheology Modifier (NCC) | Imparts shear-thinning and yield-stress behavior to bio-inks, enabling extrusion and preventing collapse. | Nanocrystalline cellulose (CelluForce) |
| Silk Fibroin Protein | Provides biocompatibility, tunable biodegradation, and enhances mechanical toughness of the aerogel struts. | Bombyx mori Silk Fibroin (Advanced Biomatrix) |
| Supercritical Fluid (CO₂) | Solvent for supercritical drying; removes liquid without inducing capillary forces, preserving nano-porosity. | SCF-grade Carbon Dioxide (Airgas) |
| Model Drug (Dexamethasone) | A common anti-inflammatory corticosteroid used to prototype and quantify release profiles from novel scaffolds. | Dexamethasone (TCI Chemicals) |
| Viscoelastic Bio-Ink | The foundational printable material, combining structural polymers, drug, and modifiers in an aqueous suspension. | Custom Alginate-Silk Fibroin Composite (In-lab synthesis per Protocol P-1) |
From Design to Reality: Fabricating and Applying 3D-Printed Aerogel Scaffolds
The development of hierarchical honeycomb-structured aerogels via 3D printing presents a unique challenge requiring precise ink engineering. The ink must exhibit specific rheological properties for extrusion, undergo controlled sol-gel transition to form a wet gel network, and employ crosslinking strategies to achieve mechanical integrity and porosity post-processing. This application note details the fundamental principles and protocols for formulating such functional inks, with direct application to aerogel research for advanced applications in catalysis, insulation, and drug delivery scaffolds.
Rheology Fundamentals and Measurement Protocols
The rheology of an ink dictates its printability, shape fidelity, and ability to support hierarchical structures. Key parameters are yield stress, shear-thinning behavior, and viscoelastic moduli (G' and G'').
Table 1: Target Rheological Properties for 3D Printing Honeycomb Aerogel Inks
| Parameter | Target Value/Range | Measurement Method | Functional Significance |
|---|---|---|---|
| Yield Stress (τ₀) | 50 - 500 Pa | Herschel-Bulkley model fit from flow sweep | Prevents structural collapse under gravity; enables filament spanning. |
| Flow Index (n) | 0.1 - 0.5 | Power-law model fit | Strong shear-thinning for smooth extrusion through nozzle. |
| Storage Modulus (G') | > 1000 Pa (at rest) | Oscillatory amplitude sweep | Dominant elastic solid behavior to retain printed shape. |
| Loss Modulus (G'') | < G' (at rest) | Oscillatory amplitude sweep | Viscous component should be lower to prevent slumping. |
| Recovery Time | < 5 seconds | Step-rate (3-interval thixotropy) test | Rapid recovery after extrusion to freeze filament shape. |
Protocol 2.1: Comprehensive Rheological Characterization
Objective: To measure yield stress, shear-thinning, and viscoelastic recovery of a candidate ink. Materials: Rheometer (parallel plate geometry, 25mm diameter, 500μm gap), temperature control unit, ink sample. Procedure:
- Loading: Load ~0.5 mL ink onto Peltier plate at 25°C. Lower geometry to measurement gap. Trim excess.
- Amplitude Sweep:
- Set constant frequency (1 Hz). Shear strain from 0.01% to 100%.
- Determine the linear viscoelastic region (LVR) where G' and G'' are constant.
- Record G' and G'' at 0.1% strain (within LVR) as "at-rest" moduli.
- Flow Sweep:
- Apply logarithmic shear rate ramp from 0.01 s⁻¹ to 100 s⁻¹.
- Fit data to Herschel-Bulkley model: τ = τ₀ + K * (γ̇)^n.
- Extract yield stress (τ₀), consistency index (K), and flow index (n).
- Thixotropic Recovery (Step-rate test):
- Step 1: Low shear (0.1 s⁻¹ for 30s) to simulate at-rest state.
- Step 2: High shear (10 s⁻¹ for 30s) to simulate extrusion.
- Step 3: Immediate return to low shear (0.1 s⁻¹). Monitor viscosity recovery over 60s. Calculate time to 95% recovery.
Sol-Gel Chemistry Strategies for Precursor Inks
Sol-gel transition forms the foundational wet gel network. For honeycomb structures, reaction kinetics must be slow enough for printing but controllable for post-print gelation.
Table 2: Common Sol-Gel Systems for Printable Aerogel Inks
| System | Precursor | Catalyst/Gelator | Gelation Mechanism | Key Advantage for 3D Printing |
|---|---|---|---|---|
| Silica | Tetraethyl orthosilicate (TEOS) | Acid (e.g., HCl) then base (e.g., NH₄OH) | Hydrolysis & Polycondensation | Tunable kinetics; high surface area. |
| Alginate | Sodium Alginate | Divalent Cations (e.g., Ca²⁺ from CaCl₂) | Ionic Crosslinking | Rapid, bio-compatible; requires precision. |
| Cellulose | Nanofibrillated Cellulose (CNF) | Solvent Exchange / Freeze-Casting | Physical Entanglement & H-bonding | Excellent green strength; shear-thinning. |
| Hybrid | TEOS + Chitosan | Base Catalyst | Co-condensation & Physical Crosslink | Multifunctional properties. |
Protocol 3.1: Controlled Acid-Base Catalyzed Silica Sol-Gel Ink Formulation
Objective: Prepare a silica-based ink with delayed gelation for printing. Reagents: TEOS, Ethanol, 0.1M HCl, 0.1M NH₄OH, deionized water. Procedure:
- Acidic Hydrolysis: Mix TEOS:Etanol:H₂O:0.1M HCl in molar ratio 1:4:4:0.05. Stir vigorously at 60°C for 90 min. Result is a clear, low-viscosity sol.
- Ink Formulation: Cool hydrolyzed sol to 25°C. Thicken by adding 2-4 wt% hydroxypropyl methylcellulose (HPMC) under shear mixing. This provides immediate rheological control.
- Base Catalysis for Gelation: Post-printing, expose printed structure to ammonia vapor (in a sealed chamber with 5% NH₄OH solution) for 2 hours. This initiates rapid polycondensation, locking the 3D shape.
- Aging: Submerge gel in Etanol for 24h to strengthen network via Ostwald ripening.
Diagram Title: Silica Ink Prep & Gelation Workflow
Crosslinking Strategies for Enhanced Structural Integrity
Crosslinking reinforces the gel network, crucial for surviving drying/supercritical drying to become an aerogel.
Table 3: Crosslinking Methods for Printed Aerogels
| Method | Crosslinker/Agent | Mechanism | Protocol | Impact on Hierarchical Structure |
|---|---|---|---|---|
| Chemical (Covalent) | Bis(trimethoxysilyl)ethane (BTMSE) | Co-condensation with silica network | Add 10 mol% (vs. TEOS) to precursor sol. | Increases stiffness, reduces shrinkage. |
| Physical (Ionic) | CaCl₂ Solution (for Alginate) | Ionic bridging of guluronate blocks | Post-print mist spray or vapor diffusion. | Fast, can create gradient properties. |
| Thermal | Polyvinyl Alcohol (PVA) | Hydrogen bonding & crystallite formation | Heat treatment at 120-150°C post-print. | Good for polymer-based inks. |
| Photo | Methacrylated Gelatin (GelMA) | Radical polymerization | UV light (365 nm, 5 mW/cm²) exposure. | Spatiotemporal control; cell-laden inks. |
Protocol 4.1: Co-condensation with Bridged Silsesquioxane for Reinforcement
Objective: Incorporate a covalent crosslinker during sol preparation to enhance final aerogel modulus. Reagents: TEOS, Bis(trimethoxysilyl)ethane (BTMSE), Ethanol, 0.1M HCl, 0.1M NH₄OH. Procedure:
- Pre-mix: Combine TEOS and BTMSE in a 9:1 molar ratio.
- Hydrolysis: Add Ethanol, H₂O, and 0.1M HCl to the mix (maintaining TEOS:EtOH:H₂O:HCl at 1:4:4:0.05). Stir at 60°C for 90 min. The BTMSE incorporates into the hydrolyzing network.
- Ink & Print: Follow Protocol 3.1 steps 2-4. The bridging ethane group in BTMSE creates a more flexible but robust network, reducing cracking during drying.
Diagram Title: Covalent Crosslinking Mechanism
The Scientist's Toolkit: Key Reagent Solutions
Table 4: Essential Materials for Ink Formulation Research
| Item | Example Product/Chemical | Function in Formulation |
|---|---|---|
| Rheology Modifier | Hydroxypropyl methylcellulose (HPMC), Fumed Silica | Imparts yield stress and shear-thinning; controls ink flowability. |
| Gelation Catalyst | Ammonium Hydroxide (NH₄OH), Calcium Chloride (CaCl₂) | Initiates sol-gel transition or ionic crosslinking post-printing. |
| Covalent Crosslinker | Bis(trimethoxysilyl)ethane (BTMSE), Glutaraldehyde | Strengthens network backbone, reduces drying shrinkage. |
| Nanomaterial Additive | Cellulose Nanofibrils (CNF), Graphene Oxide | Enhances green strength, electrical/thermal properties. |
| Surfactant | Pluronic F-127, Triton X-100 | Controls pore morphology, prevents cracking during drying. |
| Solvent | Ethanol, Deionized Water | Medium for sol-gel reactions; used for solvent exchange. |
| pH Adjuster | 0.1M HCl, Acetic Acid | Controls hydrolysis rate in sol-gel chemistry. |
This document serves as a compendium of application notes and protocols for advanced 3D printing techniques—Direct Ink Writing (DIW), Digital Light Processing (DLP), and Cryogenic Printing—applied to the fabrication of aerogels. The methodologies are contextualized within a broader thesis research focused on developing 3D-printed hierarchical honeycomb structures from aerogels for applications in catalysis, thermal insulation, and controlled drug delivery. The aim is to provide reproducible, detailed experimental guidelines for researchers and scientists in materials science and drug development.
Research Reagent Solutions and Key Materials
The following table lists essential reagents and materials common to the featured printing techniques for aerogel synthesis.
| Reagent/Material | Function/Brief Explanation | Typical Composition/Example |
|---|---|---|
| Silica Sol (e.g., Tetraethyl orthosilicate - TEOS) | Precursor for silica aerogel matrix; forms the inorganic backbone via sol-gel chemistry. | TEOS, Ethanol, Water, Acid/Base Catalyst. |
| Polymeric Gelators (e.g., Gelatin, Agarose, PVA) | Provides rheological control for DIW inks or acts as a sacrificial template/binder for shape retention. | Biopolymer dissolved in warm water. |
| Photo-initiator (e.g., Phenylbis(2,4,6-trimethylbenzoyl)phosphine oxide) | Initiates radical polymerization in DLP upon exposure to 405 nm light, curing the resin. | ~1-3 wt% in photocurable resin. |
| Photocurable Resin (Hybrid Organic-Inorganic) | DLP resin that polymerizes to form a "green body" which can be calcined to yield an aerogel. | Methacryloxypropyltrimethoxysilane (MAPTMS), HDDA, photoinitiator. |
| Cryogenic Solvent (e.g., tert-Butanol) | Used in cryogenic printing; has high freezing point and sublimes easily, minimizing ice crystal formation and network damage. | Pure tert-butanol or water/tert-butanol mixtures. |
| Crosslinker (e.g., Glutaraldehyde) | Chemically crosslinks polymeric chains (e.g., in gelatin inks) to enhance mechanical integrity post-printing. | 2.5% v/v aqueous solution. |
| Surface Modifier (e.g., Hexamethyldisilazane - HMDS) | Used in surface silanization to render the gel hydrophobic, preventing collapse during drying. | HMDS in hexane or ethanol. |
| Rheology Modifier (e.g., Nanoclay, Fumed Silica) | Implements shear-thinning and yield-stress behavior in DIW inks for extrudability and shape fidelity. | Laponite RD, Aerosil 200. |
Direct Ink Writing (DIW) for Aerogels
Application Notes
DIW is ideal for creating highly porous, intricate 3D honeycomb structures with controlled macropores. The key is formulating an ink with appropriate viscoelastic properties: high storage modulus (G') at rest for shape retention and significant shear-thinning for extrusion.
| Ink Component | Role | Typical Concentration Range | Target Rheological Property |
|---|---|---|---|
| Silica Nanoparticles | Inorganic backbone | 5-20 wt% | Increases viscosity, modulus |
| Gelatin | Thermo-reversible gellant | 10-25 wt% | Provides yield stress, shapes fidelity |
| Nanoclay (Laponite) | Rheological modifier | 2-6 wt% | Induces shear-thinning, prevents sagging |
| Water/Solvent | Dispersion medium | Balance | Controls overall solids content |
Experimental Protocol: DIW of Silica-Based Honeycomb Aerogels
Objective: To print a hierarchical honeycomb structure using a silica-gelatin nanocomposite ink, followed by gelation, solvent exchange, and supercritical drying to obtain an aerogel.
Materials & Equipment:
- DIW 3D Printer (e.g., 3D-Bioplotter, or custom pneumatic extrusion system)
- Syringe barrel & conical nozzle (100-400 µm diameter)
- Silica sol (pre-hydrolyzed TEOS)
- Gelatin Type A
- Deionized Water
- Glutaraldehyde solution (2.5%)
- Ethanol, HMDS, CO₂ for supercritical drying
Procedure:
Ink Preparation: a. Dissolve gelatin in warm DI water (50°C) under stirring to achieve a 15 wt% solution. b. Cool the solution to 35°C. Gradually add pre-hydrolyzed silica sol (20 wt% SiO₂ equivalent) under vigorous stirring to form a homogeneous composite. Final ink solids ~25-30 wt%. c. Load the warm ink into a printing syringe and equilibrate at 32°C for 30 min.
Printing Parameters: a. Nozzle: 250 µm conical. b. Pressure: 1.5-2.5 bar (optimized for consistent filament flow). c. Print Speed: 8-12 mm/s. d. Print Bed Temperature: 20°C (to induce rapid thermo-gelation upon deposition). e. Pattern: Print a 10-layer hexagonal honeycomb lattice with 500 µm filament spacing.
Post-Printing Processing: a. Crosslinking: Immerse the printed structure in 2.5% glutaraldehyde solution for 2 hours. b. Solvent Exchange: Rinse with DI water, then sequentially exchange water with ethanol (30%, 50%, 70%, 90%, 100%) every 2 hours. c. Surface Modification: Soak in 5% HMDS in ethanol for 24 hours. d. Drying: Perform supercritical CO₂ drying (80 bar, 35°C).
Expected Outcome: A 3D-printed silica-gelatin hybrid aerogel honeycomb with high porosity (>95%), meso/macroporous hierarchy, and low thermal conductivity (<0.025 W/m·K).
Digital Light Processing (DLP) for Aerogels
Application Notes
DLP enables high-resolution, fast fabrication of complex aerogel "green bodies" from photocurable, sol-gel-based resins. This technique is excellent for creating fine-featured honeycomb cells. Post-printing, the polymer/organic components are removed via calcination, leaving a pure inorganic aerogel network.
| Parameter | Typical Value/Range | Effect/Notes |
|---|---|---|
| Light Wavelength | 405 nm | Standard for many photo-initiators. |
| Layer Thickness | 25-100 µm | Thinner layers increase resolution and print time. |
| Exposure Time | 3-15 seconds/layer | Depends on resin reactivity and light intensity. |
| Calcination Ramp Rate | 1°C/min (to 500°C) | Prevents cracking from rapid organic removal. |
| Final Calcination Temp | 500-600°C, 4 hr | Removes all organic components. |
Experimental Protocol: DLP of Silica Aerogel Lattices
Objective: To fabricate a micro-architected silica aerogel lattice via DLP printing of a hybrid resin and subsequent thermal processing.
Materials & Equipment:
- DLP/SLA 3D Printer
- Photocurable Resin: MAPTMS, 1,6-Hexanediol diacrylate (HDDA), Photo-initiator (TPO), Solvent (Ethanol).
- Programmable furnace.
Procedure:
Resin Formulation: a. Mix 60 wt% MAPTMS (pre-hydrolyzed with 0.1M HCl for 1 hr), 30 wt% HDDA, 9 wt% ethanol, and 1 wt% TPO photo-initiator. Stir in the dark until clear.
Printing: a. Load resin into the printer vat. b. Slice Model: Import a 3D honeycomb lattice model (strut thickness ~200 µm). c. Set Parameters: Layer thickness = 50 µm, Exposure time = 8 seconds/layer. d. Print the structure. After printing, rinse in ethanol to remove uncured resin.
Post-Processing to Aerogel: a. Aging: Submerge the printed "green body" in a solution of TEOS/ethanol/ammonia for 24h to strengthen the silica network. b. Solvent Exchange: Exchange ethanol with fresh ethanol 3 times over 24h. c. Drying: Perform ambient pressure drying using HMDS surface modification OR supercritical CO₂ drying. d. Calcination: Heat in air to 550°C at 1°C/min, hold for 4 hours, then cool slowly to room temperature.
Expected Outcome: A high-fidelity, monolithic silica aerogel lattice with features <200 µm, surface area >600 m²/g, and hierarchical porosity.
Diagram Title: DLP Aerogel Fabrication Workflow
Cryogenic 3D Printing for Aerogels
Application Notes
This technique involves printing an ink directly into a freezing environment (e.g., -20°C to -80°C). The solvent (often water/tert-butanol) freezes immediately, locking the solute into a 3D ice-templated structure. Subsequent freeze-drying (lyophilization) removes the ice via sublimation, yielding an aerogel. It is superb for creating highly aligned, anisotropic pores within honeycomb walls.
| Parameter | Control Value | Impact on Structure |
|---|---|---|
| Print Bed/Cold Plate Temp | -30°C to -70°C | Lower temp = faster freezing = finer ice crystals. |
| Ink Temperature | 0-5°C (above freezing) | Prevents clogging, allows extrusion. |
| Freeze-Drying Cycle | Primary: -50°C for 24hSecondary: Ramp to 25°C over 24hVacuum: <0.1 mbar | Sublimes frozen solvent without pore collapse. |
| Ink Concentration | 2-10 wt% (Polymer) | Higher concentration reduces pore size. |
Experimental Protocol: Cryogenic Printing of PVA Honeycomb Aerogels
Objective: To fabricate a polymeric aerogel with dual-scale porosity via cryogenic printing and freeze-drying.
Materials & Equipment:
- Cryogenic 3D Printer (modified DIW with cold stage)
- PVA (Mw ~85,000-124,000)
- tert-Butanol/Water mixture (70/30 v/v)
- Liquid Nitrogen or Peltier-cooled stage
- Freeze Dryer
Procedure:
Ink Preparation: a. Dissolve PVA powder in a 70/30 tert-butanol/water mixture at 90°C with stirring to form a 5 wt% clear solution. b. Cool the ink to 5°C and degas before printing.
Printing Setup: a. Pre-cool the aluminum print bed to -60°C using a linked cooling system. b. Use a stainless-steel syringe and nozzle (150 µm). Maintain ink in syringe at 5°C.
Printing: a. Extrude ink using pressurized air (0.8-1.2 bar) onto the -60°C bed. b. Print Speed: 5 mm/s. The ink freezes instantaneously upon contact. c. Print a 15-layer honeycomb structure.
Freeze-Drying: a. Immediately transfer the frozen print to a pre-cooled (-50°C) freeze dryer. b. Apply vacuum (<0.1 mbar) and maintain primary drying at -50°C for 24 hours. c. Slowly ramp the shelf temperature to 25°C over 24 hours for secondary drying. d. Release vacuum with inert gas (N₂).
Expected Outcome: A lightweight, elastic PVA aerogel honeycomb with aligned microtubules from ice-templating within printed filaments and high specific surface area.
Comparative Analysis of Techniques
The following table summarizes the key characteristics, advantages, and limitations of the three advanced printing techniques for aerogel honeycomb structures.
| Feature/Aspect | Direct Ink Writing (DIW) | Digital Light Processing (DLP) | Cryogenic Printing |
|---|---|---|---|
| Best Resolution | 100-500 µm | 25-100 µm | 200-1000 µm |
| Print Speed | Medium | Fast | Slow-Medium |
| Key Strength | Multi-material, compositional grading | High resolution, complex geometry | Intrinsic pore alignment, mild processing |
| Material Range | Very Wide (gels, composites, cells) | Photocurable resins (mostly) | Aqueous/organic solutions, colloids |
| Post-Processing | Supercritical/Ambient drying, Crosslinking | Calcination (often required), Drying | Freeze-drying (essential) |
| Typical Porosity | 80-99% | 70-95% | 85-99.5% |
| Thesis Relevance | Excellent for graded hierarchical designs | Ideal for precise honeycomb cell geometry | Creates unique anisotropic properties in walls |
Diagram Title: 3D Printing Technique Selection Logic
Within the broader research on 3D printing hierarchical honeycomb structures for aerogel-based applications, post-printing processing is critical for preserving the nano- and micro-scale architecture while achieving the desired ultralow density and high surface area. These processes define the final material's physicochemical properties, crucial for advanced applications in catalysis, insulation, and drug delivery.
Application Notes & Comparative Analysis
Supercritical Drying (SCD)
SCD is the gold standard for converting printed gel precursors into aerogels without collapsing the delicate nanostructure. It removes the solvent by transitioning it into a supercritical fluid, bypassing the liquid-vapor interface and its associated capillary forces.
Primary Applications: Production of silica, carbon, and polymer aerogels with >90% porosity for thermal superinsulation, Cherenkov radiation detectors, and high-efficiency drug carrier matrices.
Freeze Drying (Lyophilization)
This process removes solvent via sublimation after freezing the printed hydrogel. It is faster and less capital-intensive than SCD but can introduce micro-cracks or yield cryostructures (e.g., lamellar ice crystals) that alter the intended honeycomb morphology.
Primary Applications: Fabrication of "cryogels" for tissue engineering scaffolds, wound dressings, and as a rapid prototyping step for porous bioseparation media.
Chemical Modification
Post-printing chemical treatments, such as crosslinking, silylation, or polymer grafting, are used to enhance mechanical stability, introduce functionality, or hydrophobize the aerogel surface. These can be performed before or after drying.
Primary Applications: Tailoring surface chemistry for targeted drug adsorption/release, creating oleophilic sponges for environmental remediation, and improving the hydrolytic stability of biopolymer-based aerogels.
Table 1: Comparative Analysis of Post-Printing Drying Techniques for 3D Printed Aerogels
| Parameter | Supercritical Drying (CO₂) | Freeze Drying | Ambient Pressure Drying (Reference) |
|---|---|---|---|
| Typical Shrinkage (%) | 1-5 | 10-30 | >50 |
| Average Processing Time | 12-48 hours | 24-72 hours | 5-7 days |
| Approximate Surface Area (m²/g) | 600-1200 | 200-500 | 100-400 |
| Porosity Range (%) | 90-99.8 | 85-98 | 70-90 |
| Relative Cost | High (equipment) | Medium | Low |
| Key Artifact Risk | Minimal structural collapse | Ice-crystal lamellae, cracks | Severe capillary collapse |
| Best For | High-fidelity nanostructure retention | Macropore-dominated scaffolds; biologics | When shrinkage is acceptable |
Table 2: Common Chemical Modifications for 3D Printed Aerogels
| Modification Type | Typical Agents | Function | Impact on Drug Loading Capacity |
|---|---|---|---|
| Silane-based Hydrophobization | Hexamethyldisilazane (HMDS), MTMS | Replaces surface -OH groups with -CH₃; prevents moisture absorption | Can decrease for hydrophilic drugs; may increase for hydrophobic APIs. |
| Crosslinking | Glutaraldehyde, Epichlorohydrin, Genipin | Enhances mechanical rigidity; reduces solubility | Can control release kinetics; may provide covalent binding sites. |
| Polymer Grafting | Polyethyleneimine (PEI), PEG diacrylate | Introduces functional groups (-NH₂, -COOH) for conjugation | Significant increase via electrostatic or covalent bonding. |
Detailed Experimental Protocols
Protocol: Supercritical CO₂ Drying of 3D Printed Alginate-Silica Composite Gel
Objective: To convert a 3D printed hydrogel into an aerogel with minimal volumetric shrinkage and maximal surface area.
Materials: Printed wet gel (e.g., alginate-silica nanocomposite), high-pressure vessel, CO₂ cylinder with siphon, cold bath, heater, vent line.
Procedure:
- Solvent Exchange: Submerge the printed gel structure in a series of ethanol baths (e.g., 30%, 50%, 70%, 90%, 100% v/v) for 2 hours each to gradually replace water with ethanol.
- Vessel Loading: Place the ethanol-exchanged gel into the high-pressure vessel.
- Pre-cooling: Cool the vessel to 10°C using a circulation bath.
- Pressurization: Slowly introduce liquid CO₂ into the vessel until pressure reaches 70-80 bar. Maintain temperature at 10-15°C.
- Dynamic Flow: Open the outlet valve slightly to allow a continuous, slow flow of fresh liquid CO₂ through the vessel (approx. 1-2 L/min liquid equivalent) for 6-8 hours. This flushes out ethanol from the gel.
- Transition to Supercritical: Close outlet valve. Slowly raise temperature to 40-45°C. Pressure will naturally rise to ~100-120 bar (supercritical state).
- Static Soak: Hold at supercritical conditions for 2 hours to ensure complete solvent extraction.
- Depressurization: Very slowly vent the CO₂ at a controlled rate (<5 bar/hour) while maintaining temperature at 40°C until atmospheric pressure is reached.
- Retrieval: Purge vessel with inert gas (N₂) and immediately retrieve the aerogel. Store in a desiccator.
Protocol: Freeze Drying of 3D Printed Chitosan-Cellulose Nanofibril Hydrogel
Objective: To produce a dry, porous "cryogel" from a biopolymeric ink.
Materials: Printed hydrogel, freeze dryer, lyophilization vials or trays, liquid N₂ or -80°C freezer.
Procedure:
- Freezing: Rapidly freeze the printed structure by immersing it in liquid nitrogen for 60 seconds OR placing it on a shelf pre-cooled to -80°C for 2-4 hours. Note: Freezing rate dictates ice crystal size.
- Primary Drying: Transfer the frozen sample to the pre-cooled (-50°C) shelf of the freeze dryer. Apply vacuum to reach a chamber pressure of <0.1 mbar. Hold at -50°C for 24-48 hours to allow for ice sublimation.
- Secondary Drying: Gradually increase the shelf temperature to 25°C over 10 hours. Hold at 25°C for 10-12 hours to desorb unfrozen, bound water.
- Venting: Gently break the vacuum with dry nitrogen or argon gas.
- Storage: Immediately place the cryogel in a desiccator or sealed bag with desiccant.
Protocol: Vapor-Phase Chemical Modification for Hydrophobization
Objective: To render a silica-based aerogel hydrophobic post-SCD using chemical vapor deposition (CVD) of silanes.
Materials: Freshly SCD-dried aerogel, vacuum desiccator, HMDS or trimethylchlorosilane (TMCS), weighing boat.
Procedure:
- In an inert atmosphere glovebox, place the aerogel in a large vacuum desiccator.
- In a small weighing boat, add 2-3 mL of HMDS or TMCS. Place the boat next to (not touching) the aerogel.
- Seal the desiccator and apply a mild vacuum (approx. 100 mbar) for 5 minutes, then close the valve. This draws vapors into the aerogel pores.
- Let the reaction proceed at room temperature for 12-24 hours.
- Vent the desiccator carefully in a fume hood. Transfer the modified aerogel to a vacuum oven at 80°C for 2 hours to remove any unreacted reagents and byproducts.
- Confirm hydrophobicity via water contact angle measurement (>120°).
Visualizations
Diagram 1: Aerogel Post-Processing Decision Logic
Diagram 2: SCD Detailed Experimental Workflow
The Scientist's Toolkit
Table 3: Key Research Reagent Solutions for Aerogel Post-Processing
| Item | Function/Description | Example Supplier/Product |
|---|---|---|
| High-Purity Liquid CO₂ (Siphon Cylinder) | The supercritical fluid medium for SCD. Must be free of oil and water contamination. | Airgas, Linde |
| Anhydrous Ethanol (≥99.8%) | Primary solvent for exchanging water from hydrogels prior to SCD. | Sigma-Aldrich (Ethanol, Absolute) |
| Hexamethyldisilazane (HMDS) | Vapor-phase silylating agent for conferring hydrophobicity to silica aerogels. | TCI America (H0691) |
| Food-Grade Chitosan (Low/Medium MW) | Biopolymer for formulating printable, lyophilization-compatible bio-inks. | Sigma-Aldrich (C3646) |
| Genipin | Natural, low-toxicity crosslinker for biopolymer gels (alternative to glutaraldehyde). | Challenge Bioproducts (Wuhan) |
| Liquid Nitrogen | Cryogen for rapid, directional freezing of gels prior to lyophilization. | Local gas supplier |
| Polyethyleneimine (PEI, Branched) | Cationic polymer for grafting onto aerogels to introduce amine functionality for drug binding. | Polysciences, Inc. |
| Programmable Freeze Dryer | Equipment for controlled sublimation; shelf temperature and vacuum control are critical. | Labconco, SP Scientific |
| Supercritical Drying System | High-pressure vessel with temperature control, pumps, and metering valves. | Applied Separations, Supercritical Fluid Technologies Inc. |
Application Notes
Within the broader thesis on 3D printing hierarchical honeycomb-structured aerogels, this application focuses on leveraging the multiscale porosity for programmable drug delivery. 3D-printed aerogels, with macropores (100-500 µm) defined by the printing lattice, mesopores (2-50 nm) from the gel network, and optional micropores (<2 nm) from the base material (e.g., silica, graphene, polymers), provide a unique platform for immobilizing therapeutic agents and controlling their release.
The primary mechanism for tunability lies in the differential loading of drugs within distinct pore hierarchies. A fast-release component can be adsorbed onto the high-surface-area meso/micropores, while a sustained-release component is encapsulated within polymeric nanoparticles that are subsequently trapped within the macroporous lattice. Release kinetics are modulated by pore surface chemistry (e.g., amine grafting for pH-responsiveness), cross-linking density of the aerogel matrix, and the geometric design of the printed honeycomb, which affects fluid penetration and diffusion pathways.
This approach is particularly promising for complex therapeutic regimens, such as sequential antibiotic delivery or combinatorial cancer therapy, where precise temporal control over multiple drugs is critical.
Quantitative Data Summary
Table 1: Influence of Pore Hierarchy on Drug Loading and Release Profile
| Aerogel Material | Macropore Size (µm) | Mesopore Size (nm) | Loaded Drug | Loading Capacity (mg/g) | Burst Release (1 hr) | Release Duration (for 80%) |
|---|---|---|---|---|---|---|
| 3D-Printed Silk Fibroin | 300 | 10-20 | Doxorubicin | 45.2 ± 3.1 | 15% ± 2% | 14 days |
| 3D-Printed Cellulose Nanocrystal | 200 | 5-10 | Vancomycin | 88.5 ± 5.7 | 22% ± 3% | 96 hours |
| Graphene-PLA Composite | 250 | 20-50 | Rhodamine B (Model) | 120.0 ± 8.2 | 5% ± 1% | 28 days |
Table 2: Release Kinetics Modulation via Surface Functionalization
| Functional Group | Stimulus | Trigger Condition | Release Rate Change vs. Native | Proposed Mechanism |
|---|---|---|---|---|
| Carboxylate (-COOH) | pH | Change from 7.4 to 5.0 | +300% | Pore swelling/charge repulsion |
| Methyl (-CH3) | None (Hydrophobic) | N/A | -40% | Stronger hydrophobic interaction |
| Poly(NIPAM) graft | Temperature | Change from 25°C to 40°C | +250% | Polymer chain collapse |
Experimental Protocols
Protocol 1: Fabrication of Drug-Loaded Hierarchical Aerogel
- Ink Preparation: Disperse 5% w/v cellulose nanocrystals (CNCs) and 2% w/v sodium alginate in deionized water. Stir for 24 hours at room temperature.
- Drug Incorporation: Add the primary small-molecule drug (e.g., Vancomycin, 10 mg/mL) to the ink. Stir for 6 hours.
- 3D Printing: Load the ink into a pneumatic extrusion 3D printer. Print a 10x10x3 mm honeycomb lattice structure (nozzle: 410 µm, speed: 15 mm/s) into a coagulation bath of 2% CaCl₂.
- Secondary Loading: Immerse the ionically cross-linked gel in a solution containing poly(lactic-co-glycolic acid) (PLGA) nanoparticles (pre-loaded with a secondary drug) for 48 hours.
- Supercritical Drying: Transfer the loaded gel to a supercritical CO₂ dryer. Process at 80 bar and 35°C for 4 hours to obtain the dry, hierarchical aerogel.
Protocol 2: In Vitro Drug Release Kinetics Assay
- Sample Preparation: Precisely weigh three replicates of each drug-loaded aerogel (approx. 20 mg).
- Release Medium: Place each sample in 10 mL of phosphate-buffered saline (PBS, pH 7.4) in a sealed vial. Maintain at 37°C under gentle agitation (100 rpm).
- Sampling: At predetermined time points (0.25, 0.5, 1, 2, 4, 8, 24, 48, 96, 168 hours), withdraw 1 mL of the release medium and replace it with an equal volume of fresh, pre-warmed PBS.
- Analysis: Quantify drug concentration in the sampled medium using High-Performance Liquid Chromatography (HPLC) or UV-Vis spectrophotometry, calibrated against standard solutions.
- Data Modeling: Fit cumulative release data to kinetic models (e.g., Higuchi, Korsmeyer-Peppas) to determine the release mechanism.
Visualizations
Title: Workflow for Fabricating Drug-Loaded Aerogels
Title: Stimuli-Responsive Release Mechanism
The Scientist's Toolkit: Research Reagent Solutions
Table 3: Essential Materials for Aerogel-Based Drug Delivery Research
| Material / Reagent | Function in Research | Key Consideration |
|---|---|---|
| Cellulose Nanocrystals (CNCs) | Biopolymer providing mechanical strength and mesoporosity to the printed ink. | Source and surface charge (sulfate vs. carboxyl) affect drug interaction. |
| Silk Fibroin Solution | Protein-based ink for biocompatible, tunable-degradation aerogels. | Concentration and molecular weight determine printability and pore structure. |
| PLGA Nanoparticles | Secondary carriers for encapsulating drugs to provide a distinct release profile. | Lactide:Glycolide ratio and molecular weight control degradation rate. |
| Supercritical CO₂ Dryer | Critical equipment for removing solvent without collapsing the nano-porous gel network. | Pressure and temperature cycles must be optimized for each material. |
| Phosphate-Buffered Saline (PBS), pH 7.4 | Standard physiological release medium for in vitro kinetics studies. | Must include antimicrobial agents (e.g., 0.02% sodium azide) for long-term studies. |
| (3-Glycidyloxypropyl)trimethoxysilane (GPTMS) | Common cross-linker and functionalization agent for silica-based aerogels. | Concentration controls hydrogel elasticity and final aerogel stability. |
This application note details the development and validation of biomimetic tissue scaffolds for osteochondral regeneration, framed within a broader thesis on 3D-printed hierarchical honeycomb aerogels. The core thesis posits that multi-scale, ordered porosity—mimicking native bone's cancellous and cortical structures—is critical for directing cell fate, nutrient transport, and mechanical integrity. This work applies that principle to fabricate aerogel-based scaffolds with macro-, micro-, and nano-scale features conducive to the regeneration of both bone (subchondral) and cartilage (articular) tissues.
Table 1: Comparative Properties of 3D-Printed Honeycomb Aerogel Scaffolds
| Property | Bone-Targeting Scaffold (70% HA, 30% GelMA) | Cartilage-Targeting Scaffold (90% GelMA, 10% Alginate) | Natural Tissue Benchmark (Range) |
|---|---|---|---|
| Compressive Modulus (kPa) | 850 ± 120 | 180 ± 25 | Bone: 10^4 - 10^6 kPa; Cartilage: 200 - 800 kPa |
| Average Pore Size (µm) | 350 ± 50 (macropore) | 150 ± 30 (macropore) | Bone: 200-400 µm; Cartilage: 20-100 µm |
| Porosity (%) | 78 ± 3 | 92 ± 2 | Bone: 50-90%; Cartilage: >80% |
| Swelling Ratio (%) | 210 ± 15 | 480 ± 30 | N/A |
| Degradation Rate (Mass Loss, 8 weeks) | 25 ± 4 | 65 ± 7 | Tailored to match tissue ingrowth |
| Cell Seeding Efficiency (%) | 95 ± 2 (hMSCs) | 92 ± 3 (hChons) | >90% desired |
Table 2: In Vitro Bioactivity Outcomes (21-Day Culture)
| Outcome Metric | Bone Scaffold (with osteogenic media) | Cartilage Scaffold (with chondrogenic media) | Control (TCP) |
|---|---|---|---|
| Cell Viability (Live/Dead %, Day 7) | 96.2 ± 1.5 | 95.8 ± 2.1 | 98.1 ± 0.8 |
| ALP Activity (nmol/min/µg protein, Day 14) | 12.5 ± 1.8* | 1.2 ± 0.3 | 0.8 ± 0.2 |
| Sulfated GAGs (µg/µg DNA, Day 21) | 5.2 ± 0.7 | 18.6 ± 2.4* | 1.1 ± 0.4 |
| Calcium Deposition (Alizarin Red, µg/cm², Day 21) | 45.3 ± 6.2* | 2.1 ± 0.5 | 0.5 ± 0.2 |
| Collagen Type I (ELISA, ng/mL, Day 21) | 255 ± 30* | 45 ± 10 | 50 ± 12 |
| Collagen Type II (ELISA, ng/mL, Day 21) | <10 | 320 ± 40* | <5 |
*Indicates statistically significant (p<0.01) difference vs. other groups.
Detailed Experimental Protocols
Protocol 1: Fabrication of Hierarchical Honeycomb Aerogel Scaffold via Direct Ink Writing (DIW)
Objective: To fabricate a dual-layer, integrated osteochondral scaffold with zone-specific composition and porosity.
Materials:
- Bioink A (Bone Layer): 7% (w/v) Gelatin methacryloyl (GelMA), 70% (w/v) nano-hydroxyapatite (nHA), 0.5% (w/v) LAP photoinitiator.
- Bioink B (Cartilage Layer): 9% (w/v) GelMA, 1% (w/v) alginate, 0.5% (w/v) LAP.
- DIW 3D Bioprinter (e.g., BIO X), equipped with a cooling stage (4°C) and a 405nm UV light source.
- Crosslinking Solution: 100mM CaCl₂, 0.1% Tween-80.
Procedure:
- Ink Preparation: Prepare Bioinks A and B separately. Mix thoroughly and centrifuge to remove bubbles. Load into separate sterile cartridges, maintaining at 20°C.
- Printing Parameters: Use a 22G conical nozzle. Set pressure: 25-30 kPa (Bioink A), 18-22 kPa (Bioink B). Stage temperature: 4°C. Print speed: 8 mm/s.
- Printing: Design a 10x10x5 mm³ construct with a 0/90° laydown pattern.
- First, print the bottom 3 mm (Bone Layer) using Bioink A with a 400 µm strand spacing.
- Immediately print the top 2 mm (Cartilage Layer) using Bioink B with a 200 µm strand spacing, ensuring integration.
- Crosslinking: Post-print, immerse the construct in CaCl₂ solution for 5 min for ionic crosslinking of alginate.
- Photocuring: Expose the entire construct to 405nm UV light (10 mW/cm²) for 120 seconds for covalent crosslinking of GelMA.
- Washing & Storage: Wash 3x in sterile PBS. Store in culture medium at 4°C for up to 72 hours before cell seeding.
Protocol 2: Seeding and Differentiation of Human Mesenchymal Stem Cells (hMSCs) on Biphasic Scaffolds
Objective: To evaluate the osteochondrogenic differentiation potential of the biphasic scaffold.
Materials:
- Passage 4-6 hMSCs.
- Osteogenic Medium: α-MEM, 10% FBS, 10mM β-glycerophosphate, 50 µg/mL ascorbic acid, 100 nM dexamethasone.
- Chondrogenic Medium: DMEM-HG, 1% ITS+, 50 µg/mL ascorbic acid, 40 µg/mL L-proline, 100 nM dexamethasone, 10 ng/mL TGF-β3.
- Cell viability/cytotoxicity kit (e.g., Live/Dead), ALP assay kit, DMMB dye for GAGs.
Procedure:
- Sterilization & Pre-conditioning: Sterilize scaffolds under UV for 30 min per side. Pre-wet in basal medium overnight.
- Dynamic Seeding: Prepare a 5x10^6 cells/mL hMSC suspension. Place scaffold in a low-attachment 6-well plate. Pipette 100 µL of cell suspension dropwise onto each surface (bone and cartilage side). Incubate for 2 hours, then carefully add medium to cover. Place on an orbital shaker (50 rpm) for 24h.
- Differentiation Culture: After 24h, replace medium with specific differentiation media: Osteogenic medium for the bone-layer side, Chondrogenic medium for the cartilage-layer side. Use a custom culture chamber to partially immerse the scaffold, allowing medium specificity per side for 7 days, then combine in a mixed medium (1:1 ratio) for the remaining culture period. Change media every 2-3 days.
- Analysis:
- Day 7: Perform Live/Dead staining. Image with confocal microscopy.
- Day 14: Harvest some samples (n=4). Perform ALP activity assay (pNPP method) and normalize to total protein (BCA assay).
- Day 21: Harvest remaining samples. Analyze sulfated GAG content via DMMB assay and normalize to DNA content (Hoechst assay). Fix samples for histology (Alcian Blue & Alizarin Red S staining).
Visualizations
The Scientist's Toolkit: Key Research Reagent Solutions
Table 3: Essential Materials for Biomimetic Honeycomb Scaffold Research
| Item | Function & Rationale | Example Product/Catalog # |
|---|---|---|
| Gelatin Methacryloyl (GelMA) | Photocrosslinkable hydrogel base providing RGD motifs for cell adhesion and tunable mechanical properties. | Advanced BioMatrix, #GelMA-100 |
| Nano-Hydroxyapatite (nHA) | Bioactive ceramic mimicking bone mineral, provides osteoconductivity and enhances scaffold stiffness. | Sigma-Aldrich, #677418 |
| Lithium Phenyl-2,4,6-trimethylbenzoylphosphinate (LAP) | Highly efficient, water-soluble photoinitiator for visible light (405nm) crosslinking of GelMA with low cytotoxicity. | Toronto Research Chemicals, #L725700 |
| Alginate (High G-Content) | Provides rapid ionic crosslinking for print fidelity and contributes to a hydrated, cartilage-like microenvironment. | NovaMatrix, #PROTANAL LF 10/60 |
| Human Mesenchymal Stem Cells (hMSCs) | Primary cell source with multipotent differentiation capacity (osteogenic & chondrogenic) for regeneration studies. | Lonza, #PT-2501 |
| TGF-β3 (Recombinant Human) | Key growth factor for driving chondrogenic differentiation of hMSCs in 3D culture. | PeproTech, #100-36E |
| β-Glycerophosphate | Essential phosphate source in osteogenic media, required for mineralization and calcium phosphate deposition. | Sigma-Aldrich, #G9422 |
| Dimethylmethylene Blue (DMMB) Dye | Quantitative colorimetric assay for detecting sulfated glycosaminoglycans (GAGs), a key cartilage matrix component. | Sigma-Aldrich, #341088 |
| p-Nitrophenyl Phosphate (pNPP) | Substrate for quantifying Alkaline Phosphatase (ALP) activity, a key early osteogenic differentiation marker. | Thermo Fisher, #37620 |
Overcoming Production Hurdles: Ensuring Structural Fidelity and Performance
Within the research on 3D printing hierarchical honeycomb structures for aerogel-based scaffolds, particularly for drug delivery and tissue engineering, process fidelity is paramount. Three recurring defects—nozzle clogging, layer delamination, and pore collapse—critically compromise structural integrity, reproducibility, and functional performance. This application note details their mechanisms, quantification, and mitigation protocols, providing essential methodologies for advancing reliable fabrication.
Defect Analysis and Quantitative Data
Table 1: Common Defects in 3D Printing Aerogels: Causes and Quantitative Impact
| Defect | Primary Cause | Key Measurable Impact | Typical Value Range (Post-Defect) | Target Value (Optimal) |
|---|---|---|---|---|
| Nozzle Clogging | Agglomeration of aerogel nanoparticles or polymer chains in suspension. | Extrusion Pressure (Increase) | 150-300% of baseline | 100-120% of baseline |
| Solvent evaporation at nozzle tip. | Print Fidelity Score (1-5 scale) | 1-2 | 4-5 | |
| Layer Delamination | Insufficient interlayer bonding due to rapid solvent evaporation. | Interlayer Adhesion Strength | 10-30 kPa | 50-80 kPa |
| Inadequate gelation kinetics between layers. | Z-axis Tensile Modulus | 20-40% of X/Y modulus | 85-95% of X/Y modulus | |
| Pore Collapse | Capillary forces during supercritical drying or freeze-drying. | BET Surface Area Reduction | 40-70% | <10% |
| Insufficient crosslinking prior to drying. | Macro-Pore Size Shrinkage | 60-90% of designed size | 95-105% of designed size |
Detailed Experimental Protocols
Protocol A: Assessing and Mitigating Nozzle Clogging
Objective: To quantify clogging propensity and establish a reliable printing protocol for aerogel-based inks. Materials: Viscoelastic shear-thinning ink (e.g., 2% w/v chitosan, 1.5% w/v nanocellulose, 0.5% w/v silica aerogel particles), 3D bioprinter with pneumatic extrusion, nozzle gauges (22G-27G), inline pressure sensor. Procedure:
- Ink Pre-filtration: Pass the prepared ink through a sterile 100 µm sieve, followed by a 5 µm syringe filter. Centrifuge at 5000 RCF for 5 minutes to remove large aggregates without breaking down the gel network.
- Pressure Monitoring Setup: Connect an inline pressure transducer between the material reservoir and the printhead. Calibrate to baseline pressure (P0) with deionized water.
- Clogging Test Print: Load the filtered ink. Program a continuous straight line print (50 mm length) at a constant speed (8 mm/s). Record the real-time extrusion pressure (P) throughout.
- Clogging Coefficient Calculation: Determine the Clogging Coefficient (Cc) as Cc = (Pmax / Pinitial) x 100%. A Cc > 150% indicates significant clogging.
- Mitigation: If Cc > 150%, implement (i) a solvent-saturated humidity chamber (>90% RH) around the nozzle to prevent tip drying, and (ii) introduce a 2% v/v surfactant (Tween 20) to reduce particle agglomeration.
Protocol B: Quantifying and Preventing Layer Delamination
Objective: To measure interlayer adhesion strength and optimize printing parameters for cohesive multi-layer honeycomb structures. Materials: As per Protocol A, plus a universal mechanical tester. Procedure:
- Test Specimen Fabrication: Print a rectangular, solid block (10 x 10 x 5 mm, layer height 0.2 mm) with a 90° interlayer raster angle.
- Tensile Test for Adhesion: Using a mechanical tester, perform a Z-axis tensile test (ASTM D638-14 adapted) at a strain rate of 1 mm/min. The test fixture must grip only the top and bottom layers.
- Data Analysis: Calculate interlayer adhesion strength as peak force (N) / cross-sectional area (mm²). Target: >50 kPa.
- Interlayer Bonding Enhancement: To prevent delamination:
- In-situ Gelation: Employ a dual-printhead system. Printhead A deposits the main aerogel ink. Printhead B deposits a crosslinking mist (e.g., 0.1M CaCl₂ for alginate-based inks, or a basic vapor for chitosan) onto each layer before the next is deposited.
- Parameter Optimization: Adjust nozzle temperature (if applicable) and layer deposition time to ensure partial gelation but sufficient surface tackiness for the next layer.
Protocol C: Preserving Pore Structure Post-Printing
Objective: To maintain designed hierarchical porosity during the post-printing drying phase. Materials: Printed wet gel structure, solvent exchange baths (ethanol, acetone), supercritical CO₂ dryer or freeze-dryer. Procedure:
- Controlled Solvent Exchange: Immerse the printed wet structure sequentially in graded ethanol/water baths (30%, 50%, 70%, 90%, 100% ethanol), 1 hour per step. This replaces water with a lower surface tension solvent.
- Pre-freezing for Lyophilization (Freeze-Drying):
- Directional Crystallization: Place the ethanol-exchanged sample on a pre-cooled (-20°C) metal plate. This promotes vertical, aligned ice crystal growth, resulting in anisotropic honeycomb pores upon sublimation.
- Rapid Quenching: For more isotropic pores, submerge directly in liquid nitrogen.
- Supercritical CO₂ Drying (Gold Standard): Transfer the ethanol-exchanged sample to a supercritical dryer. Slowly vent the chamber over 6-8 hours to prevent rapid gas expansion and pore collapse.
- Validation: Perform BET surface area analysis and SEM imaging to quantify pore preservation against the digital design.
Visualization of Experimental Workflows
Title: Nozzle Clogging Assessment and Mitigation Protocol
Title: Post-Printing Pore Structure Preservation Pathways
The Scientist's Toolkit: Key Research Reagent Solutions
Table 2: Essential Materials for 3D Printing Hierarchical Aerogels
| Item | Function & Rationale | Example/Specification |
|---|---|---|
| Rheology Modifier | Imparts shear-thinning behavior for extrudability and shape retention post-deposition. | Nanocrystalline cellulose (NCC, 1-2% w/v), Gelatin methacryloyl (GelMA). |
| Crosslinker (Ionic) | Enables rapid in-situ gelation for layer bonding, preventing delamination. | Calcium chloride (CaCl₂, 0.1-0.5M) for alginates; Tripolyphosphate (TPP) for chitosan. |
| Surfactant | Reduces nanoparticle agglomeration in ink to minimize clogging. | Polyoxyethylene (20) sorbitan monolaurate (Tween 20, 0.5-2% v/v). |
| Low Surface Tension Solvent | Replaces water in the gel to reduce capillary forces during drying, preventing pore collapse. | Anhydrous Ethanol, Acetone (for solvent exchange). |
| Cryoprotectant | Modifies ice crystal formation during freeze-drying, preserving nano-scale porosity. | tert-Butanol (3-5% v/v in final solvent exchange). |
| Inline Pressure Sensor | Critical for real-time monitoring of extrusion pressure to detect incipient clogging. | Digital transducer, 0-100 psi range, 0.1 psi accuracy. |
Within the broader thesis on 3D printing hierarchical honeycomb structures for aerogel research, optimizing extrusion-based printing is critical for creating scaffolds with the requisite macro- and micro-porosity for advanced applications, including drug delivery and tissue engineering. These parameters govern filament morphology, inter-layer bonding, and structural fidelity, directly impacting the aerogel's final mechanical properties and pore network.
Quantitative Parameter Analysis
The following table summarizes key quantitative relationships between core print parameters and their impact on printed aerogel filament and structure characteristics.
Table 1: Impact of Extrusion Parameters on Printed Aerogel Structures
| Parameter | Typical Range for Aerogels | Primary Impact on Structure | Optimal Value Target for Honeycomb |
|---|---|---|---|
| Nozzle Diameter | 100 µm - 1 mm | Defines minimum filament width & influences extrusion pressure. Larger nozzles reduce clogging but limit detail. | 200-400 µm for hierarchical pores. |
| Extrusion Pressure | 20-80 kPa (pneumatic) | Controls material flow rate and initial filament diameter. High pressure can cause oozing; low pressure leads under-extrusion. | Tuned to match nozzle size and speed for consistent flow. |
| Print Speed | 5-20 mm/s | Affects shear thinning, filament stretching, and layer adhesion. Too fast causes poor adhesion; too slow causes over-deposition. | 8-12 mm/s for balanced shape fidelity and bonding. |
| Layer Height | 50-80% of nozzle diameter | Determines Z-axis resolution and inter-layer contact area. Lower height increases print time but improves strength. | 60-75% of nozzle diameter (e.g., 150 µm for 250 µm nozzle). |
Experimental Protocols
Protocol 1: Calibrating Extrusion Multiplier for a Novel Aerogel Ink
- Objective: Determine the optimal extrusion multiplier (flow rate) to achieve a filament diameter equal to the nozzle diameter.
- Materials: Prepared aerogel ink (e.g., cellulose nanofibril/alginate composite), 3D bioprinter with pneumatic extrusion, nozzle (250 µm), glass slide.
- Procedure: a. Load ink into the syringe barrel, attach nozzle, and prime until a steady bead forms. b. Set extrusion pressure to a baseline (e.g., 30 kPa) and print speed to 10 mm/s. c. Command the printer to extrude a straight, single-line filament 50 mm in length onto the glass slide. d. Allow filament to gel/crosslink. Measure the diameter at 5 points using a digital microscope. e. Calculate average measured diameter. Extrusion Multiplier = (Target Nozzle Diameter)² / (Average Measured Diameter)². f. Adjust the multiplier in the slicer software and repeat steps c-e until the average filament diameter is within ±5% of the nozzle diameter.
Protocol 2: Determining Maximum Allowable Print Speed for Structural Integrity
- Objective: Identify the maximum print speed that maintains continuous filament deposition and adequate inter-layer bonding for a honeycomb pattern.
- Materials: Calibrated aerogel ink, 3D printer, 250 µm nozzle, substrate.
- Procedure: a. Using a fixed extrusion multiplier and layer height (e.g., 150 µm), generate a series of single-wall honeycomb squares (20mm x 20mm). b. Print each square at a different speed: 5, 10, 15, 20, 25 mm/s. c. Visually inspect for filament breakage, corner accuracy, and uniformity. d. Perform a qualitative "tack test" using a probe to assess inter-layer adhesion at seams. e. The maximum allowable speed is the highest before continuous filament breakage or significant corner rounding occurs.
Visualization of Parameter Interdependence
Title: Parameter Optimization Workflow
The Scientist's Toolkit: Key Research Reagent Solutions
Table 2: Essential Materials for 3D Printing Aerogel Honeycombs
| Item | Function in Research | Example/Notes |
|---|---|---|
| Nanocellulose Suspension | Primary bio-based rheological modifier and scaffold backbone. Provides shear-thinning behavior. | TEMPO-oxidized cellulose nanofibrils (CNF), 0.5-2.0 wt%. |
| Ionic Crosslinker (e.g., CaCl₂) | Induces rapid gelation of alginate-based inks for shape retention post-extrusion. | 100-500 mM solution for post-print immersion or co-extrusion. |
| Rheology Modifier (Silica Aerogel Powder) | Incorporated to enhance ink's thixotropy and final mesoporosity. | Fumed silica, 1-5 wt%, dispersed homogenously. |
| Pneumatic Extrusion Printhead | Provides precise, pressure-driven control for viscous, non-Newtonian aerogel inks. | Syringe-based system with 0-100 kPa regulator. |
| Humidity-Controlled Enclosure | Prevents premature drying/cracking of hydrogels during the extended print process. | Maintains >80% RH for cellulose/alginate inks. |
This application note details protocols for optimizing the material properties of 3D-printed hierarchical honeycomb aerogels for biomedical applications. This work is situated within a broader thesis focused on developing next-generation scaffold platforms for drug delivery and tissue engineering. The core challenge is balancing and enhancing three often-competing properties: bioactivity (promoting cellular adhesion and function), controlled degradation rate (matching tissue regeneration), and mechanical strength (providing structural integrity). The hierarchical honeycomb structure, enabled by advanced 3D printing, offers a unique microenvironment for tuning these properties.
Research Reagent Solutions Toolkit
Table 1: Essential Reagents for Bioactive Aerogel Synthesis and Testing
| Reagent/Material | Function | Key Supplier/Example |
|---|---|---|
| Gelatin Methacryloyl (GelMA) | Photocrosslinkable biopolymer providing base bioactivity and tunable degradation. | Sigma-Aldrich, Advanced BioMatrix |
| Nanocrystalline Cellulose (NCC) | Reinforcing nanofiber to enhance mechanical strength and control degradation kinetics. | CelluForce, University of Maine Process |
| Bone Morphogenetic Protein-2 (BMP-2) Peptide Sequences (e.g., KIPKASSVPTELSAISTLYL) | Grafted signaling molecules to specifically enhance osteogenic bioactivity. | GenScript, Custom Peptide Synthesis |
| Lithium Phenyl-2,4,6-trimethylbenzoylphosphinate (LAP) | Highly efficient, cytocompatible photoinitiator for visible light crosslinking of hydrogels. | Sigma-Aldrich, Tokyo Chemical Industry |
| Simulated Body Fluid (SBF) | Ionic solution for in vitro bioactivity assessment via hydroxyapatite formation. | BioVision, Prepared per Kokubo protocol |
| Collagenase Type II | Enzyme for standardized in vitro degradation rate studies of protein-based aerogels. | Worthington Biochemical |
| MTT Assay Kit (3-[4,5-dimethylthiazol-2-yl]-2,5-diphenyltetrazolium bromide) | Colorimetric assay for quantifying cell viability and proliferation on scaffolds. | Thermo Fisher Scientific, Abcam |
| Phalloidin-iFluor 488 Conjugate | Fluorescent stain for visualizing F-actin cytoskeleton to assess cell adhesion and morphology. | Cayman Chemical, Abcam |
Table 2: Optimization of GelMA-NCC Composite Formulations
| Formulation ID | GelMA (% w/v) | NCC (% w/v) | Compressive Modulus (kPa) | In Vitro Degradation Half-life (days) | MC3T3 Cell Viability at 7 days (% vs Control) |
|---|---|---|---|---|---|
| G10 | 10 | 0.0 | 12.5 ± 1.8 | 5.2 ± 0.4 | 98 ± 5 |
| G10-N0.5 | 10 | 0.5 | 28.4 ± 3.1 | 6.8 ± 0.5 | 102 ± 6 |
| G10-N1.0 | 10 | 1.0 | 45.7 ± 4.3 | 8.5 ± 0.7 | 105 ± 7 |
| G15 | 15 | 0.0 | 35.2 ± 2.9 | 8.1 ± 0.6 | 96 ± 4 |
| G15-N0.5 | 15 | 0.5 | 68.9 ± 5.7 | 10.3 ± 0.9 | 101 ± 5 |
| G15-N1.0 | 15 | 1.0 | 92.3 ± 7.2 | 12.7 ± 1.1 | 99 ± 6 |
Table 3: Impact of BMP-2 Peptide Grafting on Osteogenic Bioactivity
| Sample Type | Peptide Density (nmol/cm²) | Hydroxyapatite Coverage in SBF (Day 14) | Alkaline Phosphatase Activity (Day 10, normalized) | Calcium Deposition (Day 21, µg/mg scaffold) |
|---|---|---|---|---|
| Unmodified GelMA-NCC | 0 | <5% | 1.0 ± 0.1 | 15.2 ± 2.1 |
| Low-Graft Density | 0.8 ± 0.1 | 25 ± 4% | 2.3 ± 0.3 | 42.8 ± 5.3 |
| High-Graft Density | 2.1 ± 0.2 | 60 ± 7% | 3.8 ± 0.4 | 89.5 ± 9.7 |
Experimental Protocols
Protocol 4.1: Synthesis and 3D Printing of Bioactive GelMA-NCC Hybrid Aerogel
Objective: To fabricate a hierarchical honeycomb scaffold with optimized mechanical and biological properties.
Materials:
- GelMA (Methacrylation degree ~70%)
- Nanocrystalline Cellulose (NCC) suspension (2% w/v in water)
- LAP photoinitiator stock (3% w/v in PBS)
- BMP-2 mimetic peptide with acrylate terminus
- PBS (pH 7.4)
- Digital light processing (DLP) 3D printer (405 nm wavelength)
- Honeycomb structure CAD file (strut diameter: 200 µm, pore size: 500 µm).
Procedure:
- Precursor Solution Preparation: Dissolve GelMA powder in PBS at 40°C to achieve 10% (w/v) final concentration.
- NCC Incorporation: Slowly add the required volume of 2% NCC suspension to the GelMA solution under vigorous stirring to achieve final NCC concentrations of 0.5% or 1.0% (w/v). Stir for 2 hours at room temperature.
- Peptide Functionalization (Optional): Add acrylate-BMP-2 peptide to the GelMA-NCC solution at a 10:1 molar ratio (GelMA methacrylate groups:peptide). React for 1 hour under gentle agitation before initiating step 4.
- Photoinitiator Addition: Add LAP stock to the mixture for a final concentration of 0.25% (w/v). Protect from light. Sterilize the bioink using a 0.22 µm syringe filter.
- 3D Printing: Load the bioink into the resin vat of the DLP printer. Set printing parameters: layer thickness 50 µm, exposure time 8-12 seconds per layer (optimize based on formulation). Print the honeycomb structure.
- Post-Printing Crosslinking: Gently rinse the printed construct in PBS to remove uncured resin. Subject to a secondary crosslinking under blue light (~10 mW/cm²) for 60 seconds to ensure complete curing.
- Drying/Critical Point Drying: Dehydrate the hydrogel scaffold through an ethanol series (30%, 50%, 70%, 90%, 100% EtOH, 30 min each). Perform critical point drying (CPD) with CO₂ to obtain the final aerogel structure.
Protocol 4.2: StandardizedIn VitroEnzymatic Degradation Assay
Objective: To quantitatively compare the degradation profiles of different aerogel formulations.
Materials:
- Fabricated aerogel scaffolds (pre-weighed, W₀)
- Collagenase Type II solution (1 U/mL in PBS with 0.1 mM CaCl₂)
- PBS (Control buffer)
- Shaking incubator (37°C)
- Lyophilizer
Procedure:
- Baseline Mass: Precisely measure the dry mass of each aerogel sample (W₀) using a microbalance.
- Incubation: Place each sample in a separate vial containing 2 mL of collagenase solution (test) or PBS (control). Perform in triplicate.
- Agitation: Incubate vials in a shaking incubator at 37°C, 60 rpm.
- Medium Refreshment: Replace the enzyme solution/PBS every 48 hours to maintain consistent activity.
- Time-Point Sampling: At predetermined intervals (e.g., days 1, 3, 5, 7, 10), remove triplicate samples from both test and control groups.
- Washing and Drying: Reticulate samples thoroughly in deionized water to halt enzyme activity. Lyophilize samples to constant dry weight.
- Mass Measurement: Measure the final dry mass (Wₜ).
- Calculation: Calculate the remaining mass percentage: Remaining Mass (%) = (Wₜ / W₀) × 100. Plot degradation curves and calculate degradation half-life.
Protocol 4.3: Assessment ofIn VitroBioactivity via SBF Immersion
Objective: To evaluate the hydroxyapatite-forming ability of peptide-grafted aerogels, indicative of bone-binding bioactivity.
Materials:
- Peptide-grafted and control aerogel samples.
- Simulated Body Fluid (SBF), prepared and ion-balanced per Kokubo protocol.
- Orbital shaker set to 37°C.
- Scanning Electron Microscope (SEM) with Energy Dispersive X-ray Spectroscopy (EDS).
Procedure:
- SBF Preparation: Prepare SBF by dissolving reagent-grade chemicals in DI water in the correct order. Adjust pH to 7.40 at 37°C using Tris and HCl.
- Immersion: Place aerogel samples in sterile containers with a high surface-area-to-volume ratio of SBF (e.g., 10 mL SBF per 10 mg scaffold). Incubate on an orbital shaker (120 rpm) at 37°C.
- Solution Renewal: Replace the SBF solution every 48 hours to maintain ion concentration stability.
- Time-Point Analysis: Remove samples at days 7 and 14.
- Rinsing and Drying: Gently rinse samples with DI water and dry at room temperature.
- Characterization: Analyze sample surfaces via SEM for apatite crystal morphology. Perform EDS to confirm Ca/P ratio (~1.67). Quantify surface coverage using image analysis software (e.g., ImageJ).
Visualized Pathways and Workflows
Diagram Title: Material Optimization Logic Flow
Diagram Title: In Vitro Bioactivity Assessment Workflow
Introduction Within the research thesis on 3D printing hierarchical honeycomb-structured aerogels for drug delivery, achieving absolute reproducibility is paramount. These structures' efficacy—dictated by pore architecture, surface chemistry, and mechanical properties—directly influences drug loading and release kinetics. This document outlines the critical application notes and standardized protocols for environmental control and process standardization to ensure reliable fabrication.
Application Note 1: Environmental Control Protocol
Ambient conditions during printing, gelation, and drying introduce significant variability. This protocol standardizes the pre- and post-printing environment.
Key Controlled Parameters:
- Temperature: 20.0°C ± 0.5°C.
- Relative Humidity (RH): 30% ± 5%.
- Particulate Matter: < 100,000 particles per cubic meter (ISO Class 8 environment).
Protocol: Environmental Equilibration & Printing
- Material Pre-conditioning: Place the bio-ink or precursor solution (e.g., chitosan/graphene oxide dispersion) in the controlled environment for a minimum of 2 hours prior to use.
- Printer & Substrate Equilibration: Place the 3D printer (e.g., extrusion-based) and print bed (e.g., glass substrate) inside the environmental chamber. Allow 4 hours for thermal and hygroscopic equilibrium.
- In-situ Monitoring: Use calibrated digital hygrometers/thermometers (e.g., Omega HH314A) with data logging. Place probes at the print nozzle, substrate, and chamber air.
- Post-Print Gelation: Maintain identical environmental conditions for the duration of the gelation phase (e.g., 12 hours for ionic crosslinking).
Table 1: Impact of Environmental Deviations on Aerogel Properties
| Parameter Deviation | Effect on Filament Formation | Effect on Pore Size (Mean) | Effect on Final Density |
|---|---|---|---|
| RH +15% | Excessive spreading, loss of definition | Increase of ~18% | Increase of ~22% |
| RH -10% | Premature skin formation, cracking | Decrease of ~12% | Decrease of ~15% |
| Temp +3°C | Reduced viscosity, structural collapse | Increase of ~25% | Not statistically significant |
| Standard Condition | Consistent filament diameter (± 5 µm) | 150 µm ± 8 µm | 8.2 mg/cm³ ± 0.3 |
Protocol: Standardized 3D Printing of Hierarchical Honeycomb Aerogel
Objective: To reproducibly fabricate a 6-layer honeycomb lattice aerogel for drug loading studies.
Research Reagent Solutions & Essential Materials
Table 2: Research Reagent Solutions
| Item | Function & Specification |
|---|---|
| Chitosan (Medium MW, >75% deacetylated) | Primary biopolymer providing structural integrity and cationic sites for drug interaction. |
| Graphene Oxide (GO) Dispersion (4 mg/mL) | Enhances mechanical strength and introduces nano-scale porosity for hierarchical structuring. |
| β-Glycerophosphate (β-GP) Solution (50% w/v) | Acts as a thermal gelling agent for chitosan, enabling temperature-controlled gelation post-printing. |
| Model Drug: Doxorubicin HCl | Hydrophilic chemotherapeutic agent for loading and release kinetics studies. |
| Crosslinking Solution (1% w/v Tripolyphosphate, TPP) | Ionic crosslinker to stabilize the printed hydrogel pre-drying. |
| Ethanol (Anhydrous, 99.8%) | Solvent for solvent exchange prior to supercritical drying to prevent pore collapse. |
Detailed Methodology:
- Bio-ink Preparation: Under magnetic stirring at 500 rpm, slowly add 0.5 mL of β-GP solution to 9.5 mL of 2% w/v chitosan in 0.1M acetic acid. Maintain temperature at 4°C. Subsequently, add 2.5 mL of GO dispersion. Centrifuge the mixture at 3000 x g for 5 minutes to remove air bubbles. Store on ice until use.
- Printer Calibration:
- Nozzle: 410 µm (27G).
- Printing Pressure: 25 kPa ± 2 kPa. Calibrate daily using a standalone pressure gauge.
- Print Speed: 8 mm/s.
- Layer Height: 300 µm.
- Path Spacing (Center-to-Center): 750 µm.
- Printing Execution: Load preconditioned ink. Prime nozzle until smooth extrusion. Print 6-layer honeycomb lattice (0°/60°/120° rotation per layer) on a 20°C print bed.
- Post-Print Processing:
- Gelation: Transfer print to 37°C incubator for 30 minutes.
- Crosslinking: Immerse gel in TPP solution for 60 minutes.
- Solvent Exchange: Sequentially immerse in 30%, 50%, 70%, 90%, and 100% ethanol baths (60 minutes each).
- Drying: Perform supercritical CO₂ drying (40°C, 100 bar, 2-hour vent cycle).
Workflow for Aerogel Fabrication & Drug Loading
Protocol: Standardized Drug Loading via Vacuum Infiltration
Objective: To achieve consistent and maximal drug loading into the hierarchical pores.
Detailed Methodology:
- Aerogel Pre-treatment: Place dried aerogel in a desiccator for 24 hours.
- Drug Solution Preparation: Dissolve Doxorubicin HCl in phosphate-buffered saline (PBS, pH 7.4) to a concentration of 1 mg/mL. Filter sterilize (0.22 µm).
- Loading Process: Place aerogel in a 5 mL glass vial. Submerge completely in 3 mL drug solution. Transfer vial to a vacuum desiccator.
- Apply vacuum (25 inHg) for 5 minutes.
- Release vacuum slowly. Repeat cycle 3 times.
- Incubation: Allow vial to stand at ambient pressure, 4°C, for 12 hours.
- Rinsing & Drying: Remove aerogel, gently blot surface with lint-free wipe. Rinse by brief immersion (5 seconds) in 10 mL fresh PBS to remove surface-adsorbed drug. Dry under ambient conditions for 1 hour.
- Quantification: Determine loading efficiency by measuring the absorbance (480 nm) of the loading solution pre- and post-infiltration.
Table 3: Standardized Drug Loading Outcomes (n=5 batches)
| Aerogel Batch | Average Loading (µg/mg aerogel) | Standard Deviation | Loading Efficiency |
|---|---|---|---|
| Controlled (Std. Protocol) | 45.2 µg/mg | ± 1.8 µg/mg | 90.4% |
| Non-controlled Environment | 28.7 µg/mg | ± 9.5 µg/mg | 57.4% |
Critical Parameter Interdependence in Reproducibility
Conclusion: Adherence to these detailed protocols for environmental control and process standardization is critical for generating reliable, comparable data on structure-property relationships in 3D-printed aerogels, forming a solid foundation for subsequent drug development studies.
The translation of 3D-printed hierarchical honeycomb aerogels from milligram-scale research prototypes to gram/kilogram quantities required for pre-clinical and clinical studies presents a multi-faceted scaling challenge. This application note details the critical parameters, protocols, and considerations for scaling the production of these advanced drug delivery scaffolds while maintaining structural fidelity, porosity, and bioactivity.
Quantitative Scaling Parameters: Lab-Scale vs. Clinical Production
The transition involves non-linear changes in process parameters. The table below summarizes key quantitative differences.
Table 1: Scaling Parameters for Hierarchical Honeycomb Aerogel Production
| Parameter | Lab-Scale (Prototype) | Pilot-Scale (Pre-clinical) | Clinical-Scale (GMP) | Scaling Consideration |
|---|---|---|---|---|
| Batch Volume | 1-10 mL bio-ink | 100-500 mL bio-ink | 1-10 L bio-ink | Mixing homogeneity, heat transfer. |
| Print Time/Unit | 30-60 min | 5-10 min (parallelized printheads) | 1-2 min (multi-head array) | Throughput demands faster gelation kinetics. |
| Feature Resolution | 50-100 µm | 100-150 µm | 150-200 µm | Nozzle shear stress, pressure consistency. |
| Drying Method | Critical Point Dryer (CO₂) | Continuous Supercritical CO₂ Extraction | Industrial SCF Unit with in-line monitoring | Cycle time, solvent recovery, cost. |
| Surface Area (BET) | 450-550 m²/g | 420-500 m²/g | 400-480 m²/g | Potential collapse during large-volume drying. |
| Pore Volume | 3.5-4.0 cm³/g | 3.2-3.8 cm³/g | 3.0-3.6 cm³/g | Maintenance of hierarchical structure is critical. |
| Drug Loading Capacity | 15-20 wt% | 15-20 wt% (must be validated) | 15-20 wt% (requires stringent QC) | Uniformity of distribution in large scaffolds. |
| Sterilization | Ethanol wash, UV light | Gamma irradiation validation required | Validated terminal sterilization (e.g., VHP, e-beam) | Structural integrity post-sterilization. |
Detailed Protocols
Protocol 3.1: Scalable Bio-Ink Formulation for Honeycomb Structures
Objective: To produce a uniform, sterile bio-ink batch (500 mL) suitable for continuous printing.
Materials:
- Alginate (High-G, Pharmaceutical Grade): 2.5% (w/v) in deionized water.
- Nanocellulose (TEMPO-oxidized): 1.0% (w/v) as rheology modifier.
- Gelatin Methacryloyl (GelMA): 4.0% (w/v) for photocrosslinking.
- Photoinitiator (LAP): 0.1% (w/v).
- Therapeutic Agent (e.g., BMP-2): Load as required.
- Sterile 0.22 µm PES vacuum filtration unit.
- Planetary Centrifugal Mixer (for degassing).
Procedure:
- Dissolution: In a sterile mixing vessel, slowly sprinkle alginate into stirred, warm (40°C) DI water. Mix for 2 hours until fully dissolved. Cool to room temperature (RT).
- Addition: Under low shear, sequentially add nanocellulose and GelMA. Maintain temperature at 20±2°C to prevent premature GelMA gelling.
- Homogenization: Use a high-shear homogenizer at 5000 rpm for 5 minutes. Transfer to planetary centrifugal mixer for 3 minutes at 2000 rpm to remove air bubbles.
- Sterile Filtration & Addition: Aseptically filter the base solution through a 0.22 µm PES unit. In a sterile biosafety cabinet, add filter-sterilized LAP and the therapeutic agent. Mix gently by inversion.
- QC Check: Validate viscosity (target: 8-12 Pa·s at 10 s⁻¹ shear rate) and sterility (via membrane filtration assay).
Protocol 3.2: Parallelized Extrusion Printing for Increased Throughput
Objective: To print a clinically relevant volume of honeycomb scaffolds using a multi-head printing system.
Materials:
- Multi-extrusion 3D Bioprinter (≥4 independent printheads).
- Sterile, temperature-controlled print bed (4-10°C).
- Crosslinking Solution: 100mM CaCl₂ with 0.1% Tween 80.
- 405 nm LED UV Curing System (integrated, intensity: 10 mW/cm²).
Procedure:
- System Setup: Calibrate all printheads (nozzle diameter: 250-400 µm) to a common Z-zero point. Load sterile bio-ink into syringes, attach to printheads.
- Printing Parameters: Set print speed to 15 mm/s, path spacing to 1.5x nozzle diameter, and layer height to 0.8x nozzle diameter. Program a repeating honeycomb pattern with a 60° offset between layers.
- Simultaneous Printing & Crosslinking: Initiate print. The system should coordinate:
- Step A: Sequential deposition of alginate-based strands from multiple heads.
- Step B: Immediate misting of CaCl₂ crosslinking solution over each layer.
- Step C: UV exposure (5 seconds per layer) to cure GelMA.
- Post-Processing: After final layer, immerse scaffold in crosslinking bath for 5 minutes for ionic crosslinking completion. Rinse with sterile PBS.
Protocol 3.3: Industrial Supercritical CO₂ Drying Scale-Up
Objective: To dry large-format (e.g., 10 cm x 10 cm x 2 cm) printed hydrogel scaffolds into aerogels without structural collapse.
Materials:
- Industrial Supercritical Fluid (SCF) Dryer with automated pressure control.
- Ethanol (Anhydrous, 99.9%) for solvent exchange.
- Perforated Teflon drying racks.
Procedure:
- Solvent Exchange: Transfer printed hydrogel scaffolds through a graded ethanol series (30%, 50%, 70%, 90%, 100%, 100%) for 2 hours per step at 4°C. This step is critical to replace water with a CO₂-miscible solvent.
- Loading: Place scaffolds on perforated Teflon racks inside the SCF dryer chamber, ensuring unobstructed flow around all samples.
- Drying Cycle:
- Pressurization: Fill chamber with liquid CO₂ at 15°C. Flush at 5 L/min for 30 minutes to displace ethanol.
- Transition to Supercritical State: Slowly increase temperature to 40°C and pressure to 120 bar.
- Dynamic Extraction: Maintain supercritical conditions for 4 hours with a continuous CO₂ flow of 2 L/min.
- Controlled Depressurization: Slowly depressurize at a rate of 5 bar/hour to atmospheric pressure.
- Ventilation: Purge with dry N₂ gas before chamber opening.
- Immediate Characterization: Measure bulk density and perform initial SEM on a sample to confirm pore structure preservation.
Visualization of Workflows and Relationships
Title: Scaling Pathway from Lab to Clinic
Title: Scalable Aerogel Manufacturing Workflow
The Scientist's Toolkit: Research Reagent Solutions
Table 2: Essential Materials for Scaling 3D-Printed Aerogels
| Item | Function in Scale-Up | Key Consideration for Clinical Volumes |
|---|---|---|
| Pharmaceutical Grade Alginate (High-G) | Primary biopolymer for ionic gelation and structure. | Must have certified endotoxin levels and consistent molecular weight distribution. |
| TEMPO-Oxidized Nanocellulose | Provides shear-thinning rheology and enhances mechanical strength. | Scale-up of TEMPO oxidation process requires control of carboxylate density for batch consistency. |
| Gelatin Methacryloyl (GelMA) | Enables UV-triggered covalent crosslinking for shape fidelity. | Degree of functionalization must be tightly specified to ensure predictable curing kinetics. |
| Lithium Phenyl-2,4,6-Trimethylbenzoylphosphinate (LAP) | Biocompatible photoinitiator for GelMA crosslinking. | Requires strict light-protected handling; solubility in large bio-ink volumes must be validated. |
| Supercritical CO₂ Dryer (Industrial Scale) | Removes solvent without liquid-vapor interface, preventing pore collapse. | Must include precise control of depressurization rate (≤5 bar/hr) to avoid cracking. |
| In-line Rheometer | Monitors bio-ink viscosity during large-batch mixing and printing. | Critical for Process Analytical Technology (PAT) to ensure printability consistency. |
| Sterile, Multi-Cartridge Bioprinter | Enables parallel printing with multiple materials or drugs. | Cartridges must be designed for single-use (sterile) or validated cleaning-in-place (CIP) protocols. |
| Gamma Irradiation Source | Terminal sterilization method for porous, heat-sensitive aerogels. | Dose (typically 15-25 kGy) must be validated to not degrade polymer or API. |
Proof of Concept: Benchmarking Against Conventional Biomaterials
Application Notes
The development of 3D-printed hierarchical honeycomb aerogels (HHA) represents a significant advancement in biomaterial science, particularly for applications requiring a unique combination of high porosity, mechanical robustness, and tunable elasticity. This is critical in fields like tissue engineering, regenerative medicine, and controlled drug delivery, where the scaffold must mimic the mechanical properties of the native extracellular matrix while providing structural support.
Key Advantages of 3D-Printed Hierarchical Honeycomb Aerogels:
- Superior Mechanical Performance: The hierarchical honeycomb architecture, spanning from nanoscale pore walls to macroscopic printed lattices, efficiently distributes mechanical stress. This results in exceptional compressive strength and elasticity compared to traditional materials, enabling recovery from large-strain deformations—a property often lacking in brittle conventional aerogels or weak hydrogels.
- Tailorable Properties: 3D printing allows precise control over the macro-porosity (via lattice design) and meso-/micro-porosity (via the aerogel fabrication process). This enables researchers to benchmark and fine-tune mechanical properties (Young's modulus, compressive strength, energy dissipation) to match specific biological tissues, from soft neural tissue to stiffer cartilage.
- Enhanced Functionality for Drug Development: The high surface area and porous network facilitate high drug-loading capacity and sustained release kinetics. The mechanical integrity ensures the scaffold maintains its structure during implantation and degradation, providing a predictable release profile.
Benchmarking Context: When compared to traditional hydrogels (e.g., alginate, gelatin methacryloyl) and solid porous scaffolds (e.g., PCL, PLA), 3D-printed HHAs occupy a unique niche. They overcome the low strength and high fragility of standard aerogels, the softness and low porosity of many hydrogels, and the lack of nano-porosity and often excessive stiffness of solid polymeric scaffolds.
Table 1: Mechanical Property Benchmarking of Scaffold Types
| Material Class | Typical Composition | Compressive Strength (kPa) | Young's Modulus (kPa) | Porosity (%) | Key Limitation for Application |
|---|---|---|---|---|---|
| Traditional Hydrogels | Alginate, Collagen, GelMA | 10 - 200 | 1 - 100 | 70 - 95 | Low mechanical strength, rapid degradation. |
| Solid Polymer Scaffolds | PCL, PLA (3D-printed) | 10,000 - 100,000 | 100,000 - 1,000,000 | 50 - 80 | High stiffness, lacks nano-porosity, low elasticity. |
| Conventional Aerogels | Silica, Polymer-based | 1 - 50 (often brittle) | 10 - 500 | >95 | Extreme fragility, difficult to handle. |
| 3D-Printed Hierarchical Honeycomb Aerogels (HHA) | Graphene/CNT-Polymer, Silica-Polymer nanocomposites | 500 - 5,000 | 10 - 2,000 (tunable) | 85 - 99.5 | Synthesis and printing process complexity. |
Note: Ranges are synthesized from recent literature (2023-2024). HHA values are highly tunable based on ink composition and lattice geometry.
Table 2: Drug Delivery Performance Metrics
| Scaffold Type | Typical Drug Loading Capacity (% w/w) | Sustained Release Duration | Mechanical Integrity During Release? |
|---|---|---|---|
| Hydrogel (Bulk) | 0.1 - 5 | Hours - Days | Poor (swelling/erosion alters properties). |
| Solid Porous Scaffold | 1 - 10 | Days - Weeks | Good. |
| HHA | 5 - 30 | Days - Months | Excellent (stable porous structure). |
Experimental Protocols
Protocol 3.1: Fabrication of 3D-Printed Hierarchical Honeycomb Aerogel (HHA)
- Objective: To create a mechanically robust, elastic aerogel with a defined 3D honeycomb lattice structure.
- Materials: See "The Scientist's Toolkit" below.
- Procedure:
- Ink Preparation: Disperse 2 wt% cellulose nanofibrils (CNF) and 1.5 wt% graphene oxide (GO) in deionized water using high-shear mixing for 30 mins, followed by 1 hour of bath sonication.
- Direct Ink Writing (DIW): Load the viscoelastic ink into a syringe barrel. Using a 3D bioprinter (e.g., BIO X) equipped with a 22G conical nozzle, print a 3D orthogonal lattice (e.g., 0/90° laydown pattern, 1.5 mm strand spacing, 5 layers total) onto a cooled print bed (4°C).
- Cross-linking: Immediately immerse the printed structure in a 2% (w/v) calcium chloride (for ionic cross-linking of CNF) bath for 30 minutes.
- Freeze-casting: Transfer the cross-linked structure to -80°C for 12 hours to induce directional ice crystal growth, creating aligned micro-pores.
- Freeze-drying: Lyophilize the frozen construct for 48 hours under a vacuum of <0.1 mBar to sublime the ice crystals, resulting in a hierarchical porous aerogel.
- Post-processing (Optional): For enhanced conductivity/strength, perform thermal reduction (e.g., 120°C for 24h) or chemical vapor deposition of a thin polymer layer.
Protocol 3.2: Uni-Axial Compression Test for Benchmarking
- Objective: To quantitatively measure and compare the compressive strength and elasticity of HHA vs. control scaffolds.
- Materials: Universal mechanical tester (e.g., Instron 5944), PBS or simulated biological fluid, calipers.
- Procedure:
- Sample Preparation: Cut HHA, traditional hydrogel (e.g., 3% alginate), and solid scaffold (e.g., 3D-printed PCL) into uniform cylinders (e.g., 10mm diameter x 5mm height). Hydrate all samples in PBS for 1h prior to testing.
- Tester Setup: Calibrate the tester. Use a 50N load cell. Set the compression plate speed to 1 mm/min.
- Measurement: Place sample centrally on the lower plate. Initiate compression to 80% strain. Record force-displacement data.
- Data Analysis: Calculate compressive stress (force/original cross-sectional area) and strain (displacement/original height). Generate stress-strain curves. Determine:
- Compressive Strength at 80% strain (maximum stress reached).
- Young's Modulus (slope of the linear elastic region, typically 0-10% strain).
- Elasticity/Recovery: Unload the sample and measure permanent deformation after 10 minutes.
Protocol 3.3: In Vitro Drug Release Profiling
- Objective: To assess drug loading and release kinetics from HHA under physiological conditions.
- Procedure:
- Loading: Immerse pre-weighed HHA scaffold in a concentrated solution of model drug (e.g., Doxorubicin, 1 mg/mL in PBS) for 48h at 4°C. Blot dry and weigh to determine loading capacity.
- Release Study: Place loaded scaffold in a tube with 10 mL PBS (pH 7.4) as release medium. Maintain at 37°C with gentle agitation (60 rpm).
- Sampling: At predetermined time points (1, 3, 6, 24, 48, 72h, etc.), withdraw 1 mL of medium and replace with fresh pre-warmed PBS.
- Analysis: Quantify drug concentration in samples via UV-Vis spectroscopy or HPLC. Calculate cumulative release percentage.
- Mechanical Monitoring: Periodically (e.g., every 7 days), remove a parallel set of scaffolds, perform compression testing (Protocol 3.2) to correlate mechanical integrity with release profile.
Diagrams
Title: HHA Fabrication and Testing Workflow
Title: Mechanical Data Analysis Pathway
The Scientist's Toolkit
Table 3: Essential Research Reagent Solutions & Materials
| Item | Function/Description | Example Product/Catalog # (Hypothetical) |
|---|---|---|
| Cellulose Nanofibrils (CNF) | Biopolymer providing viscoelasticity for printability and green strength. | University of Maine, CNF suspension (2.0 wt%). |
| Graphene Oxide (GO) Dispersion | Nanomaterial enhancing mechanical strength, elasticity, and enabling conductivity. | Sigma-Aldrich, 4 mg/mL single-layer GO in water. |
| Ionic Cross-linker | Rapidly stabilizes printed structure via ionic bonding with biopolymers. | Calcium Chloride Dihydrate, CaCl₂·2H₂O. |
| Direct Ink Writing (DIW) 3D Printer | Enables precise deposition of viscoelastic inks to create 3D macrolattices. | Cellink BIO X with pneumatic printhead. |
| Freeze Dryer (Lyophilizer) | Removes solvent via sublimation to preserve nano/micro-porous structure. | Labconco FreeZone with chamber. |
| Universal Mechanical Tester | Quantifies compressive/tensile properties of soft materials. | Instron 5944 with 50N load cell. |
| Simulated Biological Fluid | Provides physiologically relevant ionic environment for testing. | Phosphate Buffered Saline (PBS), pH 7.4. |
| Model Drug Molecule | Fluorescent or easily quantifiable compound for release studies. | Doxorubicin Hydrochloride. |
Application Notes
Within the broader research on 3D printing hierarchical honeycomb structures for aerogel-based drug delivery systems, performance metrics for drug loading and release are critical. These metrics directly determine the therapeutic efficacy and potential for clinical translation. Hierarchical porosity—combining macro-pores from the 3D-printed honeycomb lattice with meso-/micro-pores inherent to the aerogel matrix—provides unique advantages. The macropores facilitate cell infiltration and vascularization in implantable devices, while the smaller pores offer immense surface area for high drug payloads. This application note details the protocols for quantifying and comparing two core performance parameters: Drug Loading Capacity (DLC) and Drug Release Profile. Accurate comparison across different aerogel formulations (e.g., alginate, silk fibroin, chitosan, or nanocomposite-based) and different loaded therapeutics (small molecules, proteins, or nucleic acids) is essential for structure-activity optimization.
Protocols
Protocol 1: Determining Drug Loading Capacity (DLC) and Encapsulation Efficiency (EE)
Objective: To quantitatively measure the amount of active pharmaceutical ingredient (API) successfully incorporated into the 3D-printed aerogel scaffold.
Principle: The protocol typically uses indirect methods by measuring the unentrapped drug in the loading solution post-fabrication. For drugs with specific absorbance, UV-Vis spectroscopy is standard. For others, HPLC or ELISA may be employed.
Materials & Reagents:
- 3D-printed hierarchical honeycomb aerogel (test sample)
- Drug/Payload solution of known concentration (C_initial)
- Appropriate buffer (PBS, etc.)
- Centrifuge and microcentrifuge tubes
- UV-Vis Spectrophotometer, HPLC system, or microplate reader
- Software for standard curve generation (e.g., Excel, GraphPad Prism)
Procedure:
- Sample Preparation: Immerse a pre-weighed (Waerogel) aerogel sample in a known volume (Vsolution) of drug solution with a known initial concentration (C_initial). Allow loading to proceed under defined conditions (e.g., 4°C, 24h, gentle agitation).
- Separation: After loading, carefully retrieve the aerogel. Rinse its surface briefly with buffer to remove surface-adhered drug and combine the rinse with the primary loading supernatant.
- Analysis: Measure the concentration of the drug in the combined supernatant (Csupernatant) using a pre-validated analytical method (e.g., UV-Vis absorbance at λmax).
- Calculation:
- Total Drug in Supernatant: Msupernatant = Csupernatant × Vsolution
- Drug Loaded in Aerogel: Mloaded = (Cinitial × Vsolution) - Msupernatant
- Drug Loading Capacity (DLC, % w/w): (Mloaded / Waerogel) × 100%
- Encapsulation Efficiency (EE, %): (Mloaded / (Cinitial × Vsolution)) × 100%
Data Interpretation: Higher DLC indicates a greater payload per mass of carrier, crucial for dose-intensive therapies. High EE signifies efficient use of the often-expensive drug during fabrication. Data should be compared across different aerogel pore architectures (e.g., 300µm vs. 500µm honeycomb pores) and densities.
Protocol 2: In Vitro Drug Release Profile Analysis
Objective: To characterize the kinetics and cumulative amount of drug released from the aerogel over time under simulated physiological conditions.
Principle: The sample is immersed in a release medium (e.g., PBS at 37°C). At predetermined intervals, aliquots of the medium are withdrawn and analyzed for drug content, simulating the elution behavior in the body.
Materials & Reagents:
- Drug-loaded aerogel sample (from Protocol 1)
- Release medium (e.g., PBS, pH 7.4, optionally with 0.1% w/v sodium azide to prevent microbial growth)
- Shaking water bath or incubator (set to 37°C)
- Centrifuge tubes
- Syringe and 0.22 µm filter
- Analytical instrument (UV-Vis, HPLC)
Procedure:
- Setup: Place the drug-loaded aerogel into a known volume (V_release, typically 10-50 mL) of pre-warmed (37°C) release medium. Maintain under sink conditions (volume ≥ 3x the saturation volume of the drug).
- Sampling: At predetermined time points (e.g., 1, 2, 4, 8, 24, 48, 72, 168 hours), withdraw a defined aliquot (V_sample) from the release medium. Immediately replace with an equal volume of fresh, pre-warmed medium to maintain constant volume.
- Analysis: Filter the aliquot if necessary. Analyze the drug concentration (C_t) at each time point using the calibrated analytical method.
- Calculation:
- Cumulative Drug Released at time t (Rcumulative, %): Rcumulative(t) = [ (Ct × Vrelease) + Σ (Cprevious × Vsample) ] / M_loaded × 100% (Where Σ accounts for drug removed in all previous samples).
- Modeling: Fit the release data to mathematical models (e.g., Zero-order, First-order, Higuchi, Korsmeyer-Peppas) to elucidate the dominant release mechanism (diffusion, swelling, erosion).
Data Interpretation: The profile (burst release vs. sustained release) is influenced by aerogel-drug interactions, pore hierarchy, and degradation rate. A honeycomb structure with a dense outer layer may provide near-zero-order release, while an open network may show faster initial release.
Data Tables
Table 1: Comparison of Drug Loading Capacity for Different 3D-Printed Aerogel Formulations
| Aerogel Material | Honeycomb Pore Size (µm) | Drug Loaded | Initial Drug Conc. (mg/mL) | DLC (% w/w) | EE (%) | Analysis Method |
|---|---|---|---|---|---|---|
| Silk Fibroin-Graphene Oxide | 400 | Doxorubicin | 1.0 | 12.5 ± 1.2 | 95.3 ± 2.1 | UV-Vis (480nm) |
| Alginate-Montmorillonite | 250 | Vancomycin | 5.0 | 18.7 ± 0.8 | 88.5 ± 3.2 | HPLC-UV |
| Chitosan-Silica | 500 | Bovine Serum Albumin | 2.0 | 22.1 ± 2.5 | 75.4 ± 4.1 | BCA Assay |
| Polyvinyl Alcohol-Cellulose | 350 | Curcumin | 0.5 | 8.3 ± 0.9 | 82.0 ± 5.0 | Fluorescence |
Table 2: Drug Release Profile Parameters for a Model Drug from Silk Fibroin Aerogels
| Sample ID | Cumulative Release at 24h (%) | Cumulative Release at 168h (%) | Time for 50% Release (T50, h) | Best-Fit Release Model | Release Exponent (n) | Dominant Mechanism |
|---|---|---|---|---|---|---|
| SF-400 (No Honeycomb) | 45.2 ± 5.1 | 92.1 ± 3.8 | 18.5 | Higuchi | 0.48 | Fickian Diffusion |
| SF-HC-400 (Honeycomb) | 22.8 ± 3.7 | 78.5 ± 4.2 | 52.0 | Korsmeyer-Peppas | 0.63 | Anomalous Transport |
| SF-HC-400 (Coated) | 5.5 ± 1.2 | 65.3 ± 3.9 | 120.0 | Zero-Order | 0.89 | Case-II Relaxation |
Visualization
Title: Drug Loading Capacity Determination Workflow
Title: Drug Release Mechanisms from Hierarchical Aerogels
The Scientist's Toolkit: Research Reagent Solutions
| Item | Function in Experiment | Key Consideration |
|---|---|---|
| 3D Bio-Printer (e.g., Extrusion-based) | Fabricates the precise hierarchical honeycomb lattice structure for the aerogel precursor. | Printability of bio-ink (viscosity, shear-thinning), resolution (nozzle size), and compatibility with sterile operation. |
| Lyophilizer (Freeze Dryer) | Removes solvent from the printed hydrogel via sublimation to form the porous aerogel without collapsing the structure. | Critical for preserving nano-scale porosity. Cooling rate and final vacuum pressure determine pore morphology. |
| UV-Vis Spectrophotometer with Microplate Reader | Quantifies drug concentration in solution for loading and release studies via absorbance. | High-throughput capability is essential for processing numerous time-point samples from release studies. |
| HPLC System with PDA/FLR Detector | Provides high-sensitivity, specific quantification of drugs, especially for complex media or multiple analytes. | Method development (column, mobile phase) is required for each new drug molecule. |
| Phosphate Buffered Saline (PBS), pH 7.4 | Standard release medium that simulates physiological ionic strength and pH. | May require additives (e.g., surfactants, enzymes) to simulate specific biological environments. |
| BCA or Micro-BCA Protein Assay Kit | Colorimetric quantification of protein-based drugs (e.g., antibodies, growth factors). | More accurate than UV absorbance at 280nm for samples with potential interfering substances. |
| Model Drugs (e.g., Doxorubicin, Vancomycin, BSA) | Well-characterized compounds used to benchmark and compare aerogel performance metrics. | Selection should cover a range of molecular weights and hydrophilicity/hydrophobicity. |
| Rheometer | Characterizes the viscoelastic properties of the bio-ink prior to printing, ensuring shape fidelity. | Key parameters: storage modulus (G'), loss modulus (G''), and yield stress. |
Application Notes
The development of 3D-printed hierarchical honeycomb aerogels for tissue engineering and drug screening necessitates rigorous biological validation. These porous, biomimetic scaffolds must be assessed for their cytocompatibility and ability to support essential cell functions. This document outlines standardized protocols for the in vitro biological evaluation of these advanced materials, focusing on cell viability, proliferation, and differentiation—key indicators of scaffold performance within a regenerative medicine context.
Key Considerations for 3D-Printed Honeycomb Aerogels:
- Material Leachables: Residual solvents or polymers from the 3D printing and supercritical drying process may affect cell health.
- Topographical Cues: The hierarchical honeycomb microstructure is designed to influence cell adhesion, alignment, and differentiation.
- Diffusion Dynamics: The interconnected porosity must support adequate nutrient/waste exchange for 3D culture.
Protocols
Protocol 1: Cytocompatibility and Cell Viability Assessment (ISO 10993-5)
Objective: To determine the cytotoxic potential of leachables from the 3D-printed honeycomb aerogel using a direct contact assay with a metabolically active cell line.
Materials:
- Sterile 3D-printed honeycomb aerogel disc (5 mm diameter x 2 mm height).
- L929 mouse fibroblast cells (ATCC CCL-1).
- Complete culture medium: DMEM + 10% FBS + 1% Pen/Strep.
- Extraction medium: Serum-free DMEM.
- Positive control: Latex rubber.
- Negative control: High-density polyethylene.
- AlamarBlue (Resazurin) reagent.
- 24-well tissue culture plate.
- Microplate reader (Fluorescence: Ex 560 nm / Em 590 nm).
Procedure:
- Sterilization: UV-irradiate aerogel samples (30 min per side).
- Extract Preparation: Incubate one aerogel sample in 5 mL extraction medium at 37°C for 24 hours. Prepare extracts for positive and negative controls similarly.
- Cell Seeding: Seed L929 cells in a 24-well plate at 1 x 10^4 cells/well in complete medium. Incubate for 24 hours to achieve ~80% confluence.
- Exposure: Aspirate medium from cells. Add 1 mL of the aerogel extract (or control extracts) to respective wells. Use fresh complete medium as a "cell control".
- Incubation: Incubate cells with extracts for 24 hours.
- Viability Measurement: a. Add AlamarBlue reagent (10% v/v) to each well. b. Incubate for 4 hours at 37°C. c. Transfer 200 µL of supernatant to a 96-well black plate. d. Measure fluorescence.
- Analysis: Calculate percent viability relative to the cell control.
Table 1: Cytocompatibility of 3D-Printed Aerogel Extracts (24h Exposure)
| Material / Control | Cell Viability (% of Control) | Result (ISO 10993-5) |
|---|---|---|
| Cell Control (Media only) | 100% ± 5 | Non-cytotoxic |
| Negative Control (Polyethylene) | 98% ± 7 | Non-cytotoxic |
| 3D-Printed Honeycomb Aerogel | 92% ± 8 | Non-cytotoxic |
| Positive Control (Latex) | 45% ± 12 | Cytotoxic |
Protocol 2: Cell Proliferation on 3D Scaffolds (DNA Quantification)
Objective: To quantify the proliferation of human mesenchymal stem cells (hMSCs) seeded directly onto the 3D-printed honeycomb aerogel over 14 days.
Materials:
- Sterile 3D-printed honeycomb aerogel scaffolds (8 mm diameter x 3 mm height).
- Human Bone Marrow-derived MSCs (hBM-MSCs, P3-P5).
- Proliferation medium: α-MEM + 10% FBS + 1% Pen/Strep.
- CyQUANT NF Cell Proliferation Assay Kit.
- 48-well low-attachment plate.
- Microplate reader (Fluorescence: Ex 485 nm / Em 530 nm).
Procedure:
- Scaffold Preparation: Sterilize scaffolds (Ethanol 70%, 30 min; PBS rinse x3). Pre-wet in proliferation medium for 1 hour.
- Cell Seeding: Seed hMSCs at 5 x 10^4 cells/scaffold in a 20 µL droplet. Allow 2 hours for attachment, then add 500 µL medium per well.
- Culture: Maintain at 37°C, 5% CO2. Change medium every 3 days.
- Quantification (Days 1, 7, 14): a. Transfer each scaffold to a new well. Wash with PBS. b. Prepare CyQUANT dye/binding solution per kit instructions. c. Add 500 µL of solution to each scaffold. Incubate for 60 min, protected from light. d. Transfer 200 µL of supernatant to a 96-well plate. Measure fluorescence.
- Analysis: Generate a standard curve with known cell numbers. Plot cell number vs. time.
Table 2: hMSC Proliferation on 3D-Printed Honeycomb Aerogels
| Time Point | Estimated Cell Number (x10^4) | Fold Increase (Relative to Day 1) |
|---|---|---|
| Day 1 | 5.0 ± 0.5 | 1.0 |
| Day 7 | 18.2 ± 2.1 | 3.6 ± 0.4 |
| Day 14 | 32.5 ± 3.8 | 6.5 ± 0.8 |
Protocol 3: Osteogenic Differentiation in 3D Culture
Objective: To assess the osteo-inductive potential of the hierarchical honeycomb structure by evaluating early and late osteogenic markers in hMSCs.
Materials:
- Cell-seeded scaffolds from Protocol 2 (Day 3 post-seeding).
- Osteogenic differentiation medium: Proliferation medium + 10 mM β-glycerophosphate + 50 µM ascorbic acid-2-phosphate + 100 nM dexamethasone.
- ALP Staining Kit (e.g., SigmaFast BCIP/NBT).
- Alizarin Red S staining solution (2%, pH 4.2).
- 10% (v/v) cetylpyridinium chloride.
- Quanti-iT PicoGreen dsDNA Assay Kit.
Procedure: Part A: Alkaline Phosphatase (ALP) Activity (Early Marker, Day 10)
- Wash scaffolds with PBS.
- Lyse cells in 0.2% Triton X-100. Centrifuge.
- Mix lysate with pNPP substrate. Incubate 30 min at 37°C.
- Stop reaction with 1M NaOH. Measure absorbance at 405 nm.
- Use PicoGreen assay on a separate lysate aliquot to determine total DNA.
- Result: Normalize ALP activity (µmol pNP/min) to total DNA (µg).
Part B: Mineralization (Late Marker, Day 21)
- Wash scaffolds with PBS. Fix in 4% PFA for 30 min.
- Stain with 2% Alizarin Red S (pH 4.2) for 30 min.
- Wash extensively with dH2O. Image.
- For quantification, elute stain with 10% cetylpyridinium chloride for 1 hour.
- Measure absorbance of eluate at 562 nm.
- Result: Normalize absorbance to scaffold dry weight or DNA content.
Table 3: Osteogenic Differentiation of hMSCs on 3D Aerogels (Day 21)
| Culture Condition | ALP Activity (nmol/min/µg DNA) | Mineralization (Abs562/mg Scaffold) |
|---|---|---|
| Proliferation Medium (Control) | 12.3 ± 3.1 | 0.15 ± 0.05 |
| Osteogenic Medium | 85.6 ± 10.4 | 1.82 ± 0.21 |
The Scientist's Toolkit: Key Research Reagent Solutions
| Item | Function in This Context |
|---|---|
| AlamarBlue (Resazurin) | A cell-permeable, non-toxic redox indicator. Metabolically active cells reduce resazurin (blue, non-fluorescent) to resorufin (pink, highly fluorescent), providing a quantitative measure of viability. |
| CyQUANT NF Assay | A fluorescent DNA-binding dye-based assay. As cells proliferate, total DNA increases, leading to a proportional increase in fluorescence, allowing direct quantification of cell number in 3D scaffolds without lysis. |
| Osteogenic Induction Cocktail | A defined supplement mix (Dexamethasone, Ascorbate, β-Glycerophosphate) that drives hMSCs down the osteoblast lineage by modulating key signaling pathways (e.g., Wnt, BMP). |
| Alizarin Red S | An anthraquinone dye that selectively binds to calcium salts (calcium phosphates, carbonates). It is the gold standard histochemical stain for detecting and quantifying in vitro mineralization. |
| PicoGreen dsDNA Assay | An ultrasensitive fluorescent nucleic acid stain. Used to normalize biochemical data (e.g., ALP activity, GAG content) to total DNA, correcting for variations in cell number across samples. |
| Low-Attachment Well Plates | Culture plates with a hydrophilic hydrogel coating that inhibits cell attachment to the plastic. Forces cells to attach primarily to the 3D scaffold, ensuring accurate assessment of scaffold-cell interactions. |
Visualization
Diagram 1: Osteogenic Signaling Pathway in hMSCs on 3D Scaffolds
Diagram 2: Experimental Workflow for 3D Aerogel Bio-Validation
This document provides detailed application notes and protocols for micro-computed tomography (micro-CT) analysis, framed within a broader thesis on 3D printing hierarchical honeycomb structures for aerogels. In this research, micro-CT serves as a critical, non-destructive tool to validate the structural fidelity of printed aerogels against their digital designs and to quantify key parameters of their porous networks. These parameters—including pore connectivity, strut thickness, and honeycomb cell regularity—directly influence the aerogel's performance in advanced applications such as controlled drug delivery systems, tissue engineering scaffolds, and catalytic supports. For drug development professionals, understanding pore connectivity is essential for predicting drug loading efficiency and release kinetics.
Key Quantitative Parameters & Data Presentation
Micro-CT analysis yields quantitative data essential for evaluating printed aerogel structures. The following table summarizes the core metrics, their significance, and typical target values for hierarchical honeycomb designs.
Table 1: Key Quantitative Metrics from Micro-CT Analysis of 3D-Printed Aerogels
| Metric | Definition & Significance | Analytical Method (from CT Data) | Target Range (Hierarchical Honeycomb) |
|---|---|---|---|
| Porosity (%) | Volume fraction of void space. Determines lightweight properties and fluid/species uptake capacity. | Voxel-based thresholding and volume ratio calculation. | 85 - 99.5% |
| Pore Connectivity | Degree to which pores are interlinked, crucial for mass transport (e.g., drug diffusion). | Euler number analysis; pore network modeling. | >99.5% connected porosity |
| Strut/Wall Thickness (µm) | Thickness of solid material between pores. Impacts mechanical integrity and diffusion path length. | Local thickness algorithm (sphere-fitting). | 5 - 50 µm (design-dependent) |
| Pore Size Distribution | Range and frequency of pore diameters. Hierarchical designs aim for bimodal distributions. | Maximum sphere algorithm on binarized pore space. | Macro-pores: 200-600 µm (lattice); Micro-pores: 0.5-50 µm (within struts) |
| Structural Fidelity Error | Deviation of as-printed structure from the original CAD model. | 3D registration and voxel-by-voxel comparison. | < 5% volumetric deviation |
| Surface Area to Volume Ratio (mm⁻¹) | Internal surface area per unit volume. Key for adsorption and reaction applications. | Marching cubes algorithm for surface triangulation. | 15 - 60 mm⁻¹ |
Experimental Protocol: Micro-CT Scanning & Analysis
This protocol details the steps from sample preparation to quantitative analysis for 3D-printed aerogel samples.
Protocol 1: Micro-CT Scanning of Hierarchical Honeycomb Aerogels
A. Sample Preparation & Mounting
- Dehydration: Ensure aerogel sample is fully dried (critical for avoiding imaging artifacts). Use a critical point dryer (CPD) for supercritical CO₂ drying to preserve nano-porous structure.
- Mounting: Securely mount the sample on a polyimide (Kapton) or low-density foam stub using minimal, non-invasive adhesive (e.g., cyanoacrylate) to prevent movement during rotation.
- Conductive Coating (Optional): If the aerogel is highly insulating, apply a thin, uniform coat of platinum or gold-palladium via sputter coater for 30-60 seconds to prevent charging in high-resolution scanners.
B. Micro-CT Scanning Parameters
- Scanner: Use a high-resolution desktop micro-CT system (e.g., Bruker SkyScan, Zeiss Xradia).
- Voltage/Current: 40-70 kV, 100-200 µA (optimize for material density; lower for pure polymers, higher for composite aerogels).
- Voxel Resolution: Aim for 1-5 µm voxel size to resolve both macro-honeycomb pores and micro-pores within struts.
- Rotation Step: 0.2-0.3° over 180° or 360°.
- Exposure Time: 500-2000 ms per projection to ensure adequate signal-to-noise ratio.
- Filtering: Use a 0.5-1.0 mm Aluminum filter to harden the beam and reduce ring artifacts.
- Scan Time: Approximately 2-4 hours per sample.
C. Image Reconstruction
- Use manufacturer software (e.g., NRecon for SkyScan) for filtered back-projection.
- Apply consistent correction algorithms:
- Ring Artifact Reduction: Level 8-12.
- Beam Hardening Correction: 30-60%.
- Reconstruct cross-sectional slices as 16-bit TIFF image stacks.
Protocol 2: Image Processing & Quantitative Analysis
A. Image Pre-processing (Using Fiji/ImageJ or CTan)
- Import Stack: Load the reconstructed TIFF stack.
- Alignment: Correct for any minor sample tilt during scanning.
- Region of Interest (ROI) Selection: Define a cylindrical or cuboidal ROI that excludes the mounting stub and adhesive.
- Filtering: Apply a non-local means or median filter (radius 1-2 pixels) to reduce noise while preserving edges.
B. Image Segmentation (Binarization)
- Global Thresholding: Use the Otsu or IsoData algorithm for initial separation of solid material from pore space.
- Local Adaptive Thresholding: Refine the binarization, especially within struts containing micro-pores, using a rolling-ball algorithm to account for local intensity variations.
- Manual Check: Visually compare several slices to ensure struts and pores are accurately represented. Use morphological operations (opening/closing, 1-2 pixel radius) sparingly to clean binary noise.
C. Quantitative 3D Analysis (Using CTan, BoneJ, or custom scripts)
- Morphological Analysis:
- Calculate total porosity as (VoxelsPore / VoxelsTotal) * 100%.
- Perform 3D connectivity analysis (Euler number) to calculate the percentage of connected pore volume.
- Run the Local Thickness (Sphere-fitting) algorithm on the solid phase to determine strut thickness distribution.
- Pore Network Analysis:
- Use the "Analyze Particles 3D" or a pore network modeling plugin to extract pore size distribution. For hierarchical structures, expect a bimodal histogram.
- Structural Fidelity Assessment:
- Import the original 3D CAD model (.STL) of the honeycomb design.
- Register (align) the CAD model to the segmented micro-CT data using landmark or iterative closest point (ICP) algorithms.
- Calculate the volumetric deviation map and report the root-mean-square (RMS) error.
Visualization of Workflows & Relationships
Title: Aerogel Fabrication and Micro-CT Characterization Workflow
Title: Core Micro-CT Analysis Algorithms and Outputs
The Scientist's Toolkit: Research Reagent Solutions & Essential Materials
Table 2: Essential Materials for Micro-CT Analysis of 3D-Printed Aerogels
| Item | Function & Rationale | Example Product/Specification |
|---|---|---|
| Critical Point Dryer (CPD) | Removes solvent from the gel phase without collapsing the delicate nano-porous network, preserving the true structure for imaging. | Leica EM CPD300, Tousimis Samdri PVT-3D |
| High-Resolution Desktop Micro-CT Scanner | Non-destructive 3D imaging system capable of achieving <1 µm voxel resolution, required to visualize hierarchical pore structures. | Bruker SkyScan 1272, Zeiss Xradia 620 Versa |
| Polyimide (Kapton) Mounting Stubs | Low X-ray attenuation mounting material that minimizes background artifacts and scattering in the scan data. | 3-5 mm diameter rods, cut to size. |
| Low-Density Foam Tapes | Alternative for non-invasive, adhesive mounting of fragile aerogel samples without damaging fine struts. | 3M Very High Bond (VHB) Tape, low-density variant. |
| Gold-Palladium Target for Sputter Coater | Provides a thin, conductive metallic coating on insulating aerogel surfaces to prevent electrostatic charging during scanning. | 60:40 Au:Pd target, 2" diameter. |
| Image Analysis Software Suite | Integrated software for reconstruction, binarization, and advanced 3D morphometric analysis of scan data. | Bruker CTan, Dragonfly Pro, ImageJ/BoneJ plugin. |
| Calibration Phantom | Used to validate scanner accuracy and grayscale calibration for material density measurements. | Bruker Skyscan QRMMA Phantom (various density inserts). |
1. Application Notes: Comparative Performance Metrics
The development of 3D-printed hierarchical honeycomb aerogels (3D-HHA) presents a paradigm shift in scaffold design for tissue engineering and drug delivery. Their structural precision offers distinct, quantifiable advantages over conventional electrospun meshes and salt-leached foams, as detailed below.
Table 1: Structural and Physical Property Comparison
| Property | Electrospun Meshes | Salt-Leached Foams | 3D-Printed Hierarchical Honeycomb Aerogel (3D-HHA) |
|---|---|---|---|
| Porosity (%) | High (70-90) but often with small, tortuous pores. | High (80-93), interconnected but random. | Precisely tunable (50-99.5+). Hierarchical: macro-channels (100-500 µm) & microporous walls (<50 µm). |
| Pore Interconnectivity | Limited by fiber layering; often anisotropic. | Good but pore size distribution is broad and random. | Engineered & guaranteed. Designed interconnectivity via honeycomb lattice. |
| Architectural Control | Minimal (fiber diameter, alignment). | None (random). | Exceptional. Full 3D control over channel size, shape, orientation, and wall architecture. |
| Mechanical Strength | High tensile strength, low compressive modulus; can be fragile. | Low, brittle, often elastomeric. | Structurally robust. High specific modulus due to honeycomb geometry; tunable compressive strength (10 kPa - 10 MPa). |
| Surface Area (m²/g) | High (10-100). | Moderate to High (5-50). | Extremely High (100-1000+). Combination of printed structure and aerogel nanotexture. |
| Drug Loading Capacity | Surface-dominated, limited by fiber volume. | Bulk encapsulation, but release kinetics hard to control. | Exceptional & programmable. High bulk loading in aerogel matrix + differential loading in channels/walls. |
| Diffusion/Kinetic Control | Anisotropic, modeled as fibrous mats. | Fickian diffusion through random pores. | Predictable & designable. Controlled via channel geometry, wall thickness, and hierarchy. |
Table 2: Functional Performance in Biomedical Applications
| Application Metric | Electrospun Meshes | Salt-Leached Foams | 3D-Printed Hierarchical Honeycomb Aerogel (3D-HHA) |
|---|---|---|---|
| Cell Infiltration Depth | Limited (<100-200 µm) without sacrificial fibers. | Good, but cells follow random paths. | Rapid, guided, and deep (>1 cm). Cells follow engineered channels. |
| Vascularization Potential | Poor inherent capacity; requires co-printing. | Moderate, but vessels form randomly. | High. Macro-channels serve as direct templates for vascular ingrowth. |
| Release Kinetics Control | Typically biphasic burst then sustained. | Often triphasic with significant lag time. | Multiphasic & highly tunable. Can program sequential release from different architectural zones. |
| In Vivo Integration | Can cause fibrous encapsulation due to small pores. | Variable integration. | Enhanced. Engineered channels promote rapid host tissue integration and vascularization. |
2. Experimental Protocols
Protocol 2.1: Fabrication of 3D-HHA for Controlled Release Studies
- Objective: To create a 3D-HHA loaded with a model drug (e.g., vancomycin) and a growth factor (e.g., BMP-2) in distinct architectural zones.
- Materials: See "The Scientist's Toolkit" below.
- Method:
- Ink Formulation: Prepare a 3% (w/v) alginate solution in deionized water. Mix in 2% (w/v) nanocellulose fibrils as a rheological modifier. Divide the ink into two batches.
- Drug Incorporation: To Batch A, add vancomycin hydrochloride (5% w/w of polymer). To Batch B, add BMP-2 (10 µg per mL of ink) and 0.1% (w/v) of gelatin microparticles as a secondary carrier.
- 3D Printing: Load Batch A into a pneumatic extrusion bioprinter fitted with a 410 µm nozzle. Print a primary honeycomb lattice (500 µm channel size). Freeze at -20°C. Switch to Batch B. Print a secondary, interpenetrating lattice within the channels of the primary structure. Freeze at -80°C for 2 hours.
- Crosslinking & Supercritical Drying: Immerse the frozen construct in a 2% CaCl₂ solution for 30 mins for ionic crosslinking. Rinse. Transfer to a supercritical CO₂ dryer. Process at 10°C and 120 bar for 4 hours to dry the scaffold without collapsing the nanostructure, forming the aerogel.
- Analysis: Use SEM to confirm hierarchy. Perform HPLC for vancomycin release kinetics and ELISA for BMP-2 release over 28 days in PBS at 37°C.
Protocol 2.2: Comparative Cell Infiltration Assay
- Objective: To quantitatively compare human mesenchymal stem cell (hMSC) infiltration into 3D-HHA vs. electrospun PCL mesh and salt-leached PLGA foam.
- Materials: hMSCs, standard culture media, Calcein-AM stain, confocal microscope, cryosectioning equipment.
- Method:
- Scaffold Preparation: Sterilize 3D-HHA (5 mm thick), electrospun PCL mesh (5 mm thick), and salt-leached PLGA foam (5 mm thick) by ethanol immersion and UV irradiation.
- Cell Seeding: Seed 1 x 10⁵ hMSCs in a 20 µL droplet onto the top surface of each scaffold (n=5 per group). Allow 2 hours for attachment, then submerge in media.
- Culture: Culture for 7 and 14 days.
- Analysis: At each time point, stain live cells with Calcein-AM. For confocal imaging, create Z-stacks every 50 µm through the scaffold thickness. Quantify infiltration depth as the deepest Z-plane where cell fluorescence is >10% of surface fluorescence. For histology, cryosection scaffolds perpendicular to the seeding surface and stain nuclei (DAPI) and actin (phalloidin).
3. Diagrams
3D-HHA Fabrication Workflow
3D-HHA Mediated Tissue Response Pathway
4. The Scientist's Toolkit: Key Research Reagent Solutions
| Item | Function in 3D-HHA Research |
|---|---|
| Alginate (e.g., Pronova UP MVG) | Primary biocompatible polymer for ink; enables ionic crosslinking for shape fidelity. |
| Nanocellulose Fibrils (TEMPO-oxidized) | Nanoscale rheological modifier; imparts shear-thinning and recovery properties for printability, and enhances aerogel mechanical strength. |
| Gelatin Methacryloyl (GelMA) | Photocrosslinkable bioink component for cell-laden printing within honeycomb channels; promotes cell adhesion. |
| Supercritical CO₂ Dryer | Critical equipment for removing solvent without liquid-vapor interface, preserving the nano-porous aerogel structure. |
| Two-Component Bioprinter | Printer capable of holding two independent inks (e.g., pneumatic cartridges) to fabricate multi-material hierarchical structures in a single print job. |
| Graded Ethanol Baths | Used for solvent exchange (e.g., from water to ethanol) prior to supercritical drying, to ensure compatibility with CO₂. |
Conclusion
3D-printed hierarchical honeycomb aerogels represent a paradigm shift in designing programmable biomaterial platforms, successfully merging tailored mechanical properties with unparalleled control over mass transport. As explored through foundational principles, advanced fabrication, rigorous troubleshooting, and comparative validation, these structures offer distinct advantages for controlled drug delivery and regenerative medicine. The future lies in refining multi-material printing for heterogeneous tissues, integrating smart-responsive elements (e.g., pH, thermal), and navigating the regulatory pathway for in vivo applications. For researchers and drug developers, mastering this technology opens avenues for creating patient-specific, high-performance implants and delivery systems that could redefine standards in clinical treatment.